
I mentioned my labneh in a post last week but people had questions on social media about it so I thought it deserved its own post…
If you’ve gone plastic-free and zero-waste and still want to eat cheese, trying to find it may drive you over the edge. Where I live in Northern California, occasionally I’ll find a small wheel, snag it, shred most of it and freeze it. I really would like to find a cheese buying club. I know at least a couple of people in our zero-waste meetup group would be interested in sharing a wheel.
Fortunately, labneh (or yogurt cheese) essentially makes itself and it can replace cream cheese—even in cheesecake, although I haven’t tried that—yet.
Unlike cream cheese, however, labneh offers the benefit of live cultures (i.e., gut-friendly probiotics). Like many of the foods I make, it does require some planning ahead. You’ll need to make it a few days before you plan to eat it. But isn’t this how we used to eat? Long ago before our society become convenience-driven, we planned ahead according to time requirements, the seasons, the harvest, the big meals.
Below, I have lots of pics and explanations, so if you want to skip all of that, simply follow these instructions for making labneh:
- In the fridge, strain yogurt over a jar.
- Wait.
That’s it. Now for the long version…
Ingredients
- Yogurt
You’ll yield a volume of labneh equivalent to about half the volume of the yogurt you start out with. So, if you want one cup of labneh, start with a couple of cups of yogurt.
I make my yogurt for the labneh. To do that, heat up milk to 180ºF, let it cool to 110ºF, add yogurt from a previous batch, put mixture covered in a warm spot overnight and in the morning, you’ll have fresh yogurt. Here is my post on yogurt with more info.
Directions


1. I like to use a jar to make my labneh. With a rubber band, secure a thin, porous cloth to the inside of a large jar, suspending the cloth without it touching the bottom where the whey will collect. Pour in the yogurt. Close the jar.
2. Move the straining yogurt to the refrigerator for two to three days.
3. Once the yogurt has strained to your desired consistency, transfer it from the cloth to a jar and store it in the refrigerator. You can also roll it into balls, place those in a glass dish or jar, and over them, pour a mixture of olive oil, lemon juice, chopped fresh herbs and salt. I don’t do this because a) I’m lazy and b) I don’t want to use up my precious olive oil this way.


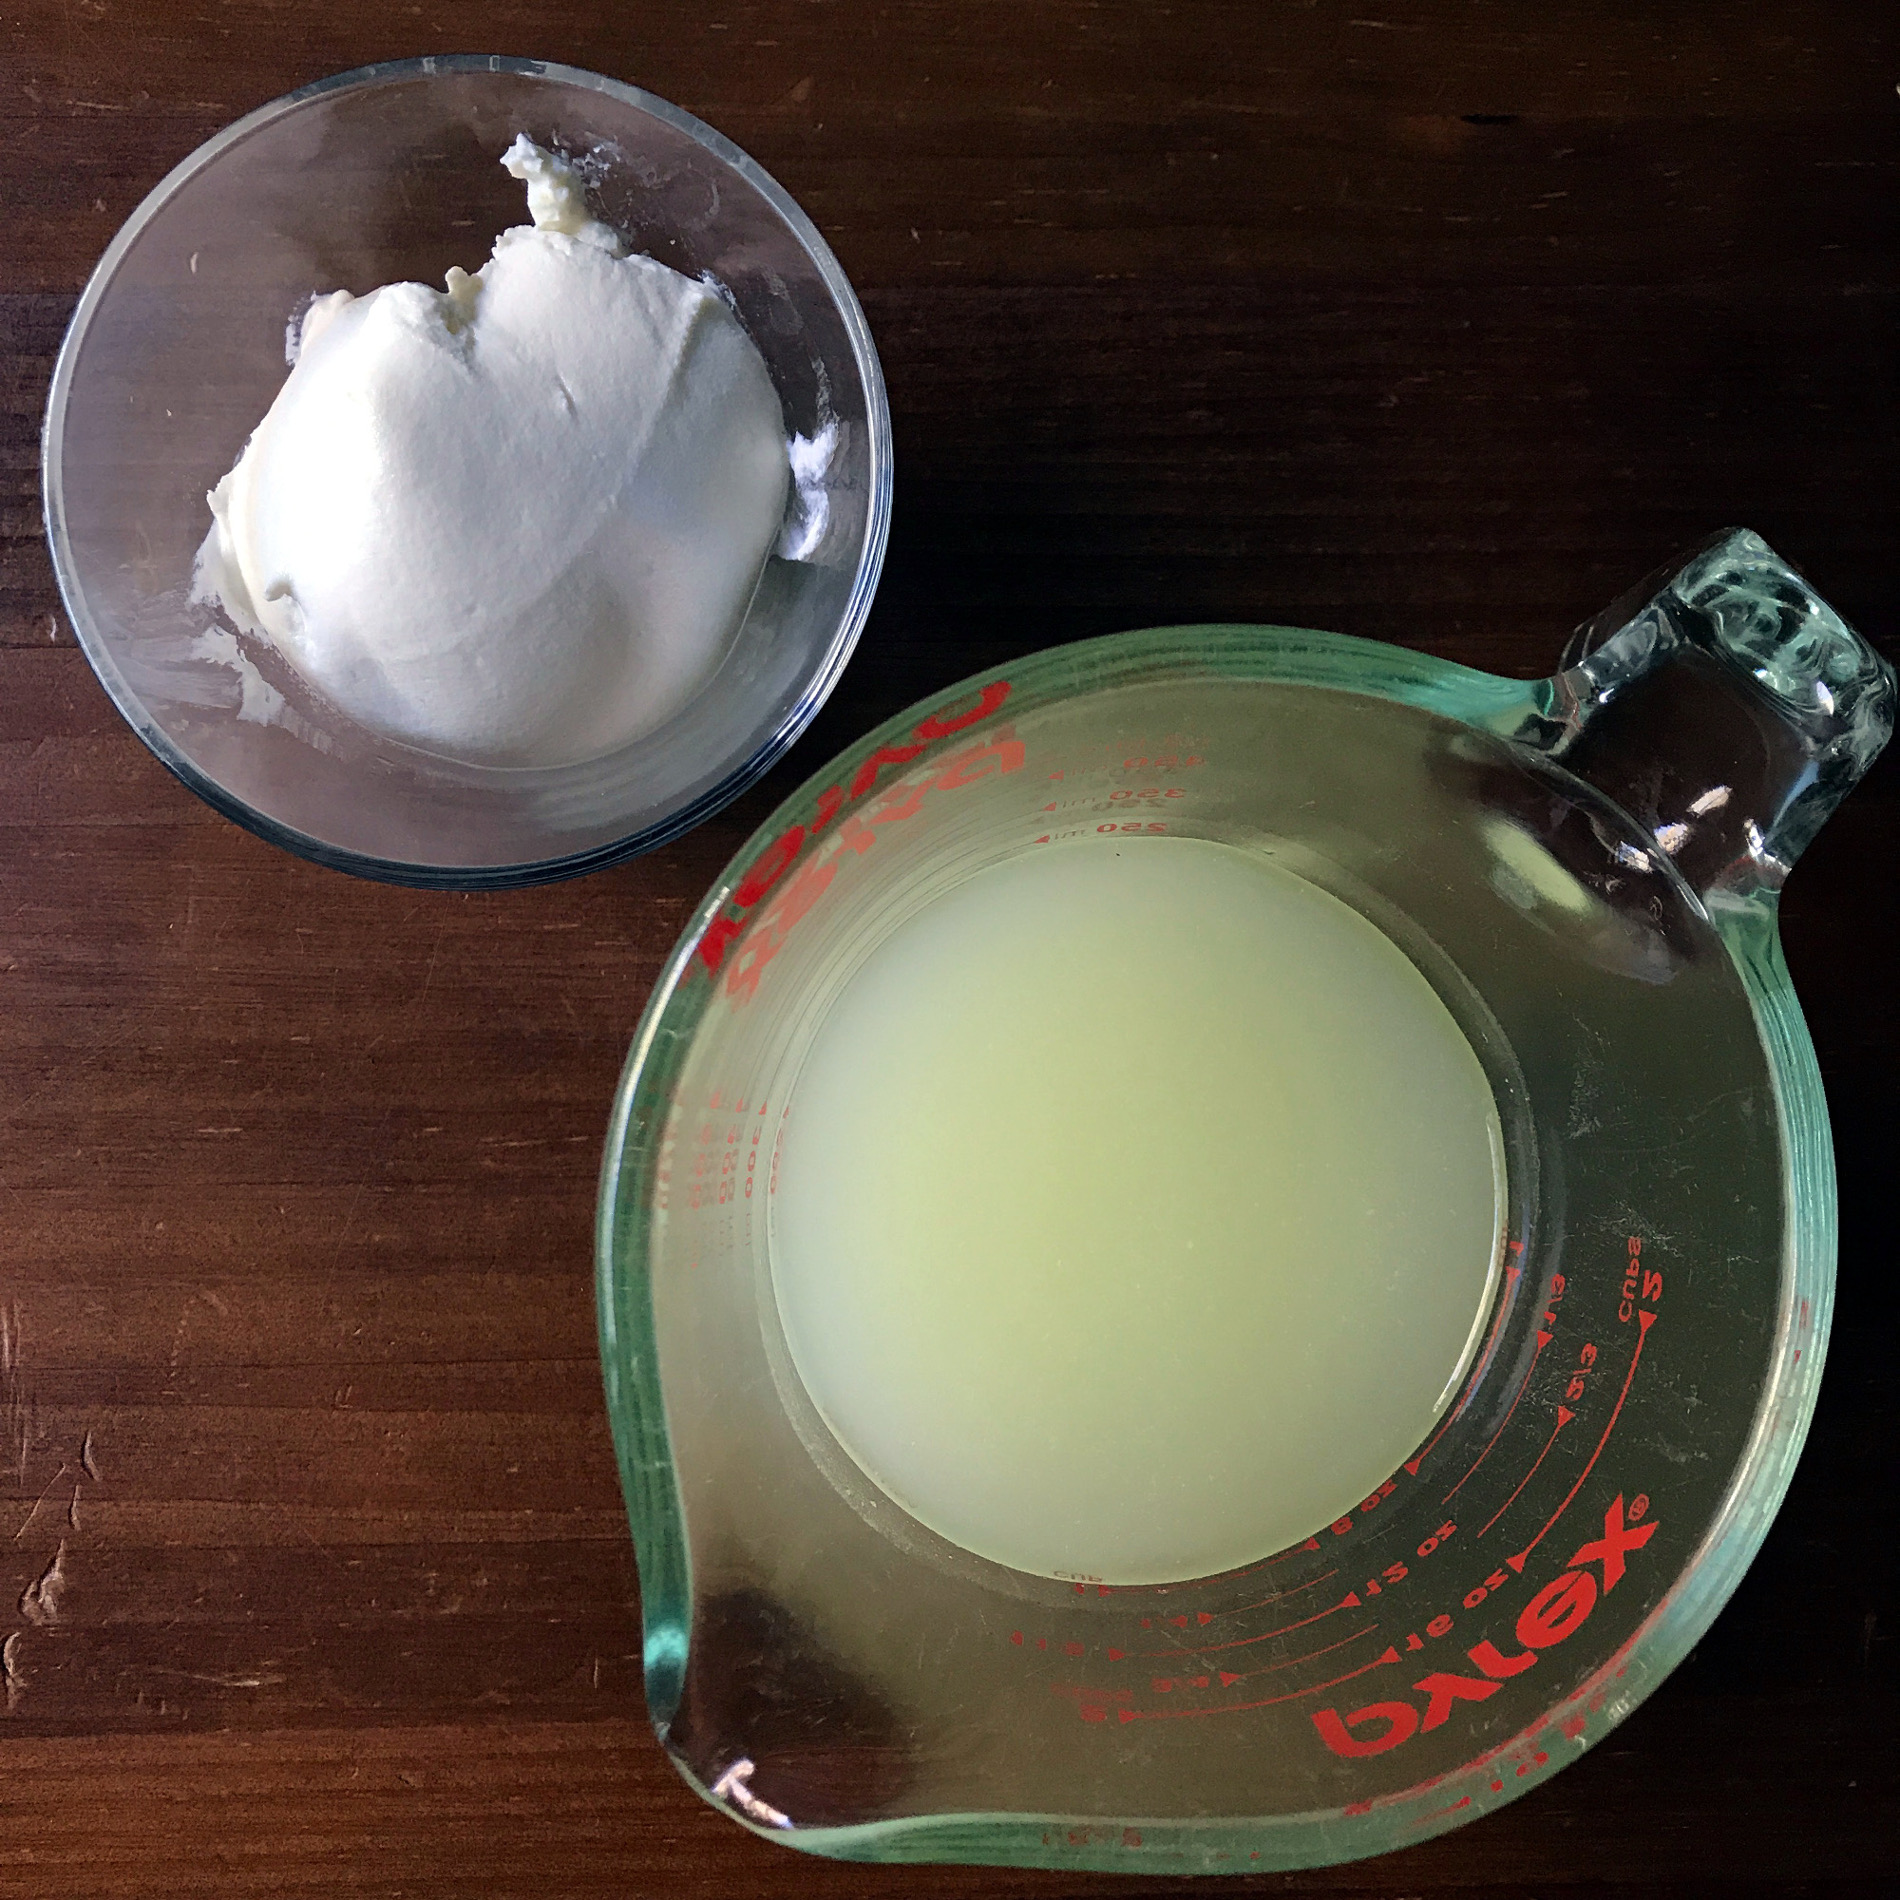
You’ll end up with a shockingly large amount of whey. Don’t toss this! You can use this liquid, filled with good bacteria, to kickstart another ferment, add some tang to soup or you can bake with it.
I made soft pretzels with the whey from this labneh. The recipe I use calls for 1 1/4 cups of water. I had a scant cup of whey and topped it up with water to reach the full amount of liquid. The pretzels had a delicious, subtle tang to them. The big test came when I offered them to my daughter. I had to stop her from polishing them off…

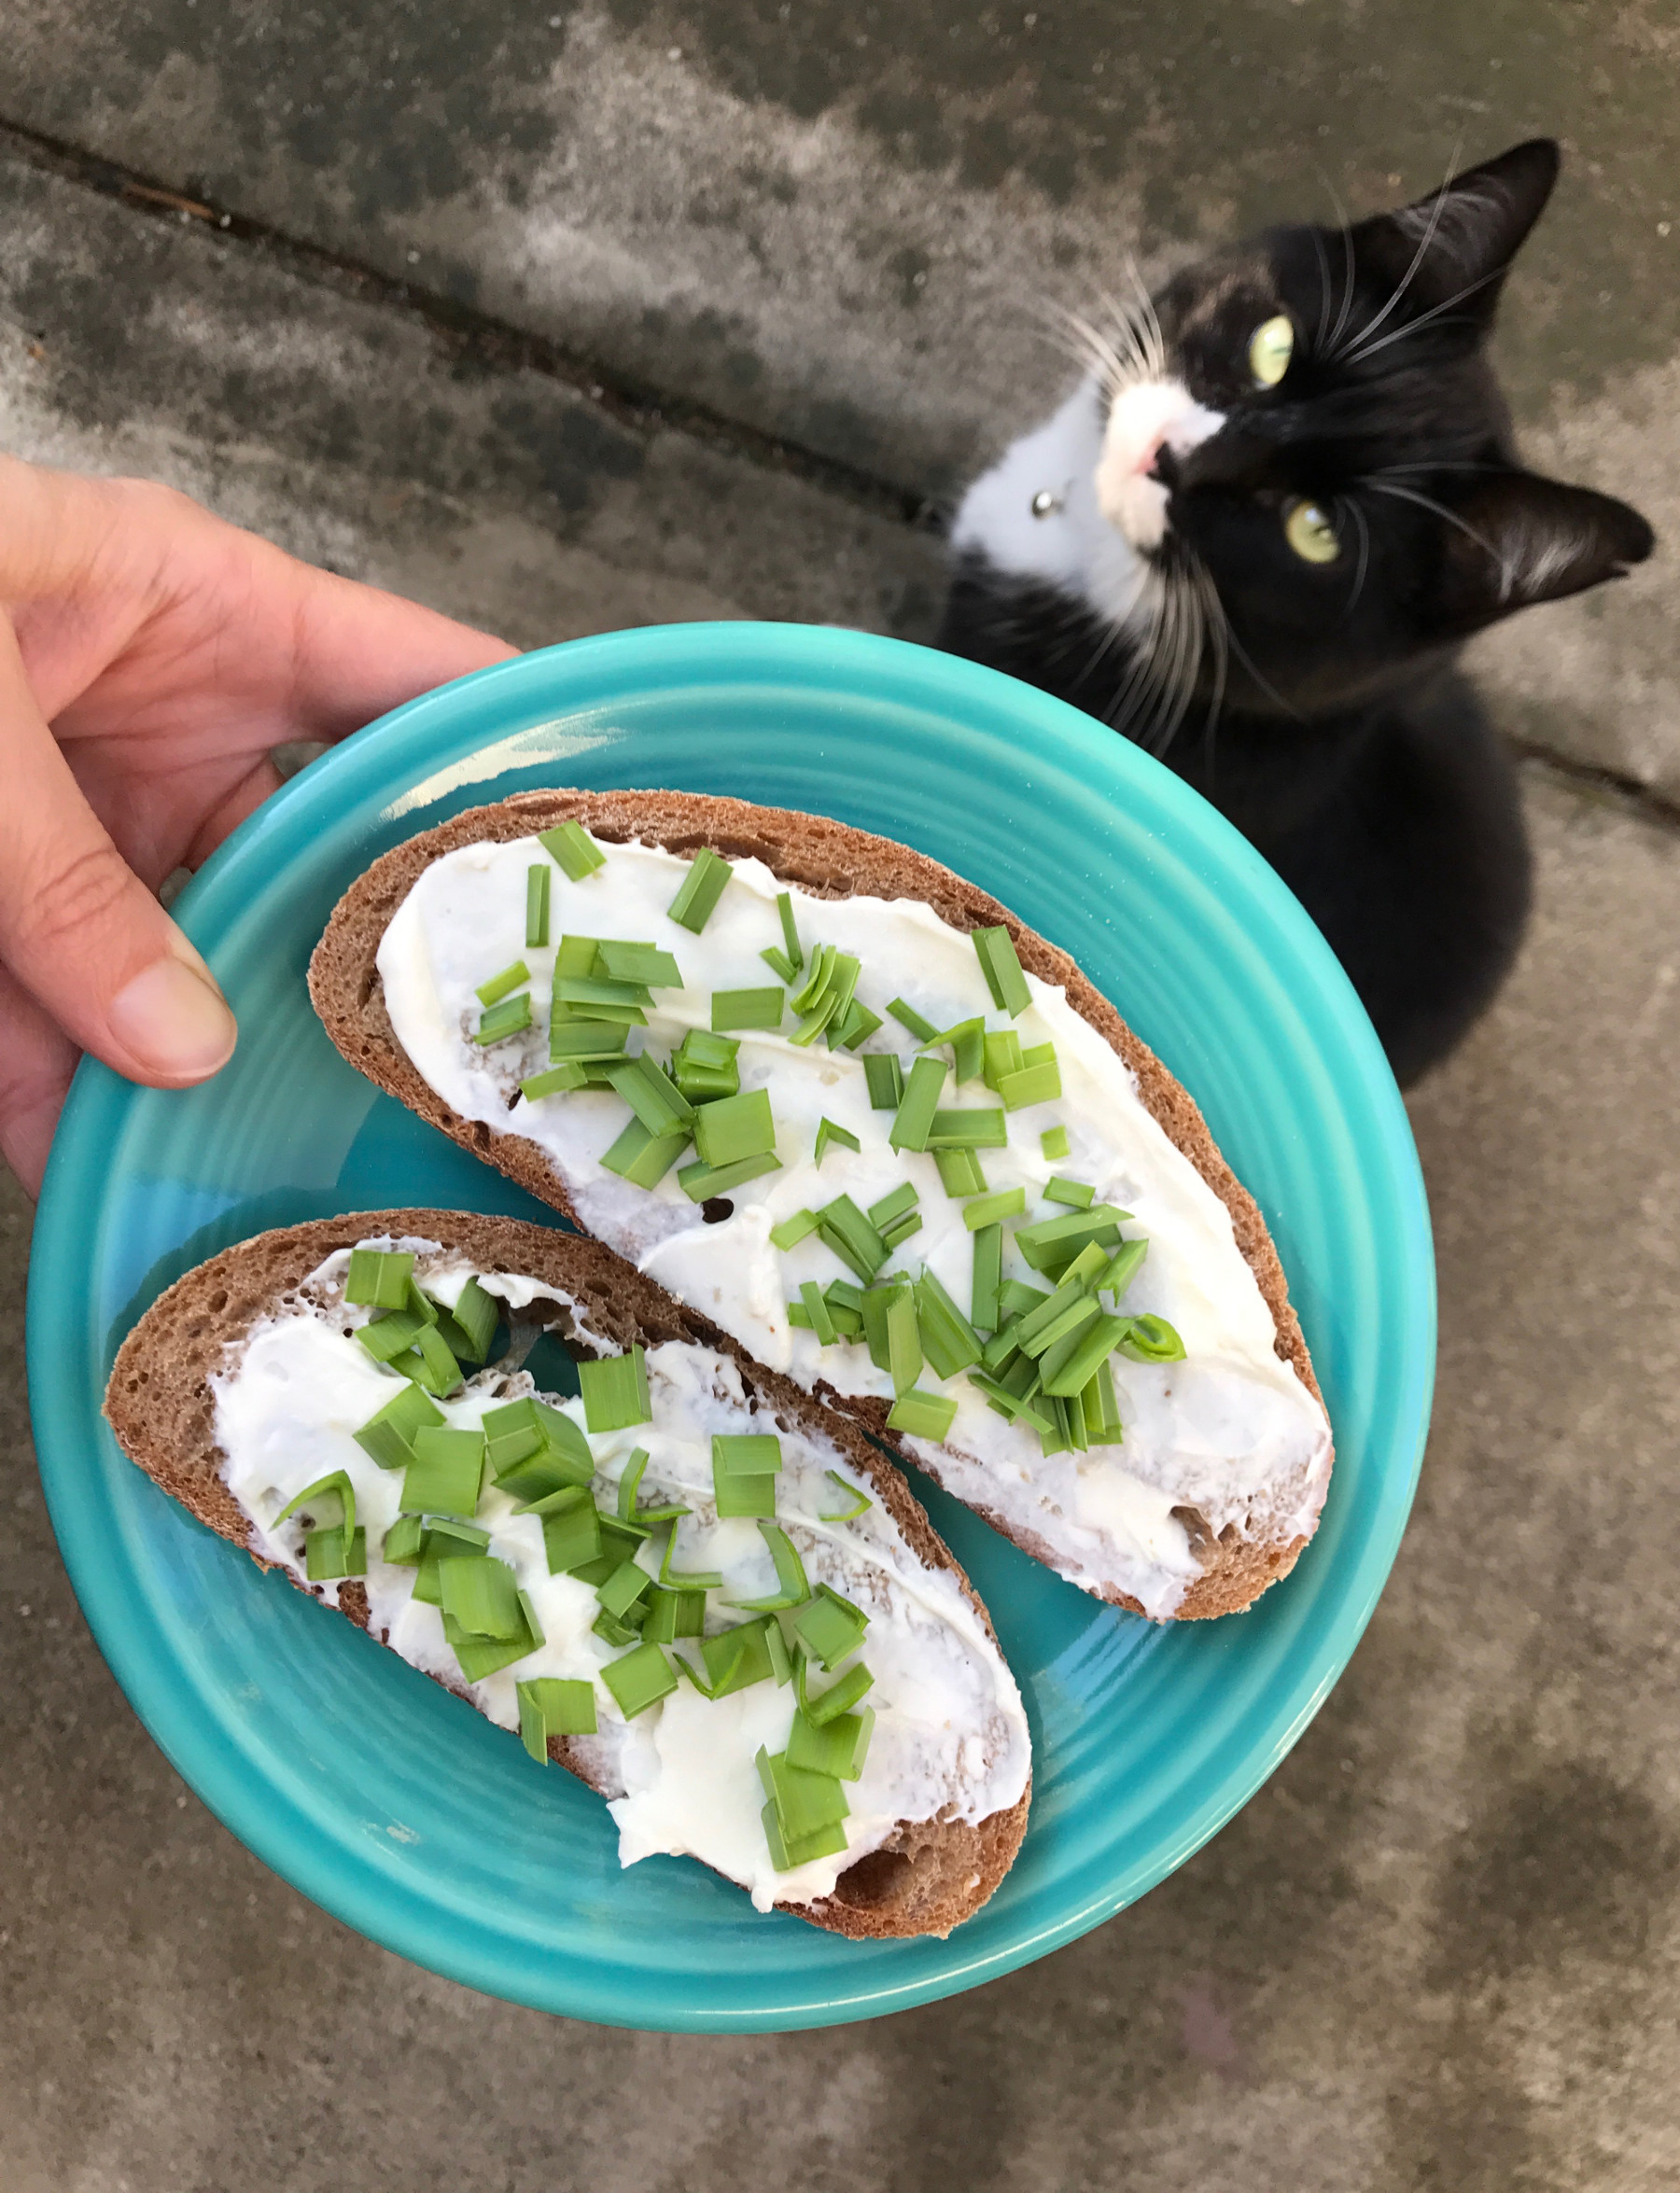
Labneh naturally goes with sourdough bread. Below, you can see some with chopped baby leeks sprinkled on top. I’ve been regrowing these leeks in my window in a jar of water.

Before I started this blog, I didn’t cook this way nearly as much—finding a use for everything. Today, I feel like I can make a feast out of practically nothing. Preventing food waste can seem like a Sisyphean task—you have to constantly stay on top of it—but it’s so fun to get creative and figure out what to make with what you have on hand.
")
Ingredients
- Yogurt
Instructions
- With a rubber band, secure a thin, porous cloth to the inside of a large jar, suspending the cloth without it touching the bottom where the whey will collect. Pour in the yogurt. Close the jar.
- Move the straining yogurt to the refrigerator for two to three days.
- Once the yogurt has strained to your desired consistency, transfer it from the cloth to a jar and store it in your refrigerator. You can also roll it into balls, place those in a glass dish or jar, and over them, pour a mixture of olive oil, lemon juice, chopped fresh herbs and salt.
Notes
You'll yield a volume of labneh equivalent to about half the volume of the yogurt you started out with. So, if you want one cup of labneh, start with a couple of cups of yogurt.
You'll end up with a shockingly large amount of whey. Don't toss this! You can use this liquid, filled with good bacteria, to kickstart another ferment, add some tang to soup or you can bake with it.

Wow! Looks amazing chef 😉
https://mzukowskiblog.wordpress.com/2017/11/15/this-ones-for-you/
Thank you!
Querida,me encantan tus recetas y explicaciones.Mil gracias por todo tu trabajo y todo lo que compartes. Abrazos
Gracias, Maria 🙂 ~ Anne Marie
So, what would you do with the leftover oil if you choose to preserve the labneh balls that way?