For this post, I’ve sewn a French seam—which a few French followers on Instagram have told me they call an English seam. This technique neatly finishes the seams of the bag so the raw edges of the fabric do not unravel—making the bag last longer.
If you can sew a straight line, you can sew a French—or English—seam.
First, choose the fabric
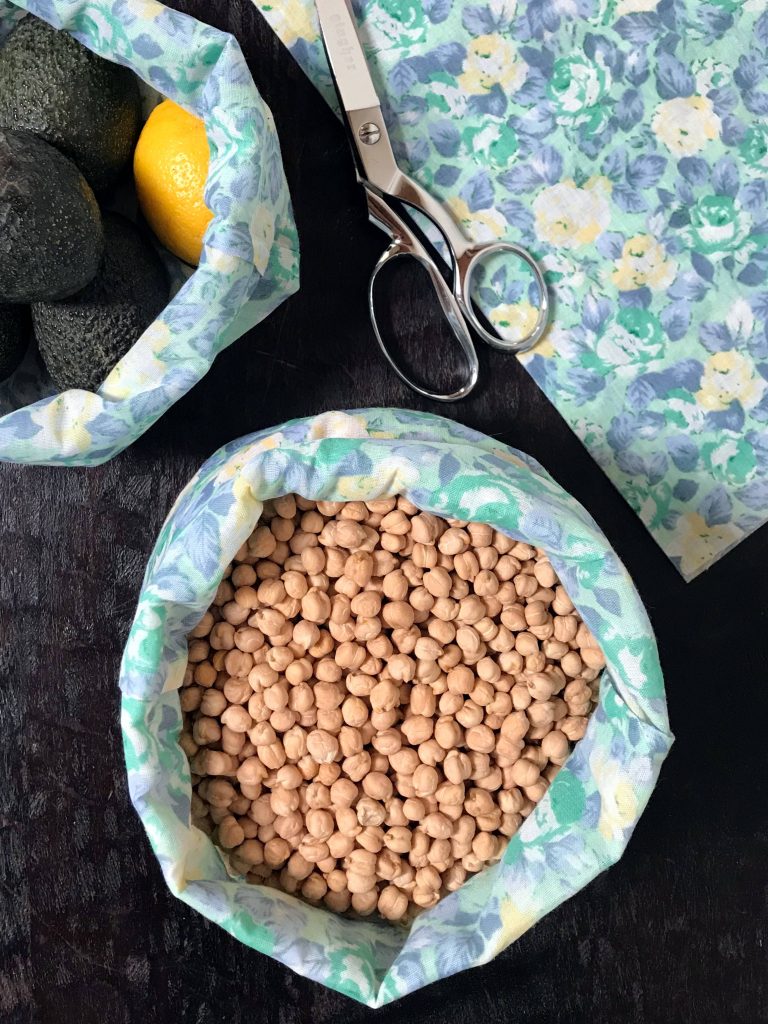
The fabric in this post came from fabric donations to my sewing bee’s Reusa-Bag project. Choose lightweight sturdy fabric, preferably made of natural fibers, as synthetic fabrics shed microplastic fibers in the laundry.
How to sew produce bags with French seams
Because the sizes of donated fabrics always vary, my bag sizes vary. I cut them approximately the same size and shape as the plastic ones from the farmers’ market or grocery store. Those have no closures and so I don’t bother adding a drawstring to my bags. But if you want to make a casing for a drawstring, add an extra inch or so to the length of the bag.
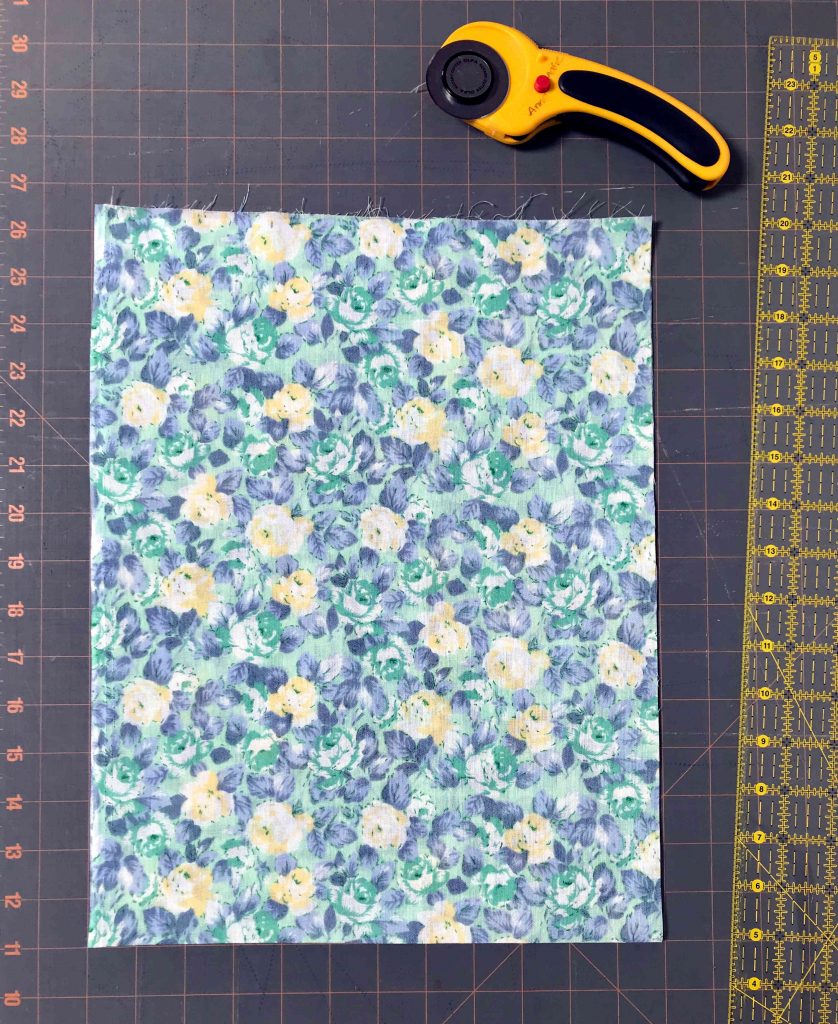
1. Cut the fabric
I iron fabric before I cut it because wrinkles can make the bag (or any garment) wonky. If you will make several bags, cut one out and use that as a template for cutting out the other bags. This speeds up the process. For the bag in this post, I cut out a piece of fabric 12 inches wide by 31 inches long.
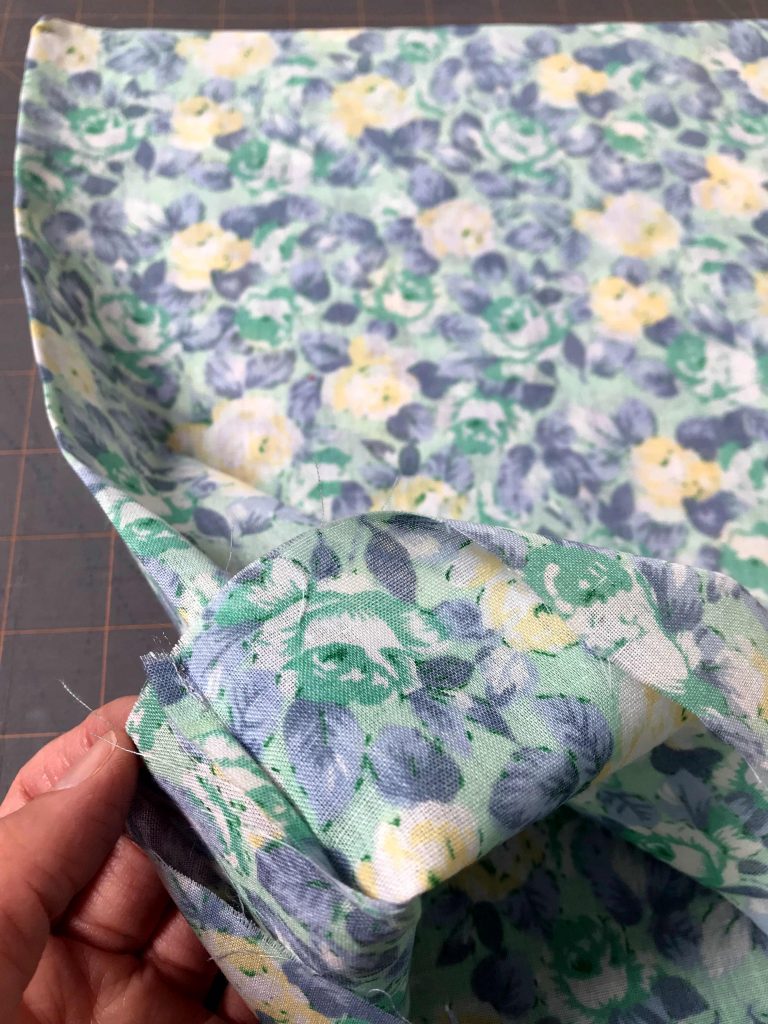
2. Fold the fabric in half, wrong sides together
Ordinarily, you sew with right sides together. Here, you will first sew with the wrong sides together. As you can see from the pictures, the right sides reveal the vibrant pattern and the wrong sides, the dull version. If you use a plain sheet or muslin fabric, there are no wrong or right sides, unlike our current politics on climate change, so you don’t need to differentiate between them. Just sew away.
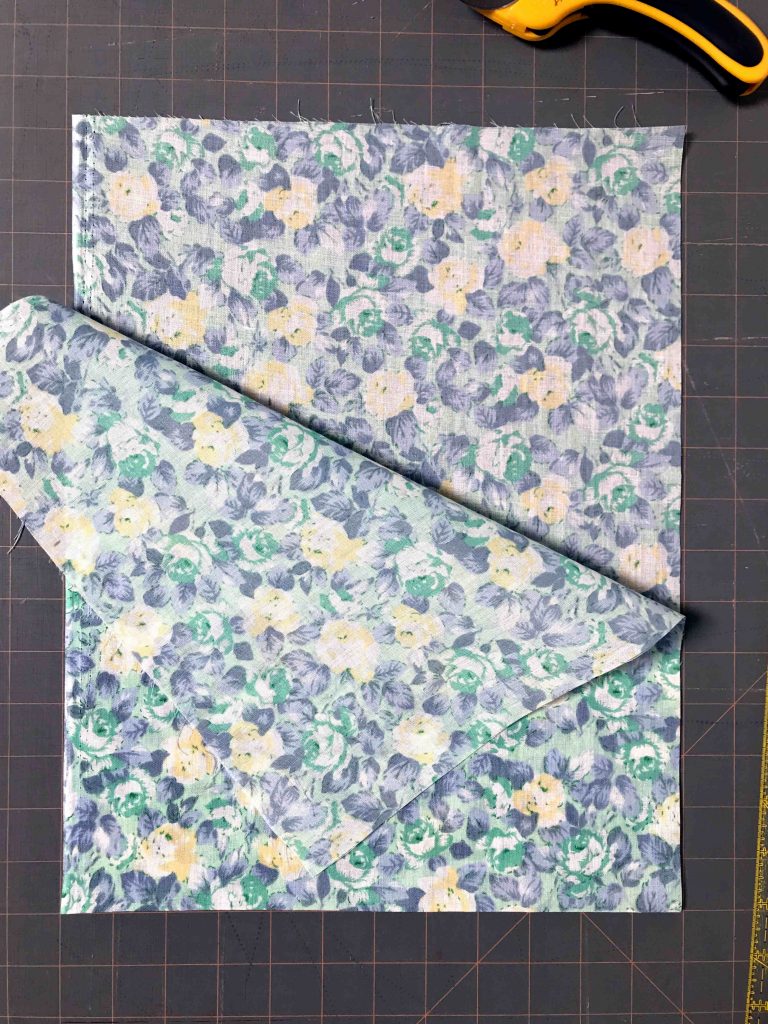
3. Sew the first seam
On each side, sew with a seam allowance of about 1/4 inch for this first seam (i.e. sew the seam 1/4 inch from the edge of the fabric). I always backstitch at the beginning and end of my fabric to reinforce the seam (I learned to do this in home ec in grade eight!).

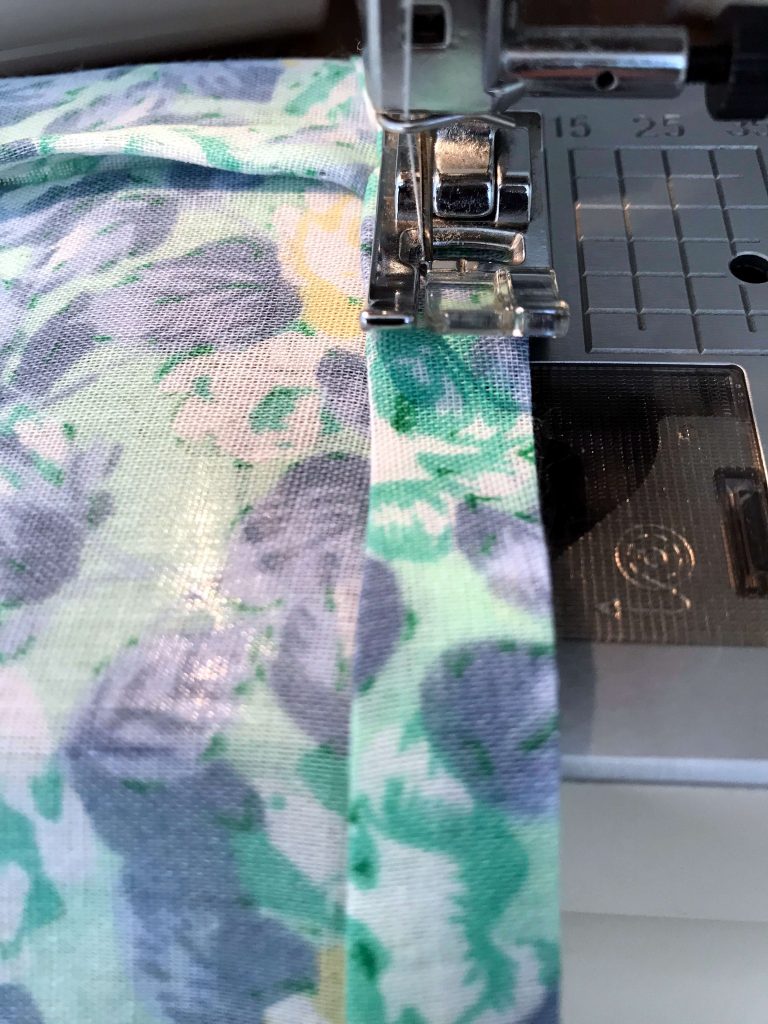
4. Turn the bag right side in and press
Turn the bag so the seams and raw edges are now inside. Press.
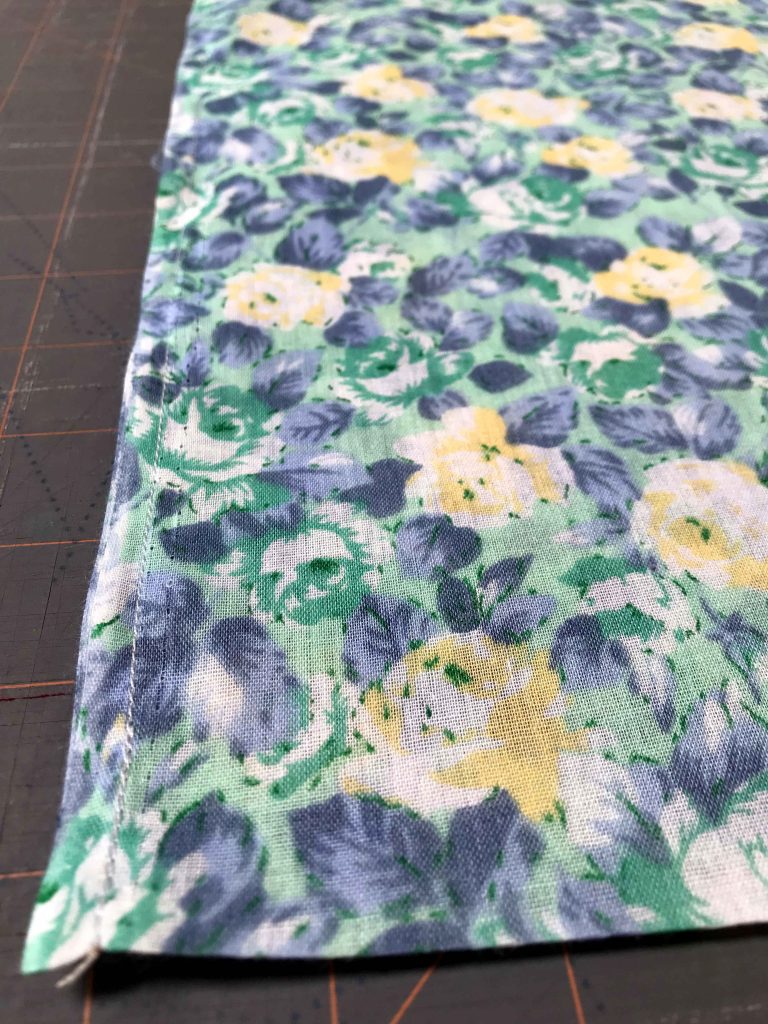
5. Sew the second seam
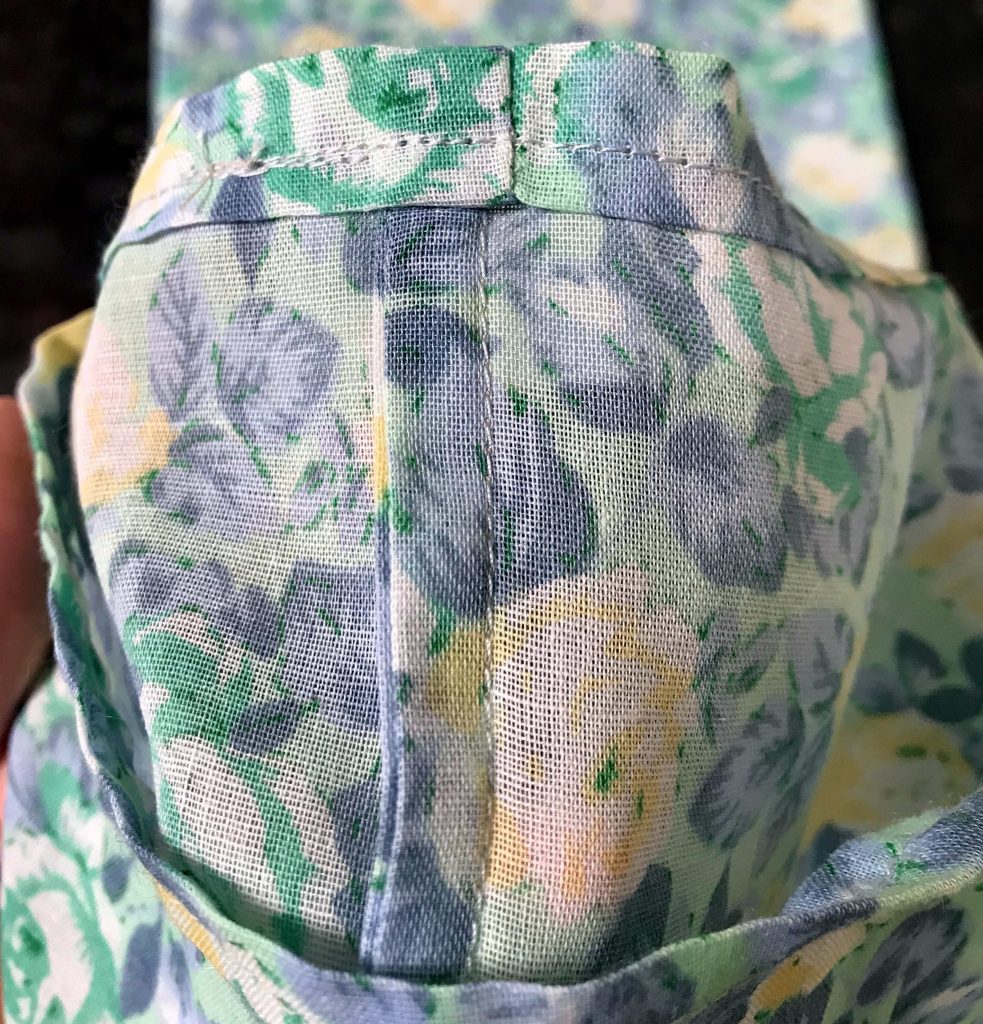
Now you’ll sew another seam. Sew this one approximately 3/8 of an inch from the edge of the fabric. In other words, make this second seam allowance a little bit wider than the seam allowance of the first seam. This encloses the raw edge of that first seam.

6. Hem the top edge of the produce bag
Turn the bag again so the seams face out, then fold down the top edge approximately 1/4 inch, press again and fold down another 3/8 inch. Sew a hem close to the bottom edge of the folded fabric.
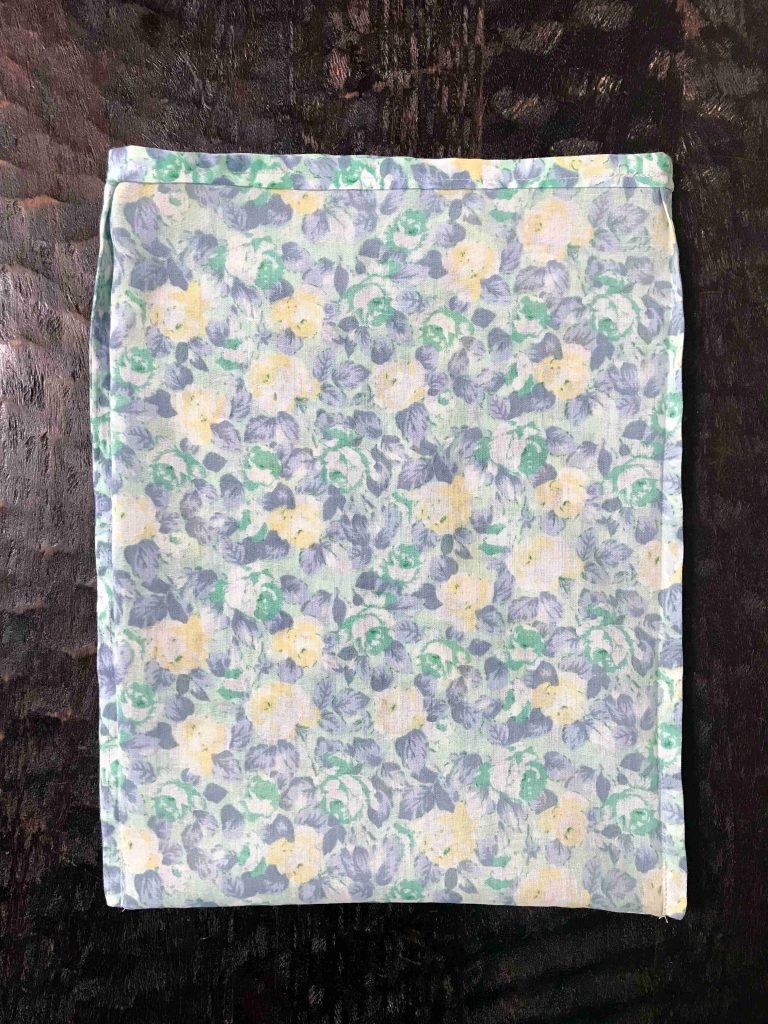
7. Turn the bag right side out
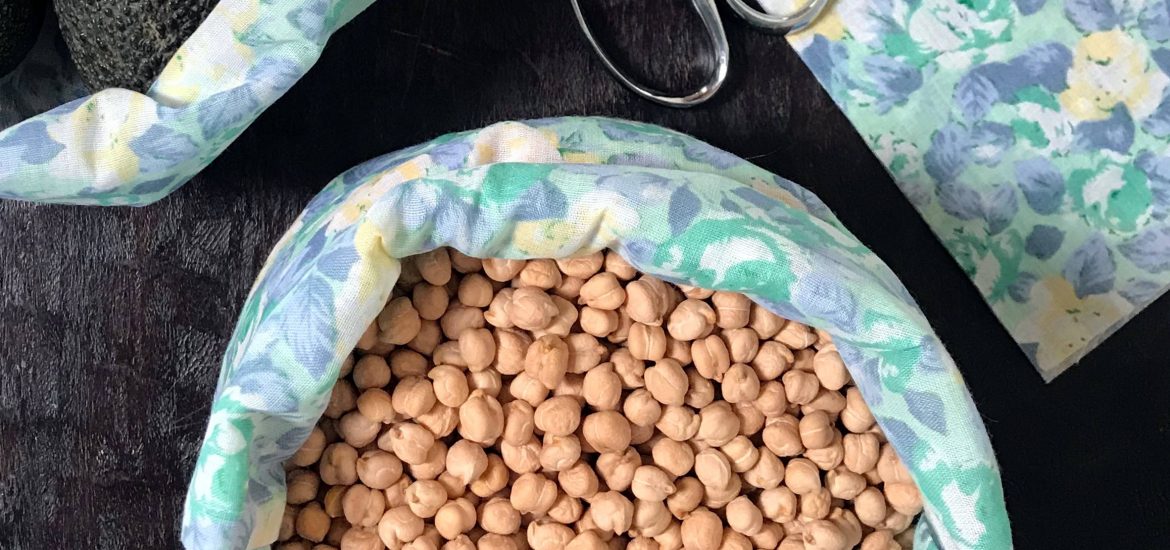
You’re done! Go forth to the farmers’ market, produce section of the grocery store or bulk bin aisles and put your bags to work!

When I use these at the bulk bins, I close them with an elastic band or elastic hair band. I have a lifetime supply of these from before we went zero waste. Or, do make that casing and drawstring. You can also sew two lengths of ribbon into the side seam of the bag and tie the top closed.
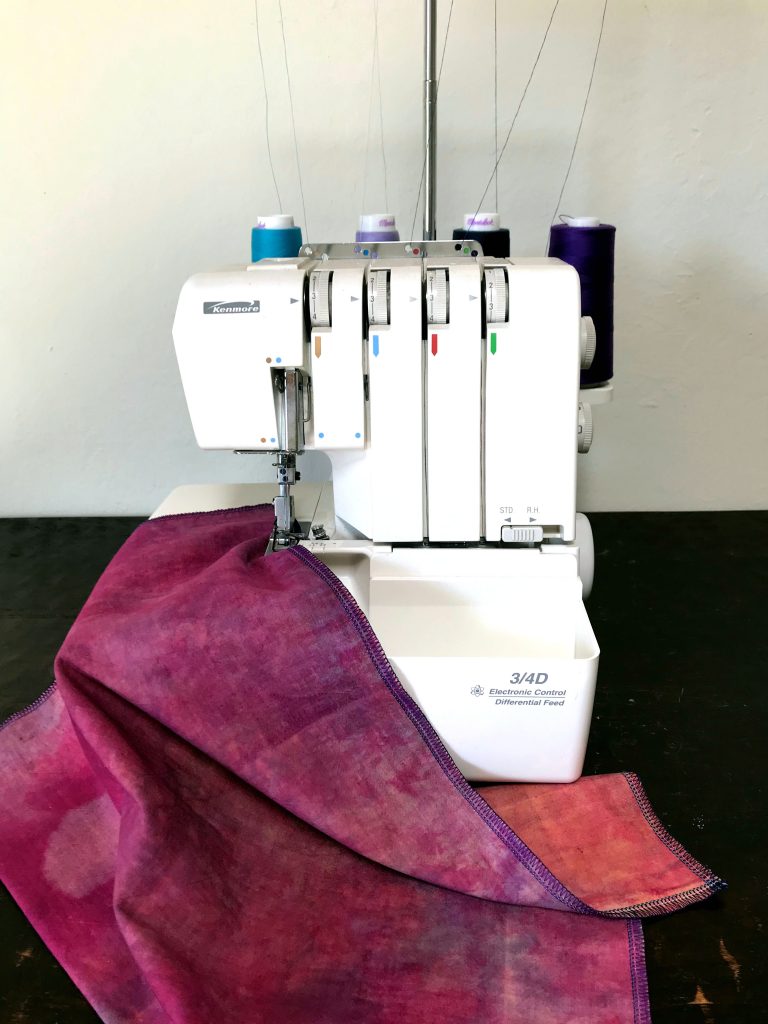
How to sew produce bags on a serger
I love my serger. It sews two rows of straight stitches, trims the fabric edge and finishes that raw edge with two overlock stitches. I recently timed myself sewing reusable produce bags on my machine. I clocked in at less than 3 minutes (2 minutes 52 seconds to be precise)! Go here for the instructions to sew these simple produce bags on a serger.

My YouTube channel
Did you know I have a YouTube channel? I almost forgot about it myself. One of my volunteer sewists—and friend—Cecilia, has started making videos for it. She filmed one during a recent sewing get-together to show the two methods we use to make these bags. We each sew in our own style so the directions differ a tiny bit from what I’ve written above.
By the way, those are NOT my detergents in the community laundry room at the end of the video! I buy mine in bulk at Rainbow or make my own.
Great post! I bought a set of produce bags last summer that will probably last me for a few years, but I should definitely try to sew my own (maybe as gifts for my family and friends?). It doesn’t look extremely difficult… But we shall see!
Jenna ♥
Stay in touch? The Chic Cupcake
Thank you Jenna!
Both storebought and homemade last for a long time. These are a great project for practicing your sewing skills and they do make nice gifts. You can wrap your gift in another bag!
Happy produce shopping 🙂
Anne Marie
I read your post and watched the fun video. I laughed aloud when it switched music during the serving. I have some mesh ones but these are versatile and durable. Bonus that I can repurpose a sheet. I might run string througha
I laughed at that part too, Melissa. My friend has been making these videos and her edits always make me laugh out loud 🙂 Thanks for watching and reading!
Happy sewing!
Anne Marie
… through the top to tie it closed🙂🌸.
Thank you
A possible option for people who don’t have access to sewing equipment, is to use small to medium sized cloth tote bags. Many homes will have several, as they are often handed out freely at events, stall and promotions. Just tie the handles together to make a seal. I find that best works for dried larger unit items such as beans, but not so much for smaller items like fine oats.
This looks like a fun project to do with my granddaughter who wants to learn to sew. Thank you! We’ve been using cloth produce bags for dry goods like beans and at the Farmer’s Market for years. I do have a question: What do you do with things like celery, carrots, bell peppers, fresh herbs and greens to keep them crisp once they’re home?
I’ve tried standing them in jars with a little water at the bottom, but that hasn’t worked for me. I’ve tried refrigerating them in Fido jars, with and without the rubber rings. If I place a clean dish cloth in the bottom to absorb excess moisture, this seems to work for a few days, but not a whole week.
The only thing that keeps them crisp long enough for us to use them without waste is to store them in plastic bags, the kind the supermarket provides, and not the bio bags, sadly, which seem to suck the moisture right out of them. Do you have a solution?
Hi Kathryn Grace,
This is the perfect project for someone who wants to learn to sew. And the French seam is easy but finishes the bag so nicely. I keep my produce in the crisper, often not in anything. Smaller items like carrots go into a cloth bag. My greens wilt right away if I don’t do something with them. When I bring them home, I tear or cut them up, wash them and then put them into a clean cloth bag, go outside, twirl the bag around in the air like a human salad spinner and then put the whole thing in my crisper drawer. The moisture keeps them crisp and having them cut up is just like having a bag of prewashed greens from the store, sans the plastic. I hope that helps.
Happy sewing with your granddaughter,
Anne Marie
Thanks for the tips Anne-Marie. There’s such a sense of satisfaction pressing out a French seam, isn’t there? I look forward to sharing that with my granddaughter. Cloth bags in the fridge have not worked for me, but I haven’t tried your idea of leaving greens in a damp one. Like you, I wash and trim the greens so they’re already to pop in a salad. I store mine in a Fido jar, sans rubber ring, in the fridge. That works well for three days, then they’re done. I’ll try your bag method and see if we can extend the useful time of our greens. I only get to the farmer’s market every couple of weeks due to scheduling conflicts, so the greens run out fast!
My pleasure Kathryn Grace! I hope the bag trick works. I also love a French seam. It looks so nice and is so simple to do!
My 7-year old is sewing these bags! She is so proud, and I finally have some more produce bags. This is just the perfect sewing project for beginners.
Anna
Hi Anna,
That’s great! She should be proud. I agree, they are perfect for learning how to sew. Enjoy your new bags!
~ Anne Marie
[…] And as pedestrian as it is, feel free to take a free cloth produce bag to put your lettuce in! Make sustainable choices one bag at a time! […]
[…] How to Make Reusable Produce Bags. I want to do […]
Hello,
What is your way to handle the plu of each filled bags when your are shopping.
Hi Line,
I shop with a list, either written down on a piece of paper from our paper recycling bin or on my phone and I jot down the PLU number there. Then I just tell the cashier the number. They don’t seem to mind. People have told me that they use washable crayons and that they work well. I haven’t tried it myself but it sounds like a good idea.
~ Anne Marie
Thank you for your answer Anne Marie.
You’re welcome Line 🙂
How much do you estimate your bags add to the weight of the produce!
Hi Joyce,
I use lightweight fabric and so the tare is usually around .08 ounces. If you calculate the tare and mark it on the bag, vendors should deduct that from the total weight of the bag plus the produce or whatever you’re buying.
~ Anne Marie
I use bags with drawstrings, so I weight my produce before I put it in the bag and then print the sticker and wrap around the drawstring.
Not very crafty myself, but my husband didn’t want some of his old cotton t-shirts so took them to a local dry cleaner and she was willing to make them into produce bags for us! This post was the inspiration for the upcycling, so thank you!!!!
[…] produce bags is a great way to give them a second life. The Zero Waste Chef has a great tutorial on how to make produce bags out of old […]
[…] join the movement! DIY bags are the new thing, didn’t you […]
Out of desperation for a hair tie a while back I cut a 2 inch ring off the top stretchy part of my husband’s holey sock and used it. It was so comfortable, stayed in place and didn’t pull. So, I cut 2 more from the same sock. Since then I continue to cut those ring strips from all worn socks using the rings as I would a rubber band for other needs. This might work for closure on the cloth bags, too. The rest of the sock that the rings were cut from I cut length wise in half and used as a kitchen wipe. A clean one can be grabbed for every spill, if I choose. It then gets tossed into a small pail under my sink, eventually washed n reused. They’re just the right size for small dripples and a quick counter wipe. Hope this helps others
Carol
Hi Carol,
I love all of this! Thank you very much for sharing. I can imagine that the sock ring hair tie would be very comfortable. And I love the paper towel replacement! That’s so clever 🙂
~ Anne-Marie