
Like many of the people who took my poll earlier this week on Instagram, you may be surprised to learn how easily you can make delicious tofu from scratch.
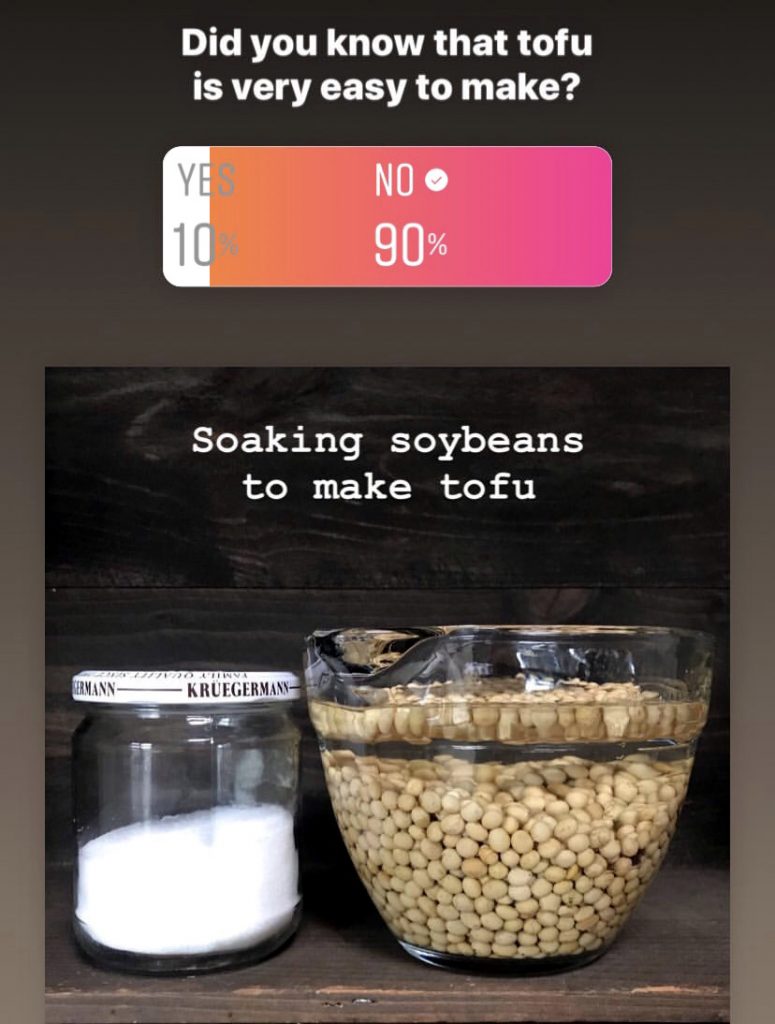
However, like many of the recipes I cook today, preparing tofu does require some planning ahead. If you want tofu for dinner, you’ll need to soak your soybeans in advance—the night before or very early in the morning.
To make tofu, you first make soy milk. So if you prefer, you can make the milk—and a bit extra to drink—a day or two in advance of making the tofu. This gets most of the prep out of the way. Once you have made the milk, you can finish making the tofu fairly quickly.
Only three ingredients
Delicious homemade tofu requires only soybeans, a coagulant and water.
- I buy non-GMO, organic soybeans. GM soybeans can withstand large doses of glyphosate, the active ingredient in Monsanto’s herbicide Roundup. Why avoid this? Research suggests that glyphosate causes non-Hodgkin’s lymphoma and glyphosate may increase cancer risk for children and at “safe levels,” glyphosate harms your gut bacteria.
- I have used Epsom salt (magnesium sulfate) as the coagulant in the past. It makes tasty tofu but renders it softer than nigari (magnesium chloride) does, which I used for the tofu in this post. I can buy powdered nigari in bulk at Rainbow. I haven’t tried making tofu with vinegar or lemon juice but have read that it works fairly well. Apparently it makes quite a soft tofu.
- For the water, I use tap that I filter with naked charcoal. You can buy these from Life Without Plastic or Miyabi Charcoal.
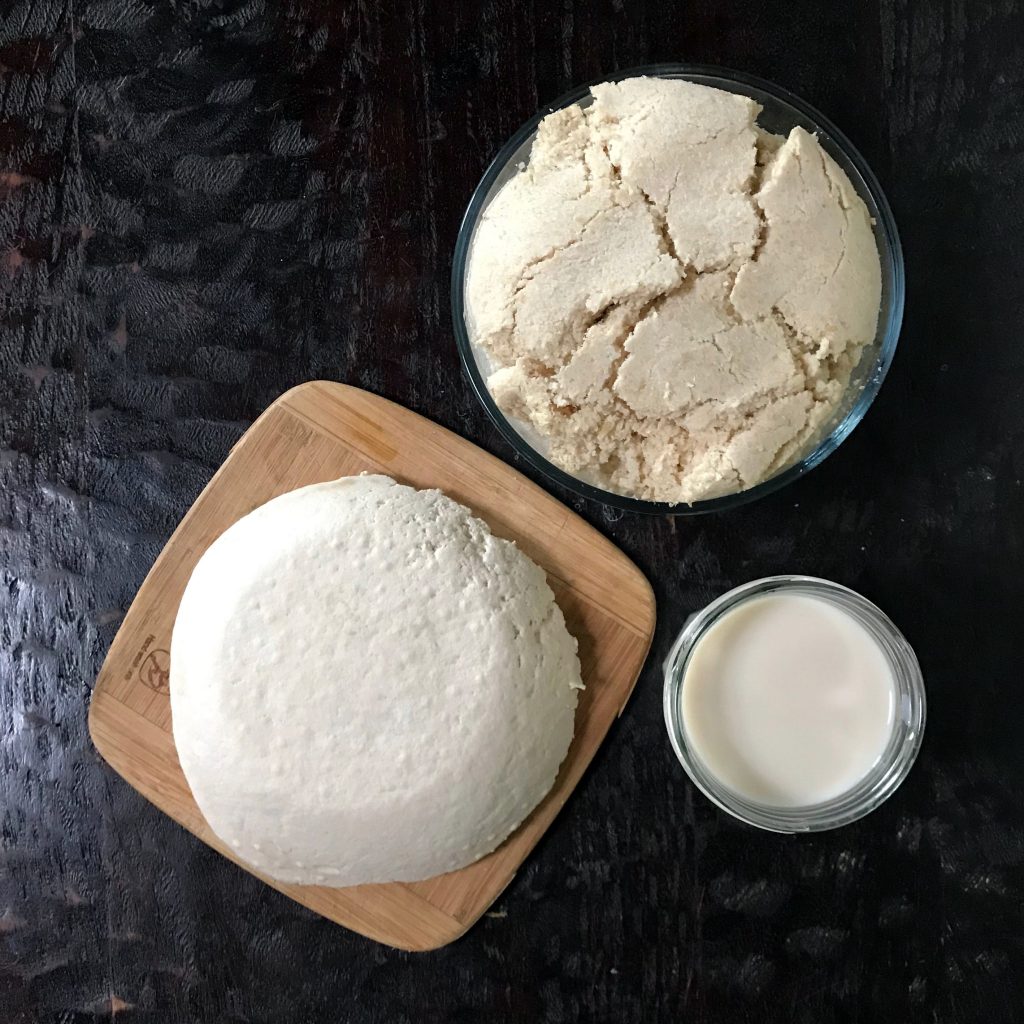
Think ahead of what you’ll do with the SHOCKINGLY LARGE amount of okara (soybean pulp) that homemade tofu renders. This is the only thing I find difficult to deal with when making tofu. I’ve added okara to soup—it makes a nice thickener—and I’ve made really delicious biscotti with it. It also adds flavor and texture to homemade granola. You can use it like you would pulp from nut and seed milks.
When you see the large amount of okara left over from making tofu, I think it makes you respect the food more. So many resources go into producing what we eat. That awareness makes you want to cook with care and not waste a single morsel.
And now for the recipe.
Homemade Soy Milk and Tofu
Ingredients
- 2 cups non-GMO, organic soybeans
- 1 ½ teaspoons nigari powder
- water

Directions
First, make soy milk
1. Soak soybeans overnight.

2. Drain, rinse and place beans in a blender with just enough fresh water to cover. Purée in two batches.

3. Add the puréed beans to a large pot.

4. Stir in 8 cups of fresh water.

5. Slowly heat the mixture to a simmer and stir often until it becomes foamy, about 15 minutes.

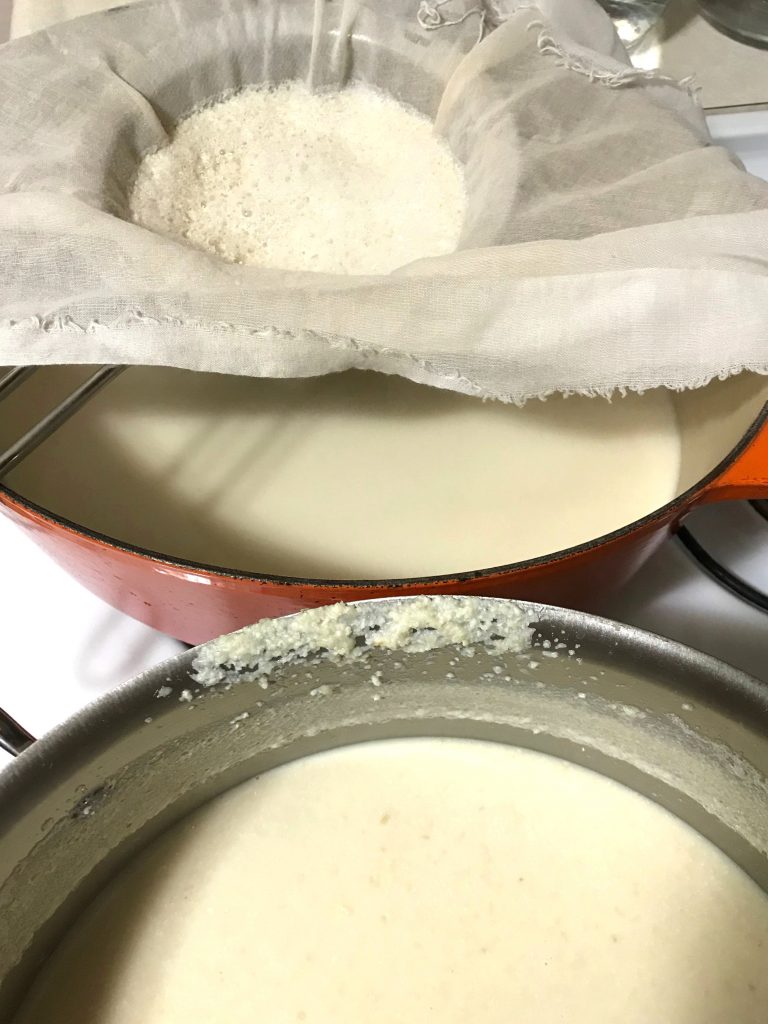
6. Line a sieve with a thin cloth or nut milk bag and place over another large pot. Strain out the milk. Squeeze out as much as possible from the cloth or nut milk bag. If you’d like to reserve some milk, remove it before moving on to the next step. This will render a little over 10 cups of soy milk.
Now, make the tofu
7. Heat the milk to 180° Fahrenheit. While the milk heats, dissolve the nigari in 1/2 cup water. If you reserved quite a bit of milk from this, adjust the amount of nigari accordingly.


8. When the milk has reached 180° Fahrenheit, turn off the heat, pour in the dissolved nigari and stir gently. Curds will begin to form.
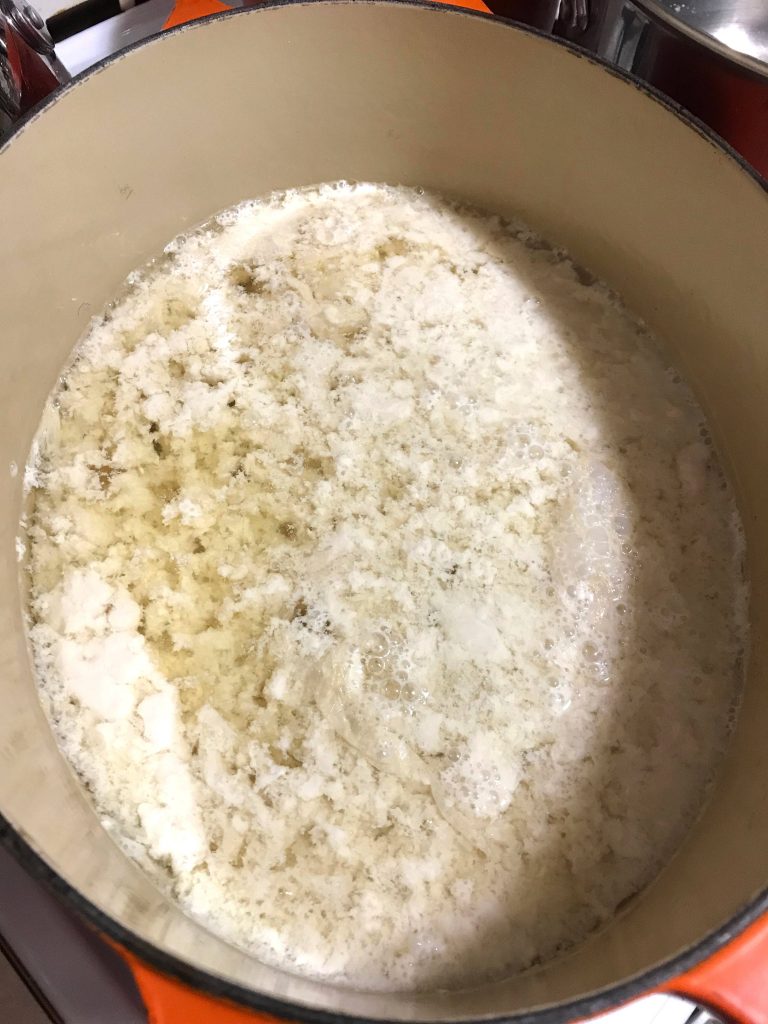
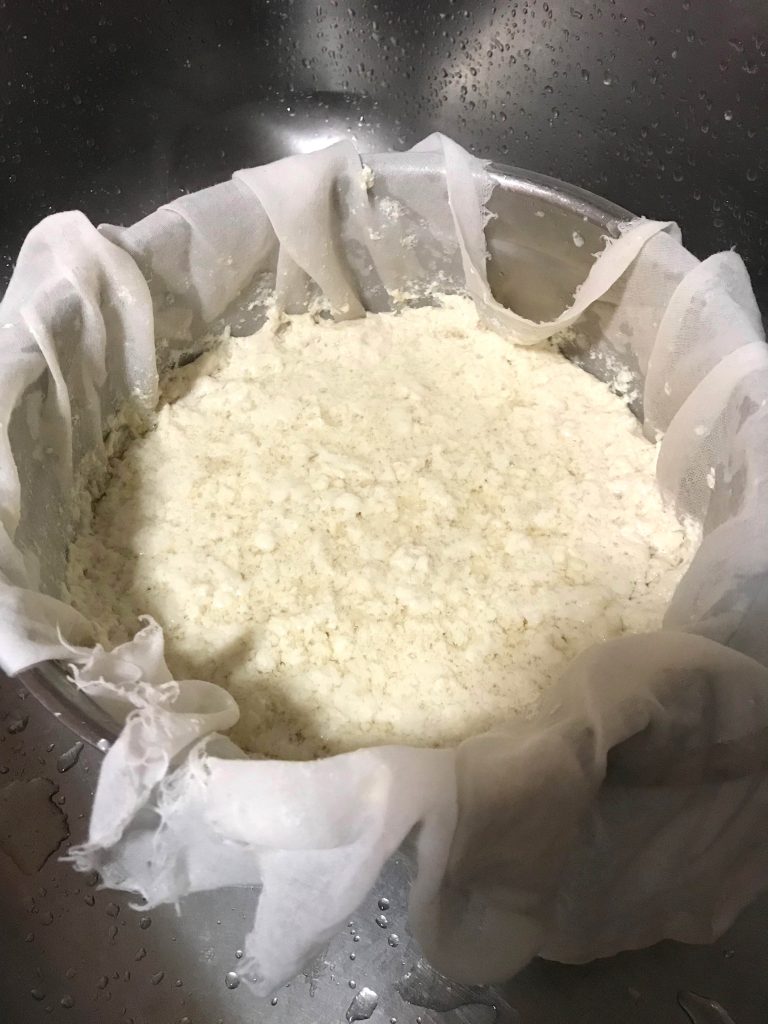
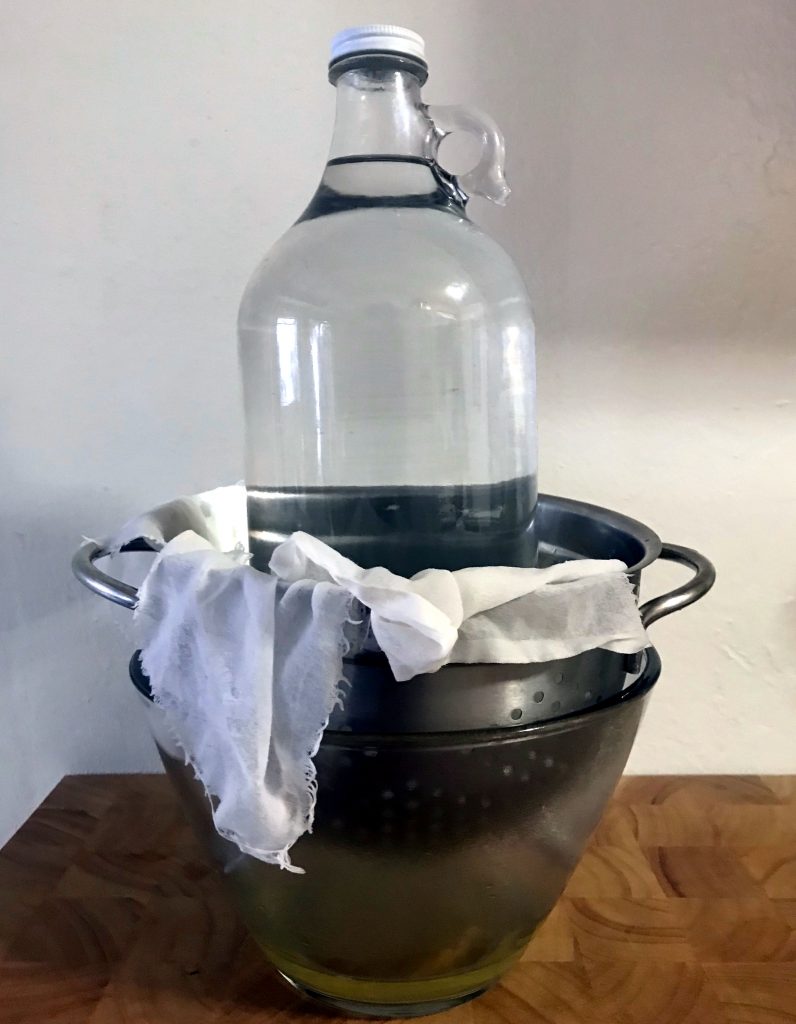
9. After the curds have formed—about 10 minutes—strain them out. If you have a tofu press, set that up in the kitchen sink, pour the curds into it and form your block of tofu. If you do not have a tofu press, place a colander in the kitchen sink. Line the colander with a thin cloth or nut milk bag. Pour the curds in. Squeeze out as much liquid as you can. Fold the cloth over the curds, place a plate on top and a weight (I use a jug of water) on that to press out more water.
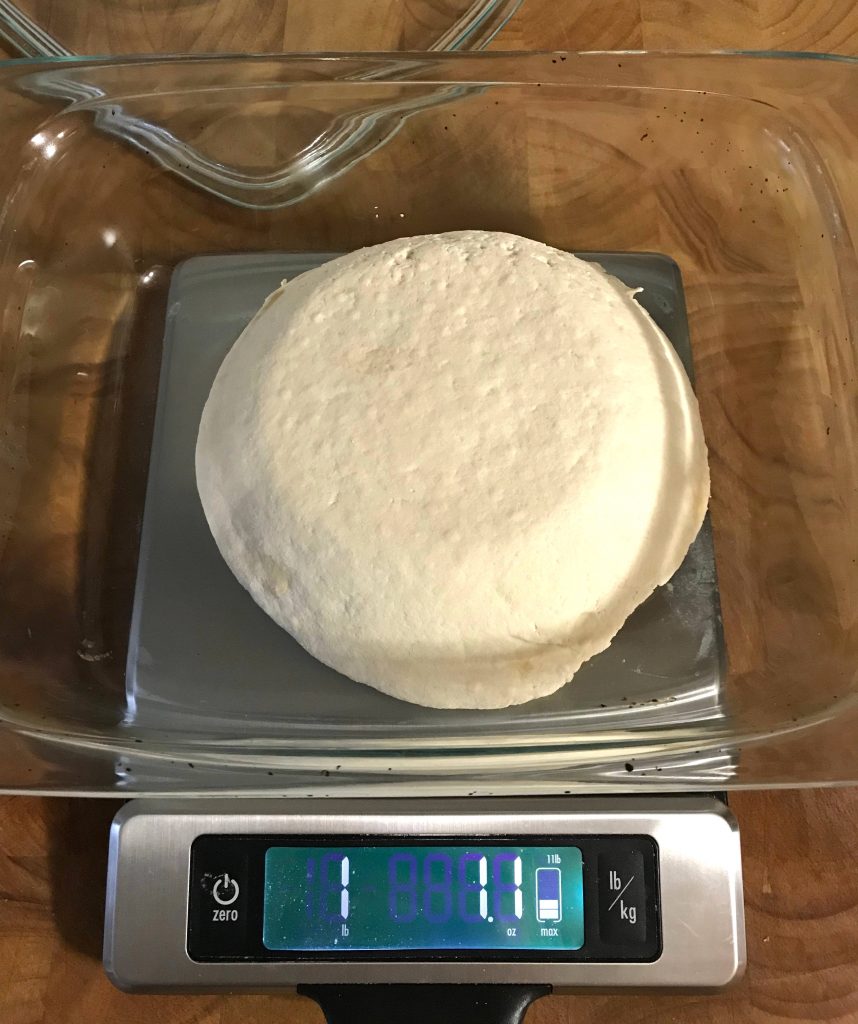
10. Let the tofu drain for about 20 minutes and then either cook it or store it in the refrigerator in a container of water.

Homemade Soy Milk and Tofu
Ingredients
- 2 cups non-GMO, organic soybeans
- 1 ½ teaspoons nigari powder
- water
Directions
1. Soak soybeans overnight.
2. Drain, rinse and place beans in a blender with just enough fresh water to cover. Purée in two batches.
3. Add the puréed beans to a large pot.
4. Stir in 8 cups of fresh water.
5. Heat the mixture to a simmer and stir often until it becomes foamy, about 15 minutes.
6. Line a sieve with a thin cloth or nut milk bag and place over another large pot. Strain out the milk. Squeeze out as much as possible from the cloth or nut milk bag. If you’d like to reserve some milk, remove it before moving on to the next step. This will render a little over 10 cups of soy milk.
7. Heat the milk to 180° Fahrenheit. While the milk heats, dissolve the nigari in 1/2 cup water. If you reserved quite a bit of milk from this, adjust the amount of nigari accordingly.
8. When the milk has reached 180° Fahrenheit, turn off the heat, pour in the dissolved nigari and stir gently. Curds will begin to form.
9. After the curds have formed—about 10 minutes—strain them out. If you have a tofu press, set that up in the kitchen sink, pour the curds into it and form your block of tofu. If you do not have a tofu press, place a colander in the kitchen sink. Line the colander with a thin cloth or nut milk bag. Pour the curds in. Squeeze out as much liquid as you can. Fold the cloth over the curds, place a plate on top and a weight (I use a jug of water) on that to press out more water.
10. Let the tofu drain for about 20 minutes.
11. Cook the tofu immediately, store it in the refrigerator in a container of water or freeze it. Freezing renders a chewy, firmer, flavor-absorbing texture. Cube the tofu, spread it across a cookie sheet and once it has frozen, pop off the cubes from the pan and either allow them to thaw if you’ll cook the tofu now, or store them in a glass jar in the freezer to cook later.

Hi Anne-Marie, thanks again for breaking this down to a really easy recipe, once again.
I have two questions: I tried to make soy milk last autumn. The workshop leader told us it needed to simmer for 2 hours. So when I tried at home, it was really sweaty, hard work! Plus the kitchen smelled awful. Worst was the taste, however. In the workshop, milk and tofy tasted neutral, like in the shops. My milk (organic, local beans from zero-waste shop) tasted – incredibly disgusting: bitter, beany, like nothing I ever tasted. Had to discard it after all the work. Broke my heart. Any idea why the result was so bad? I was totally discouraged to try again. I love soy milk, but hate tetra packs …
Hi Corinna,
The first time we made soy milk it also tasted disgusting. I’m not sure what went wrong. It was a long time ago. I think cooking it for two hours may be part of the problem. Also I have read that the beans can affect the taste. They should be as fresh as possible. We have several bulk stores near us but the super busy one has the highest turnover and so the freshest food. If you try again, you might want to make a very small batch and see how that goes. Also, I would sweeten the milk a little bit (with a couple of dates, maybe a touch of vanilla) if you’re drinking it. I’m going to bake with the small amount of soy I set aside from this.
Good luck!
~ Anne Marie
Hi! Boil the beans COVERED for 15 minutes on med-high heat (if boil-over occurs crack lid slightly). Don’t remove the lid completely while beans cook. Covering removes beany taste. The grainy texture you experienced was due to overcooking.
I make a large batch every Sunday to quickly make soy milk for breakfast throughout the week. Here’s my routine after boiling the beans:
Rinse (remove skins optionally).
I put 1 cup beans in a freezer bag for each day of the week; total 7 bags. Place in freezer.
When I’m ready for my breakfast soy milk:
Put 1 cup beans into blender.
Add 2 cups of water & blend for 2 minutes or so until creamy.
Then add 1 more cup of water, salt, vanilla, etc. Blend for 10 seconds. Done!
PS re. Okara: you can soak it again and get another, weaker batch of soy milk out of it. Then freeze for anything you would use tofu shreds for (bolognese, stews).
Thanks for the ideas Corinna. I need lots of them for all my okara 🙂
“So many resources go into producing what we eat. That awareness makes you want to cook with care and not waste a single morsel. ” I 100% agree with this. As I read these words, I couldn’t help but think of the pulp that is left behind when I make nut milk or the astounding amount of whey left over while making cheese! Would it be OK with you if I featured the above quote in an upcoming blog post? Of course, I would credit you with it and would link back to your blog.
Hi Sophie,
I think the same thing when I make ricotta. SO much whey! The tofu is very much like that. More okara than tofu. But it is useful stuff. Yes, you can quote me 🙂 Thank you!
~ Anne Marie
I never understood why I should filter the nutmilk or oatmilk in the first place, if it is only used for muesli. I blend and pour it over, no nutmilk bag required. If I eat my muesli with oats and nuts anyway, why discard and dry what I might as well use directly … just my thoughts. Obviously different for coffee 😉
I agree with you.! If I’m using it in a smoothie or oatmeal, then I’ll definitely be using the pulp. The thing is, I also like it as just plain milk, so I usually filter it anyways and either keep the pulp in the fridge to use elsewhere, or stick it in the freezer and when I have a big enough stash take the time to thaw and dehydrate it to turn it into almond meal.
Hi! This is my first time making tofu and all I have is epsom salt. How much should I use?
Thanks!
Hi Hope,
Epsom salt will work. I’ve made it with that. It’s softer though so it doesn’t stand up to frying like tofu I make with the nigari. But it tastes delicious and is a good consistency for scrambles.
~ Anne Marie
Something else to my list of what I want to try making myself, though I’m curently struggling with my first sourdough starter!
Tofu is fun to make and very simple. A starter is a bigger commitment! I struggled with my first one and composted it but I look back and realize it was probably fine. I wasn’t patient with it. Poor Heloise 🙁 I hope you can get yours going.
~ Anne Marie
This is fascinating, thanks for writing it up. I’ve been reading your blog avidly for a while now, and you’ve inspired me to do more of the stuff I was already doing, and taking it further. Next stop for me will be scrap apple vinegar. Might even try tofu one day… Never say never. Anyway, thanks again for a really great blog.
are you starting with dried or fresh soybeans?
Hi Sophie,
I started with dry soybeans that I bought in bulk.
~ Anne Marie
The Homemade Vegan Pantry has some great uses for okara unfish sticks, & “crab” cakes!
thank you for posting this, i am going to give it a try! i know you are local to me… would you mind sharing your favorite bulk stores on this side of the bay? rainbow is nice but not always realistic for me ( i am in el sobrante).
Hi Erin,
My pleasure 🙂 Thanks for checking it out. What about Berkeley Bowl? It’s still a bit of a trip for you but closer than Rainbow.
~ Anne Marie
Is the liquid that drains out once the curds have formed usable in any way (whey?)? Would it be similar to buttermilk, say? Or does the epsom salts / nigari make it taste inedible?
I don’t eat soy, but your Tofu post reminds me of this beautiful series of blog posts about Hari Kuyo, which is a Japanese tradition of disposing of broken pins and needles into a cake of Tofu, in a kind of memorial service and Thank You to good tools. Apparently this occurs on February 8th of every year. Enjoy: http://plays-with-needles.blogspot.com/2013/02/happy-harikuyo.html
I didn’t know making tofu was this simple! I should definitely give it a shot. Our family has a soymilk machine I use regularly, and I usually just make savory pancakes with the pulp. It’s similar to Korean jeon or a frittata. It’s easy to adjust the recipe to accommodate for the wetness/dryness of the batter.
Thanks for the recipe!
[…] saw this over at The Zero-Waste Chef last week in a post about making tofu. The words just stood out to me and I wanted to share them […]
I’m so happy to discover this – I’m trying to reduce my waste and eat less meat, but tofu has been caught in the middle! Thanks for sharing.
Hey there! Lovely post, thank you for sharing this 🙂 I was just wondering if you know how to make zero-waste tempeh? I can’t find the ”starter” package/plastic-free… and I just love tempeh. Any ideas will be highly appreciated.
Best regards!
Do you Hull your soybeans before making milk?
Hi Rose, No hulling necessary!
Anne Marie
do you recommend removing the soybean hulls for making soy milk?
Anne Marie, what about making tempeh with the okara? That was how tempeh was discovered in Indonesia–the leftover pulp from making soy milk fermented and became tempeh.
I found on amazon a nigiri but it was liquid not powder. Do I still use 1 1/2 tsp? Also, it says you can use it for ricotta and queso fresco!!!!
Hi Mich,
I haven’t used liquid nigari but I’ve read lots of recipes that call for it. It should work. I don’t know how potent it is compared to the powder so I’m not sure how much you’d use. The package might have some information on that.
~ Anne Marie
Have worked with this approach and tweaked it. More an Okara recipe really:-) , been making cornbread and “meat”loaf and burgers, it is pretty amazing this possibility and what is made. Thanks for making the time, there are a lot of recipes out there, used an amalgamation but I like this one and the method and description and pics!