
Gardeners want to fill their yards with healthy plants—not the landfill with single-use plastic trash. But walk into a typical nursery and you’ll find plastic everywhere, from the plastic bags of soil, compost and mulch to the plastic hoses and watering cans to the pots of almost every single seedling, flower and tree for sale. The plants in plastic pots create an odd juxtaposition—small green miracles growing in fossil fuel-derived, nature-destroying material.
Plastic in our soil (and water and air) ends up in our food and in our bodies. The companies manufacturing the stuff—Big Oil and Big Plastic—created this crisis, not us. Fortunately, we consumers can eliminate loads of plastic in the garden and in our lives with a bit of creativity.
Many of the plastic-free gardening tips below surpass the definition of sustainability—to do no harm—and actually regenerate the environment by adding more to the Earth than they remove.
Avoid plastic bags of topsoil and potting soil
I’ll get the toughest switch out of the way first. Finding an alternative to ubiquitous plastic bags of soil can be done but require some planning and searching.
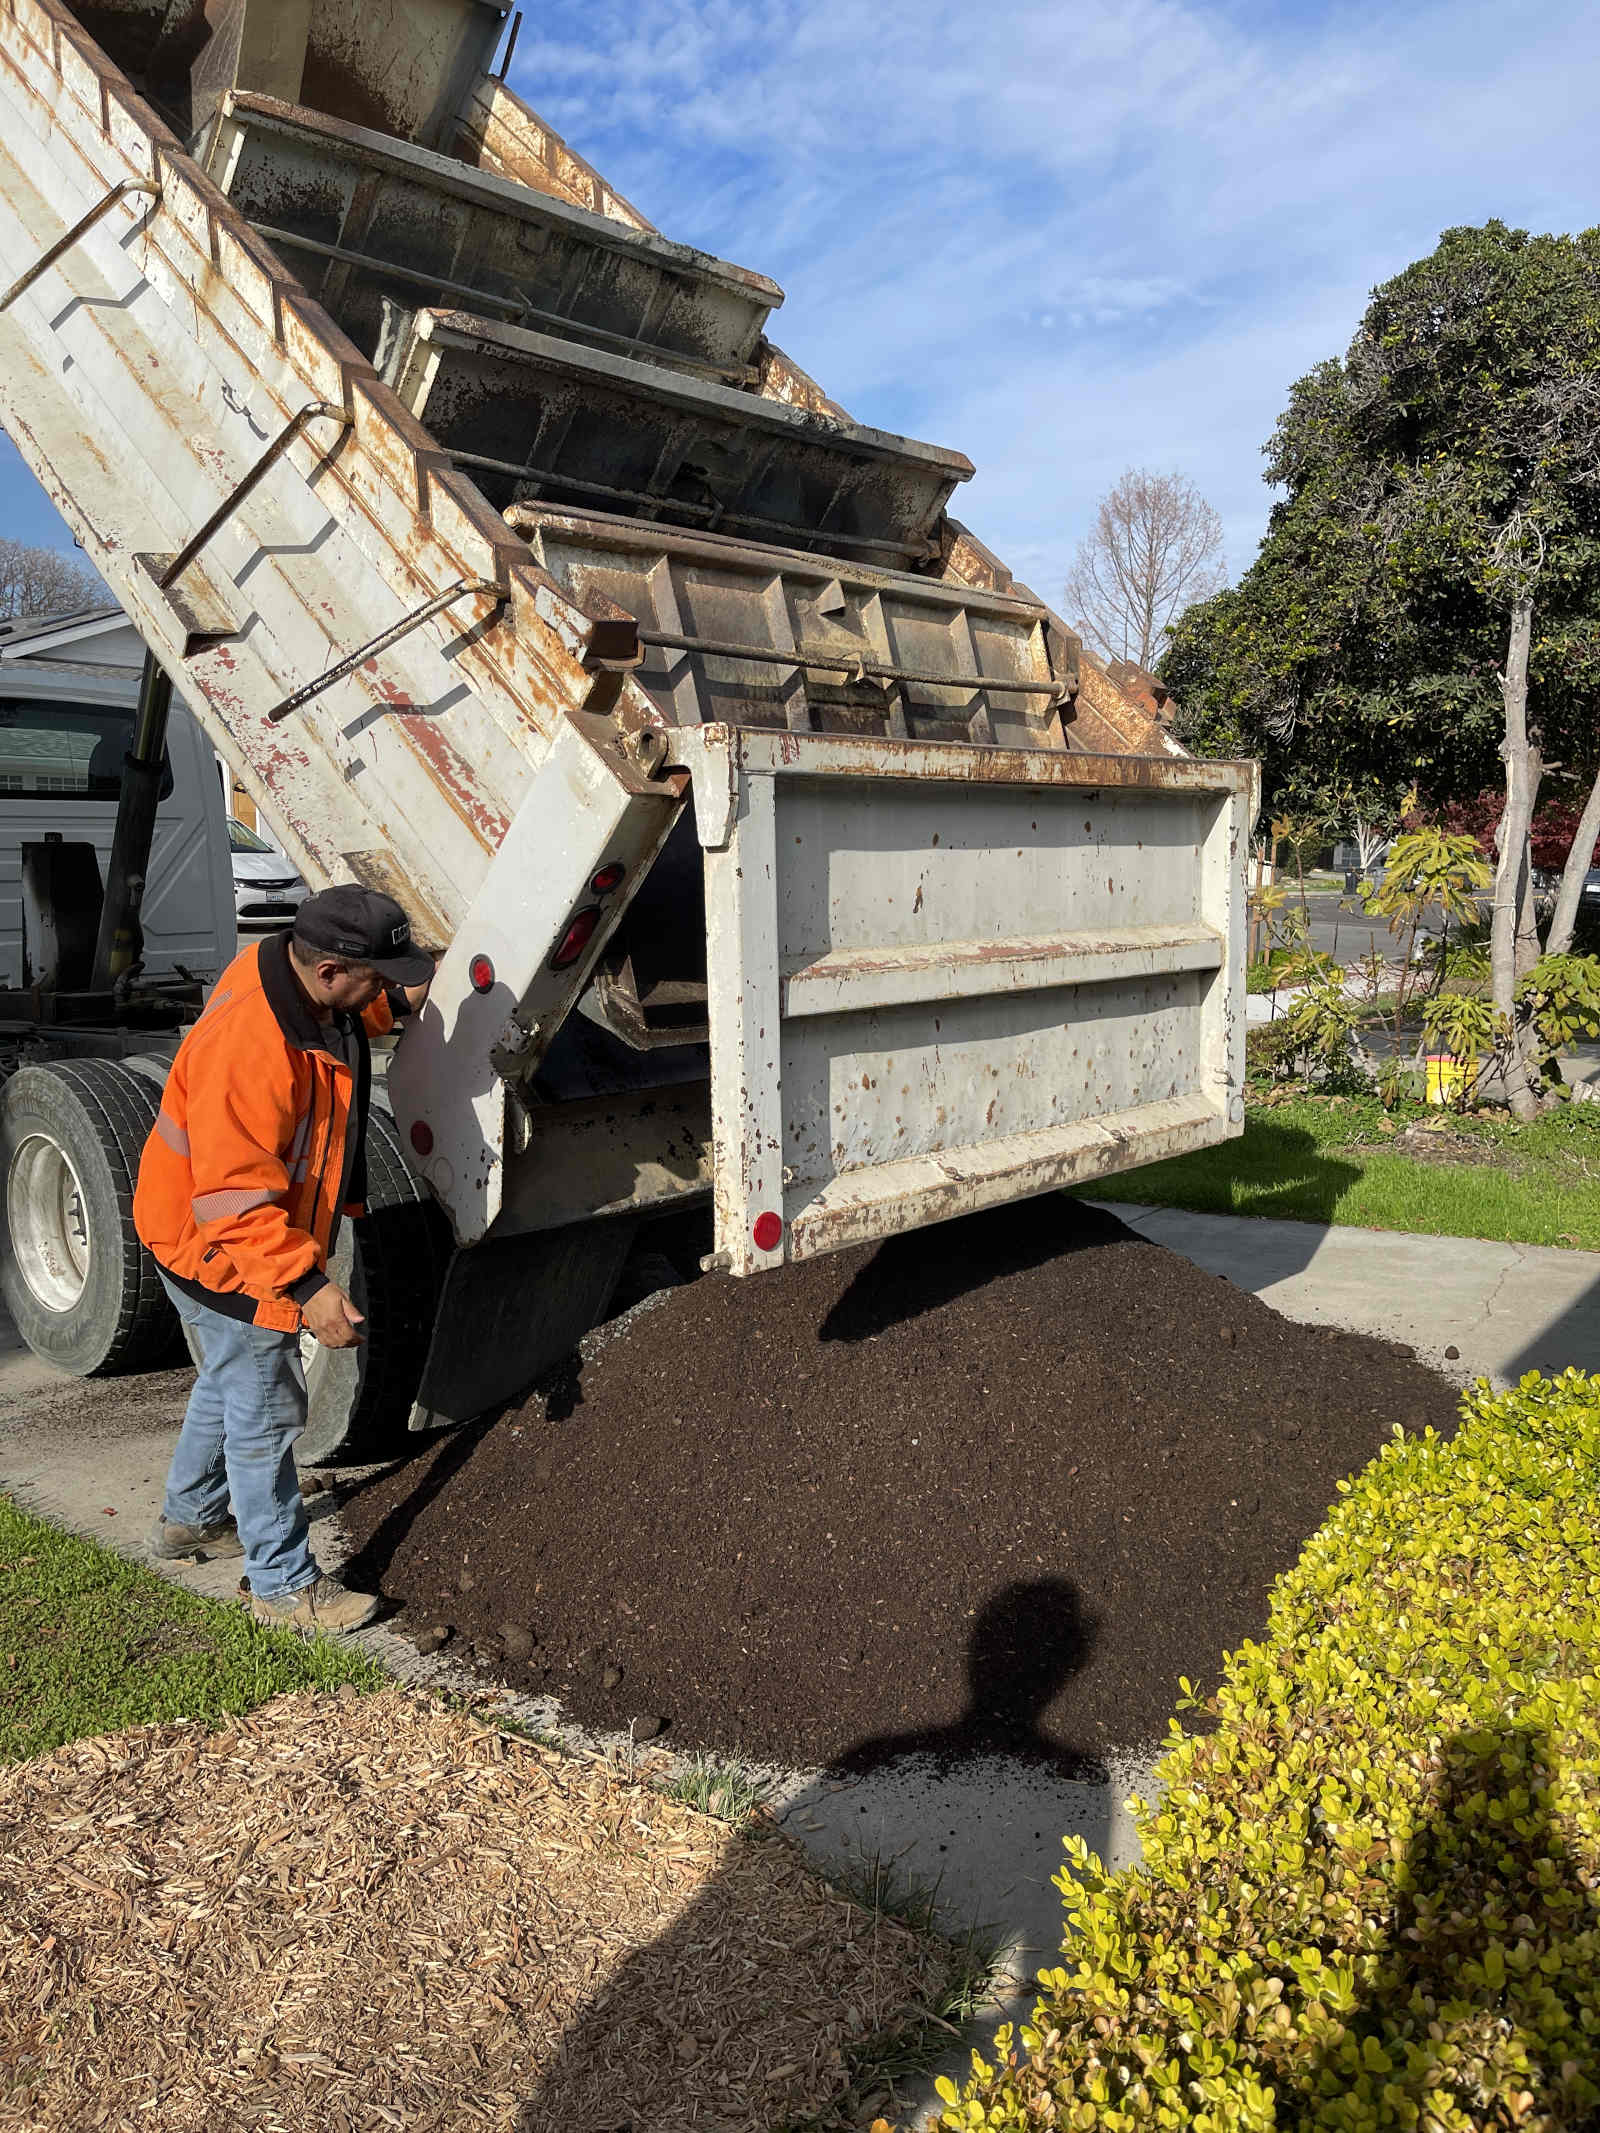
You can make your own potting soil mix to avoid the large plastic bags of the stuff but you’ll need to buy the ingredients somehow—perlite and coir, for example, in addition to compost and topsoil. You may find a business that sells these in bulk or delivers them via dump truck. (We did this this year.) Look for a landscaping supply store near you. If you need soil for your yard—not for pots—buy topsoil. (Potting soil goes in pots and topsoil in garden beds). You’ll also want some compost (we will get to that soon).
You can also “make” the actual soil. However, this requires time. You can’t simply make soil like you’d bake a cake—start in the morning, pour the batter into the pan, lick the bowl, bake and serve later that day. My hugelkultur beds, which I am obsessed with, essentially make soil, albeit very slowly. (See more on hugelkultur down below.) If you leave mulch long enough, it will also break down into new soil.
Build hugelkultur beds for plastic-free gardening soil
At its most basic, a hugelkultur mound or bed consists of dead wood buried in soil. As the wood decomposes, it releases water and nutrients, while insects and worms tunnel through the decomposing matter and aerate the soil. With California facing its worst drought—exacerbated by climate change—in 1,200 years and trees consisting of 50 percent water, what grows in our yard, stays in our yard.
In the old days, I would have tossed dead branches and other resources into our yard bin. And that’s a good solution—our city turns yard waste into compost. Just like food scraps, yard waste—leaves, branches, grass clippings—releases methane gas when cut off of oxygen in a compacted landfill. Green bins and hugels do not. And our clay-like soil gets the organic matter it craves. Another bonus: raised beds containing a layer of branches and logs require less soil to fill. You save money and cut down on plastic bags of soil from the nursery.


The arugula I planted in one of our four (and counting) hugelkultur beds seems to grow exponentially after I cut it. And the seeds came from a free garden share! (More on that later.)
Go here for more on hugelkultur.
Compost food scraps, avoid buying plastic bags of black gold
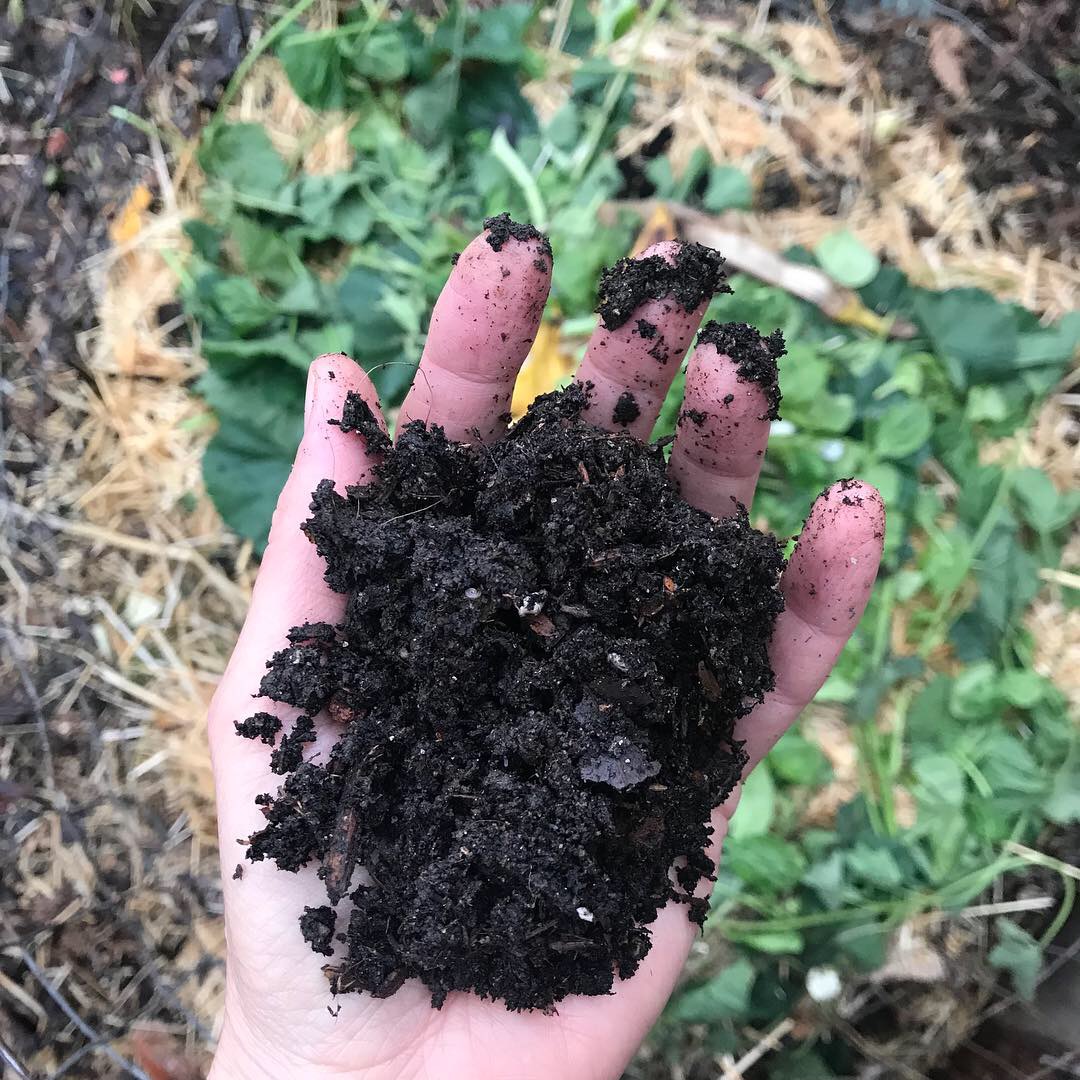
Done properly, food scraps decomposing in a compost pile emit no stench and finished compost smells wonderful—earthy, rich and full of possibility. Mix it in with your soil for a water-conserving, nutrient-dispensing soil amendment.
Our city also provides free compost. Residents simply show up at the recycling center with containers and a shovel to help themselves. Your city may have a similar program. Just as I prefer to cook my own food so I can control what goes into it, I prefer to make my own compost. But if I couldn’t make my own, I know where to find it.
Go here for a comprehensive post on composting.
Make plastic-free mulch in your garden
Compost is also a type of mulch—and so much more! Avoid plastic bags of mulch, make your own for free and retain water in the soil.
To make mulch, save falling leaves and yard trimmings. After the leaves dry out, crush them up as you spread them in your yard or, if you have a lawnmower, run them over with it. And save your nitrogen-rich grass clippings for mulch (even better for your yard, consider not mowing at all). But apply small amounts of the clippings regularly, rather than dumping large amounts on the soil at once. (Go here for more information on using grass clippings as mulch.)
You can also mulch with shredded paper and cardboard. We lined the bottoms of a few of our hugelkultur beds with cardboard to keep weeds down, as all good mulch should do.
Some store-bought mulch consists of plastic sheeting to smother weeds. You have so many alternatives to choose from that don’t harm the soil.
Check for free plants in the compost bin
You may find something good growing in there. We have had potatoes, tomatoes, squash and an avocado tree grow in ours. Transplant them gently.
I did not plant potatoes in the bed below but did fill it with generous amounts of compost. Now we have two small potato plants, which I’ll transplant on the weekend to a burlap sack (more on that down below). I’ve planted other seeds in this bed so the potatoes need to move out.
Grow even some of your own vegetables and you’ll not only enjoy them plastic-free, you’ll also reduce your food miles to footsteps.

Grow herbs and vegetables from scraps
Last year, I regrew basil from several sprigs my daughter had stripped for making pesto to top homemade pasta. I had regrown basil in the past from leafy sprigs but hadn’t tried this trick with stripped stems. Surely, I thought, I could do something with all of that greenery. So I plunked the stems in water, hairy roots appeared and I planted them outside. I let them flower at the end of the summer to attract bees (bees love basil).
I will also never buy green onions again. They regrow so easily. Punk the white hairy ends in water and replant them in soil after you see some new growth. I have replanted green onions in pots indoors and out and also directly in the soil. I’ve regrown leeks this way also. Just know that leeks grow very slowly and don’t plan on eating them for several months.
Go here for more information on growing basil and onions from scraps.


Grow plants from cuttings
I wanted to buy a rosemary plant for my garden but cannot find a plastic-free pot in the garden centers where I live. (Some nurseries take back their sturdier pots to reuse.) So, I am growing some from cuttings I took from a friend’s yard in October. Roots developed slowly and not on every cutting, so if you try to propagate rosemary, cut several pieces to ensure you get at least a couple of good candidates. The cutting I later planted in a pot has grown slowly but surely indoors in a sunny window this winter. I’ll transfer the plant outside in a month or so.
In the fall, I planted a pile of succulents that my daughter’s landlady gave us. You simply cut these and stick the ends in the soil. The surviving plants have thrived (a few didn’t make it).
Join a community garden for plastic-free gardening goodies
A Meetup group I belong to—Sustainable Homesteading in the South Bay—hosts garden swaps at the end of every month at our fabulous community garden. I have brought home plastic-free plants, cuttings and seeds from this group and look forward to seeing what people bring at the end of February! These garden shares cut out the middle man—and piles of the packaging. (Check your Buy Nothing group for free plants also.)
The peach tree sapling from the garden share that I transplanted in November survived the winter and has started to grow new buds. I did bring it home in a plastic pot but the gardener reused that plastic pot (no new plastic is the goal) and I can plant something in it to take back to the garden share later this year.
Go here to find a community garden near you or ask your city if it has one. If you don’t have a space to garden at home but would like to grow some food, you can get your fix at a community garden.
Save seeds for next year
Bees pollinated that basil I regrew from essentially compost and I now have more seeds than I know what to do with. I’ll have to take some to my garden share. I could also sprout some.

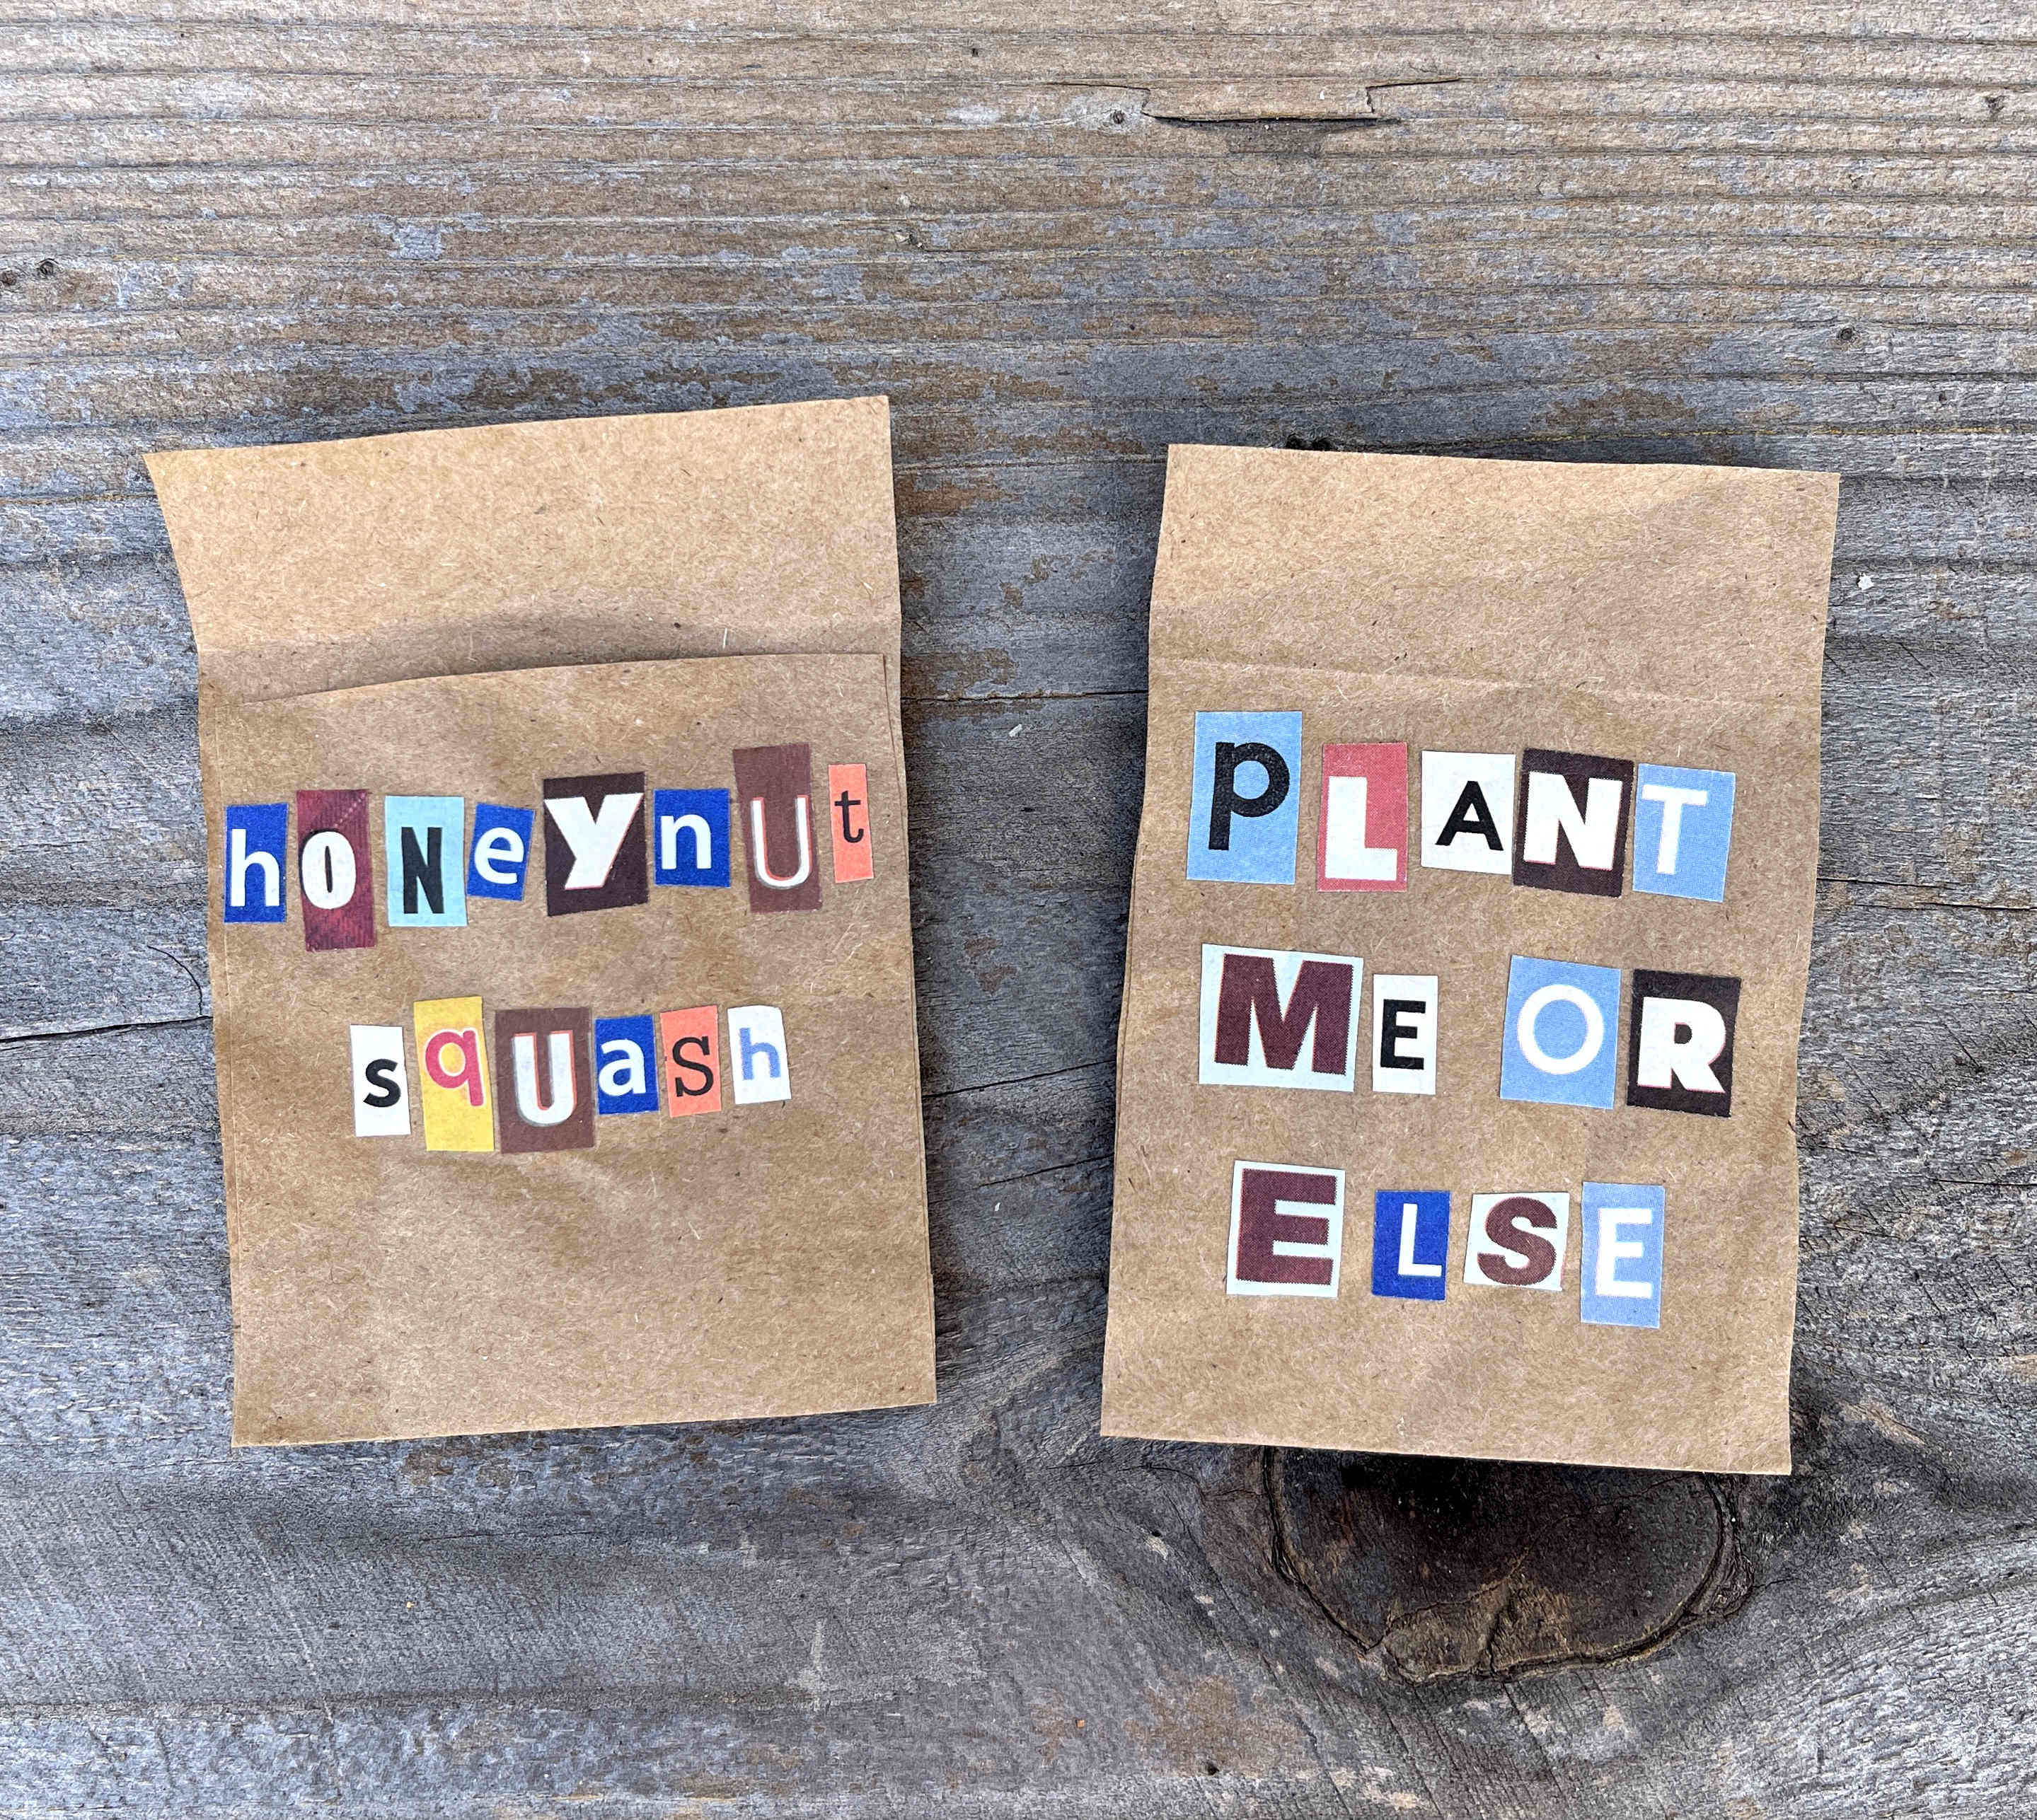
After one of my green onions went to seed last summer, I collected the seeds that hadn’t blown away and will plant those this year. I harvested seeds from honeynut squash this winter—a delectable, small sweet variety. I hope they do well in the garden. We’ve also grown bell peppers from seeds saved while prepping dinner.

Borrow tools from a library of things
Tools aren’t made of single-use plastic but their packages are and who has room in their home for more stuff? If you’re fortunate enough to live in a city with a library of things or tool lending library, take advantage of it when you need a tool you’ll use only occasionally. You may want to build raised beds, for example, but not own any of the tools you need to craft them. Search here for a tool lending library near you.
Or ask in your Buy Nothing group for free gardening tools—and other gardening accessories. In the spring, people clear out their garages and desperately want to get rid of the clutter. You just might score that item you want for your garden. Estate sales can also be a good source of secondhand tools. Start your search for estate sales in the US here.
Plant seeds and cuttings in paper and cardboard
Skip the flimsy plastic seed starting trays and make your own containers.
When I lived in Canada, we had to start our plants indoors, gradually harden them off outside as the weather warmed up (i.e., set them out for a couple of hours one day, a few more the next and repeat until they adjusted) and then plant them in the ground after the May 24 weekend.
I used newsprint to make my pots back then. I wrapped the paper around a jar or glass several times, then smushed the paper flat at the bottom, removed the jar, filled the paper pot with soil and planted my seeds. It worked really well. You could also glue them together with compostable wheat paste.
Cardboard bathroom tissue tubes also work as do any small paper bags you have on hand. Or you could cut up a larger paper bag to make smaller paper pots. You’ll likely find all kinds of containers you didn’t realize you had. They will cost nothing and will break down in the soil.

Turn a burlap sac into a large natural, plastic-free garden planter
A café not too far from me roasts its own coffee beans that arrive in burlap sacks. The owner has no use for these sacks and gives them to me for free! They make natural, plastic-free, large planters. I have several of them and want more—a good excuse to go back to the cafe for its delicious chai.
Essentially, to transform a burlap sac into a planter, you roll down the top to shorten it (otherwise your four-foot-tall planter will need a ton of soil), fill it with soil and plant something. This works really well for potatoes. As the potatoes grow, roll up the rim of the bag and add more soil and compost—known as hilling. You won’t need to do this with other plants. When your free burlap planter wears out after two or three years, its natural fibers can go back into the soil.
Go here for a post on burlap sac planters.

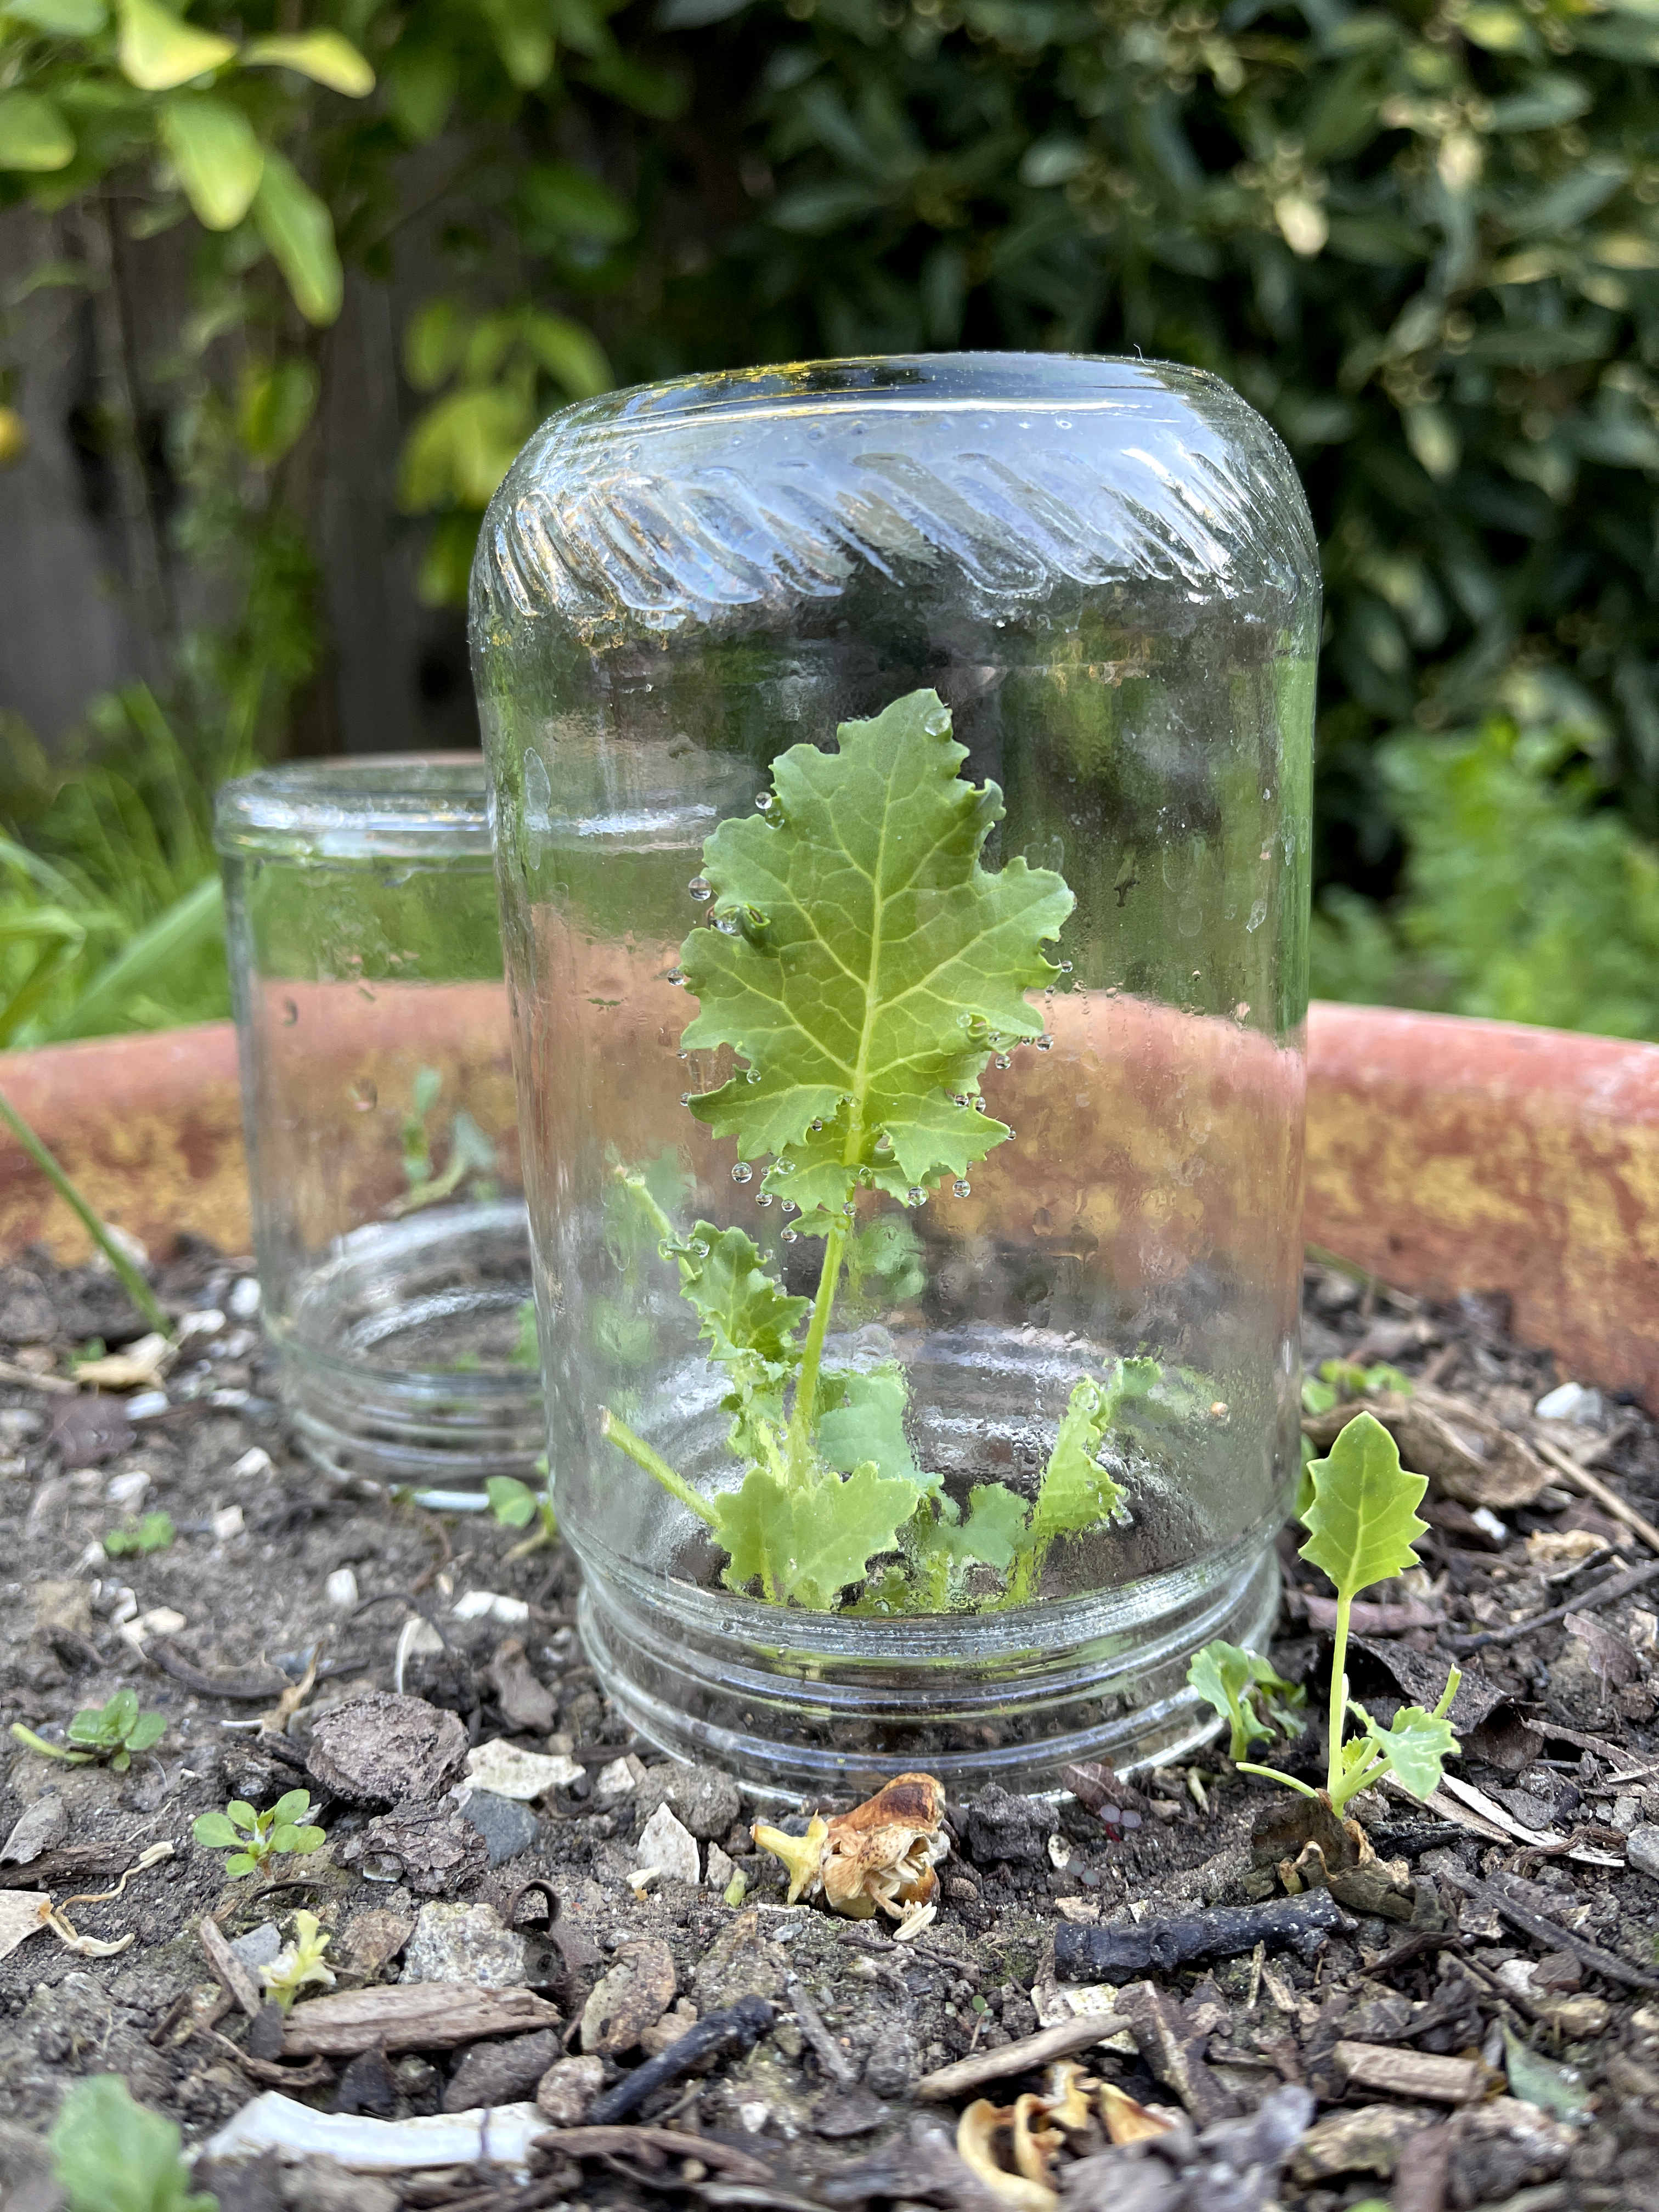
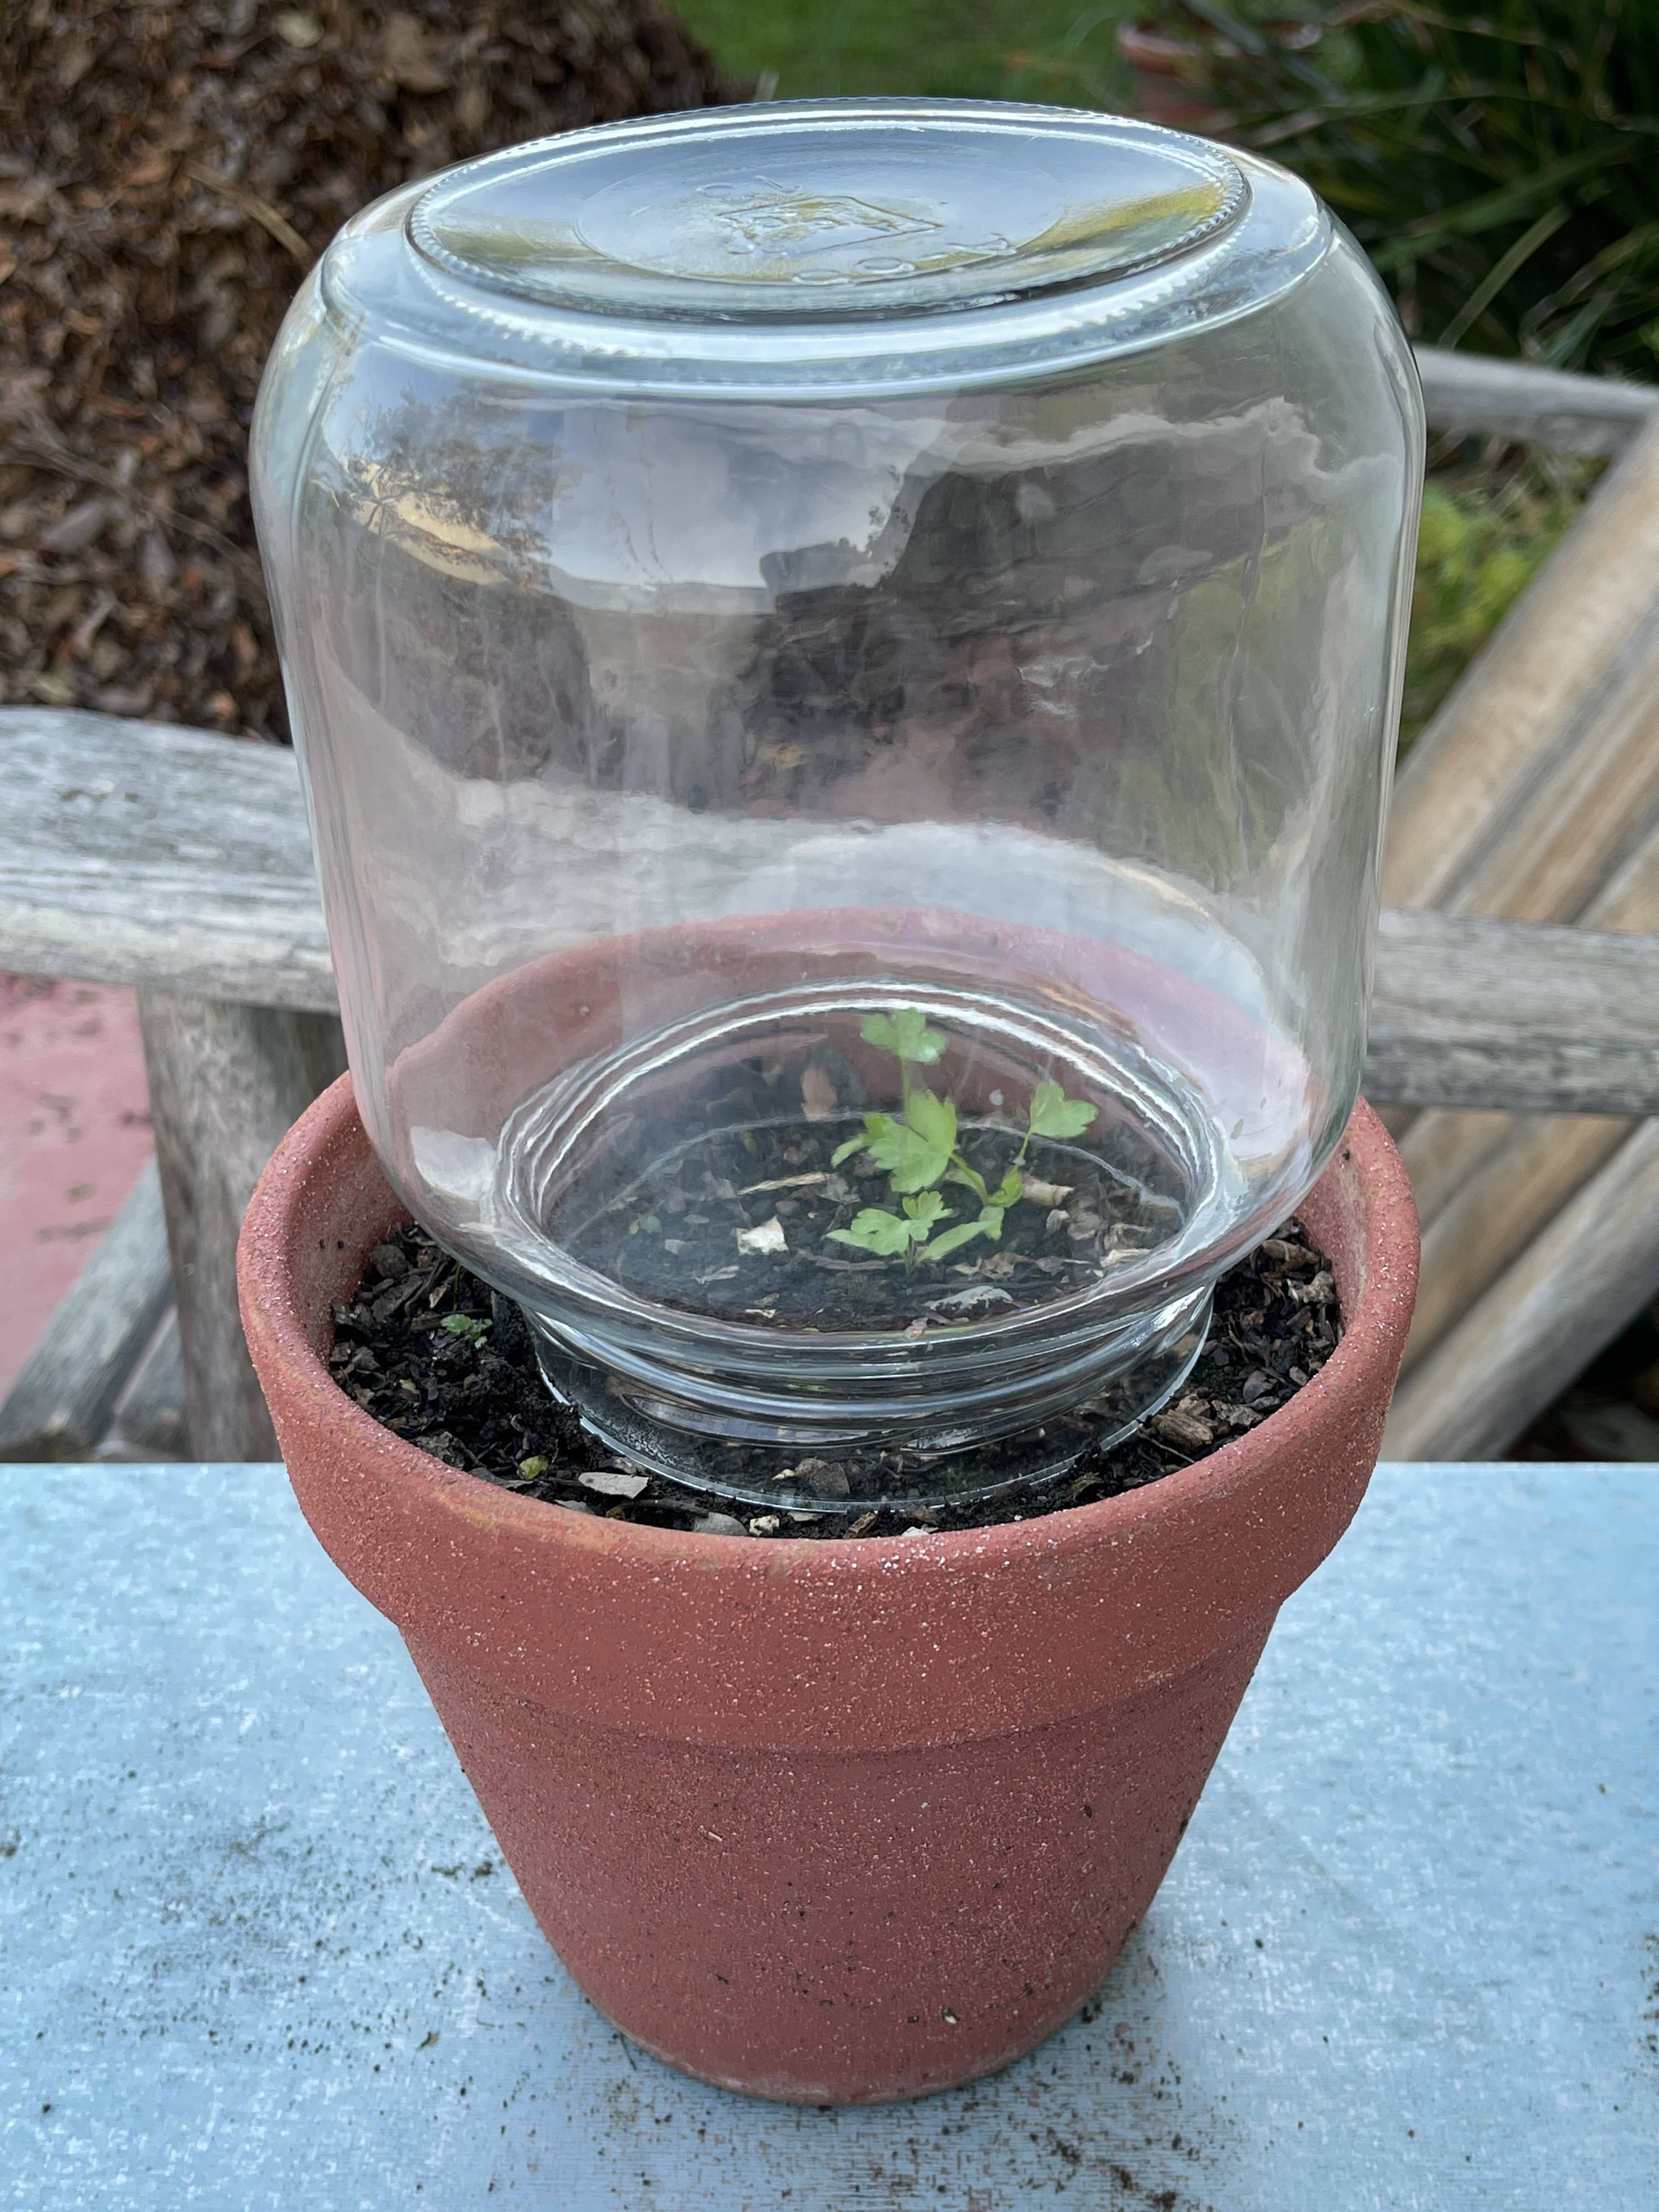
Protect young plants with jars not plastic
You can buy all kinds of plastic sheets and blankets to protect your plants from frost. Please don’t. Although the oceans justifiably receive much attention for the havoc we have wreaked upon them in the form of plastic pollution, microplastic infiltrates the soil in even greater amounts than in the oceans.
A bell-shaped glass cloche placed over your young plants serves as a miniature hothouse. Cloches also protect your plants from snails or rabbits or anything else that will mow them down. I bought some gorgeous imported glass French cloches for a gift years ago. They cost a fortune. Jars cost nothing and do pretty much the same thing, although I don’t have jars as large as some of the bigger cloches. Just be sure to remove the jars during the day when the weather (finally) warms up so your plants don’t fry in the sun. (Go here for tricks to remove labels from jars.)
My kale pictured below had been thriving and I knew just what I would make with it (the dried apricot, farro and kale salad in my cookbook). But I wasn’t the only one craving kale for dinner. One morning, to my dismay, I discovered chewed stubs where my fledgling kale had shown so much promise just the day before. I covered what remained with a jar and the kale has begun to come back. My parsley also loves its cloche.


I could transform my yard overnight into a lush garden if I shelled out thousands of dollars for store-bought mature plants and trees. Instead, I’m enjoying this low-waste, slow, inexpensive and somewhat random gardening approach.
Check out my award-winning cookbook!
- Taste Canada silver for single-subject cookbooks
- Second-place Gourmand cookbook award in the category of food waste
- Shortlisted for an award from the International Association of Culinary Professionals
Learn more about my book here.
Great post! Also check out soil blocking. I tried it out last year for seed starting and I loved it. Typically people buy the soil, but I won’t need to do that because I have compost that I made. For the fibrous material, coconut fiber or some other product is common, but last year I grew luffas, so I have a bunch of those dried. I’m going to experiment with shredding that up or maybe using hair so that I don’t have to buy a product in a plastic bag.
Oh I want to grow luffas this year! They work so well in the kitchen (and elsewhere). Thank you for sharing these tips. I will check out soil blocking. Happy growing!
Lovely post! I remember the year when I had four beautiful pumpkins growing out of our compost heap! It was like a remarkable gift.
Those freebies are the best. I usually only get one, maybe two but not four! That’s awesome 🙂
I do many of these already. Good idea on the toilet paper rolls!
Thank you! Those tubes come in handy. Enjoy your garden 🙂
You’re welcome!
Soil blocking is the best way to reduce plastic in garden. Check out Lisa mason Ziegler- gardeners workshop- she’s the expert. Been doing this for a few years now & no going back. After the initial investment of the blocker (25-30) I have started hundreds of seeds using this method.
Lovely post. I follow a lot of things that you have mentioned here.
I compost all my kitchen waste and I have set up a separate leaf composter in which we compost all the dry leaves, twigs and trimmings. This way I do not have any garden waste plus I get a regular supply of rich leaf mulch/compost.
I also practise pit composting. So this is also my source for garden soil coz it continuously recycles the soil.
I have 3 pineapple plants growing in pots, all regrown from the head of a pineapple we had bought. I have 3 spinach plants regrown from the store bought spinach. A majority of my plants are grown from cuttings people gave me. Coz in my experience, plants grown from cuttings survive better than nursery bought saplings.
So my garden definitely does not look fancy as it is not perfectly organised. I have very random things growing next to each other but it is sustainable 😃.
Great ideas! I love the idea of making seeding pots with newspaper. And I plan to save my own seeds this year!
That potato’s not rogue! It’s a volunteer 🙂
When I first moved to my current home and started my garden, I purchased some plants in plastic trays. I reuse these trays every year and haven’t had to purchase any for two years now. I return the plastic trays and pots I don’t use to the store. They gladly take them back! I also use toilet paper rolls and egg cartons to start seeds. If you find you must purchase soil and other amendments in plastic bags, you can use them as planters as well until they fall apart.
Thank you very much for all of these tips, Julie! Happy planting!
Great tips! Still looking for ways to keep entire rows warm. Maybe old cotton sheets? I’m a 5yr cancer survivor. Trying to eliminate plastic from my life. My gen ignores plastic. Otherwise, basics like a garden hose would be safe. Watering with a metal bucket is a nice substitution.