
I guess this means my daughter literally made the greatest thing.
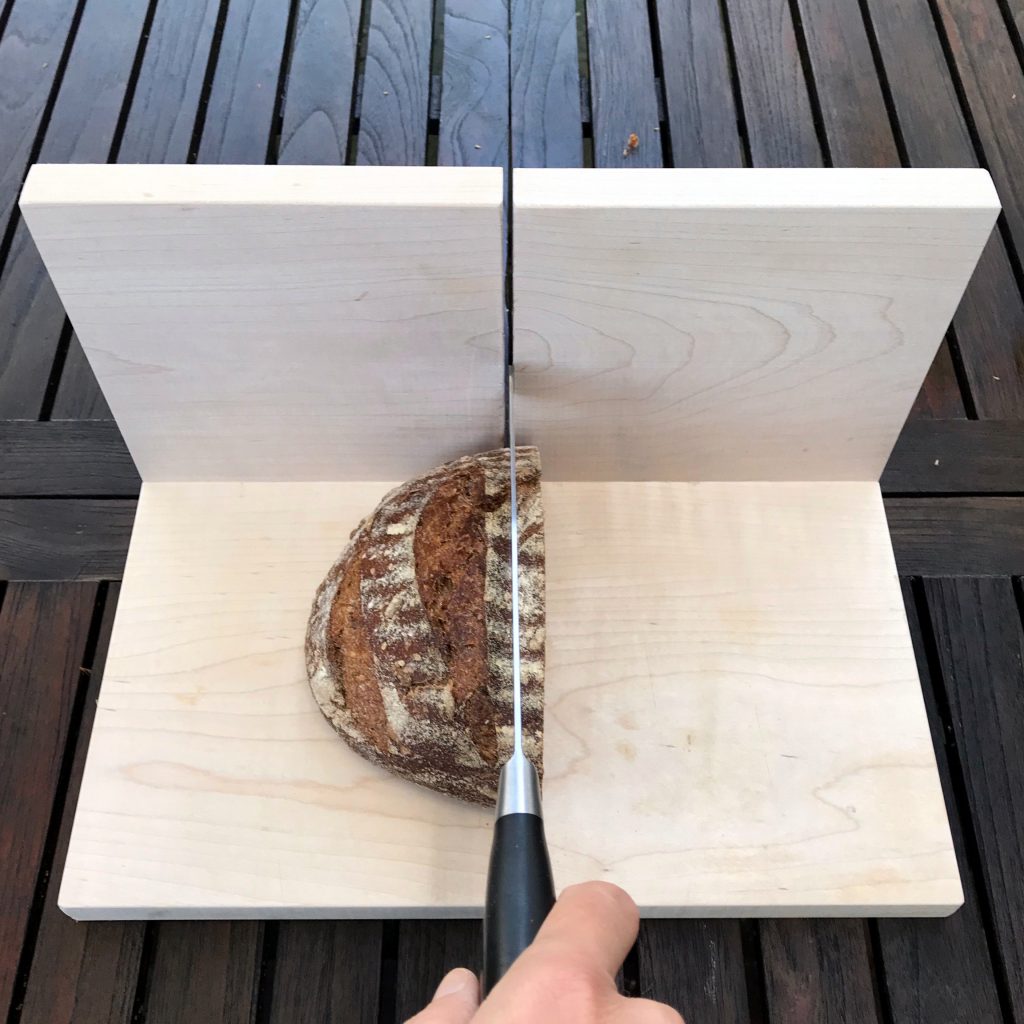
Recently, my daughter Charlotte wanted to buy a wooden bread slicing guide. If we don’t mangle our bread when we slice it, we often saw off uneven pieces, whether cutting my homemade sourdough bread or a loaf of store-bought bread. And yes, we do sometimes buy bread. It’s okay! You don’t have to bake the bread if you don’t want to!
With a slicing guide, Charlotte reasoned, we would be able to cut uniform, smooth slices. After she found the model she wanted online, she realized she could probably make it—with some help. Enter Chandra and his power tools.
Chandra has everything Charlotte needed to make this—a table saw, drill press, hand tools, sandpaper, screws, clamps, safety goggles (very important!) and very nice scrap maple left over from a previous project.
Instructions for homemade bread slicing guide
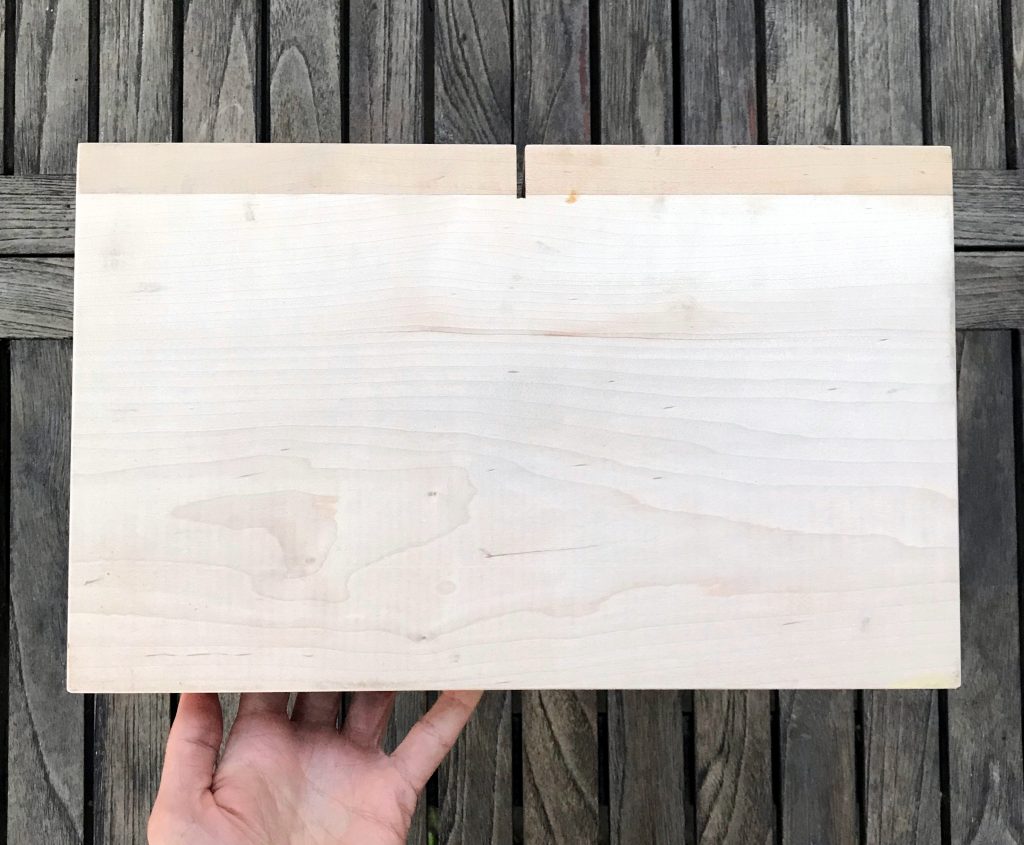
1. Cut two thick boards of maple (or other hardwood) at the same time, one on top of the other, using a table saw. If you cut the two boards together like this, they will match up when you screw them together. Charlotte’s pieces measured 14″ by 7 1/4″ by 1″ thick. You may want a different size.
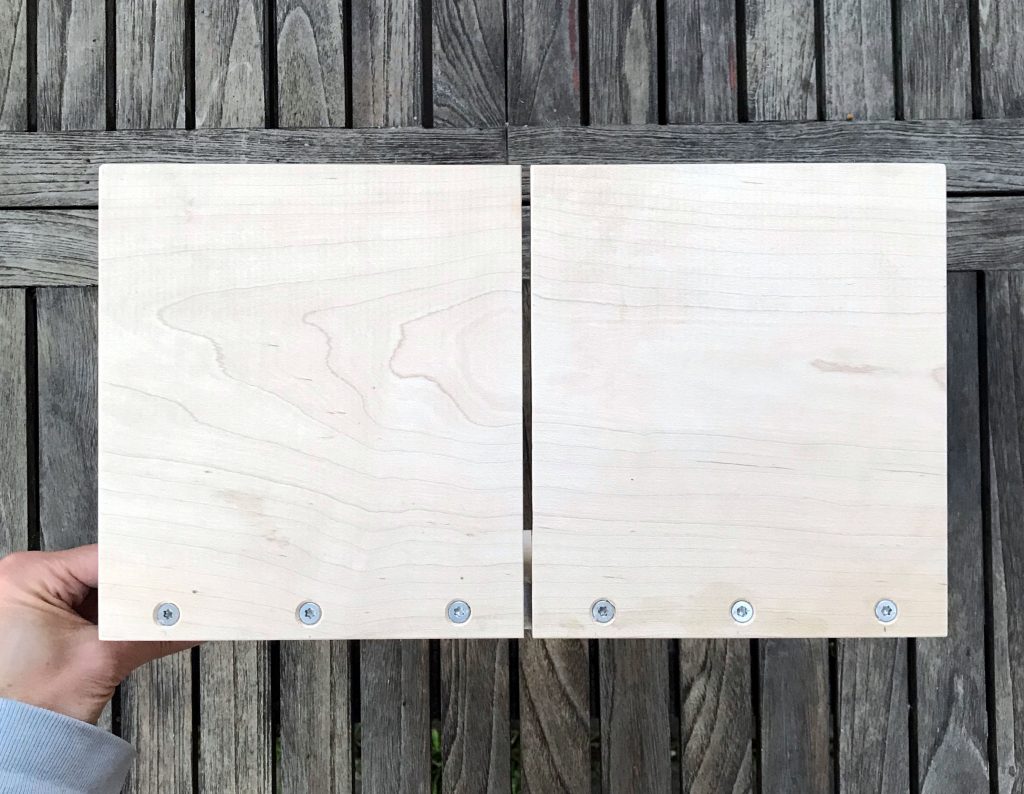
2. Next, you’ll screw the back board into the bottom board (the cutting surface). Clamp the boards together with the back perpendicular to the bottom. With the boards aligned and clamped, drill six 1/8″ holes. Screw together after each hole is drilled. Start at the edges and work to the center.
3. If you know what you’re doing with power tools, cut the slot down the center of the back board while the screws are in. Chandra supervised Charlotte while she did this. He said that a beginner working on their own should take the back board off and then cut it in half with the table saw. If you use a thin saw blade, you may have to cut more wood away from the center.
4. Sand. Then sand some more. Start with coarser sandpaper and work your way up to fine until you have rendered very smooth surfaces.
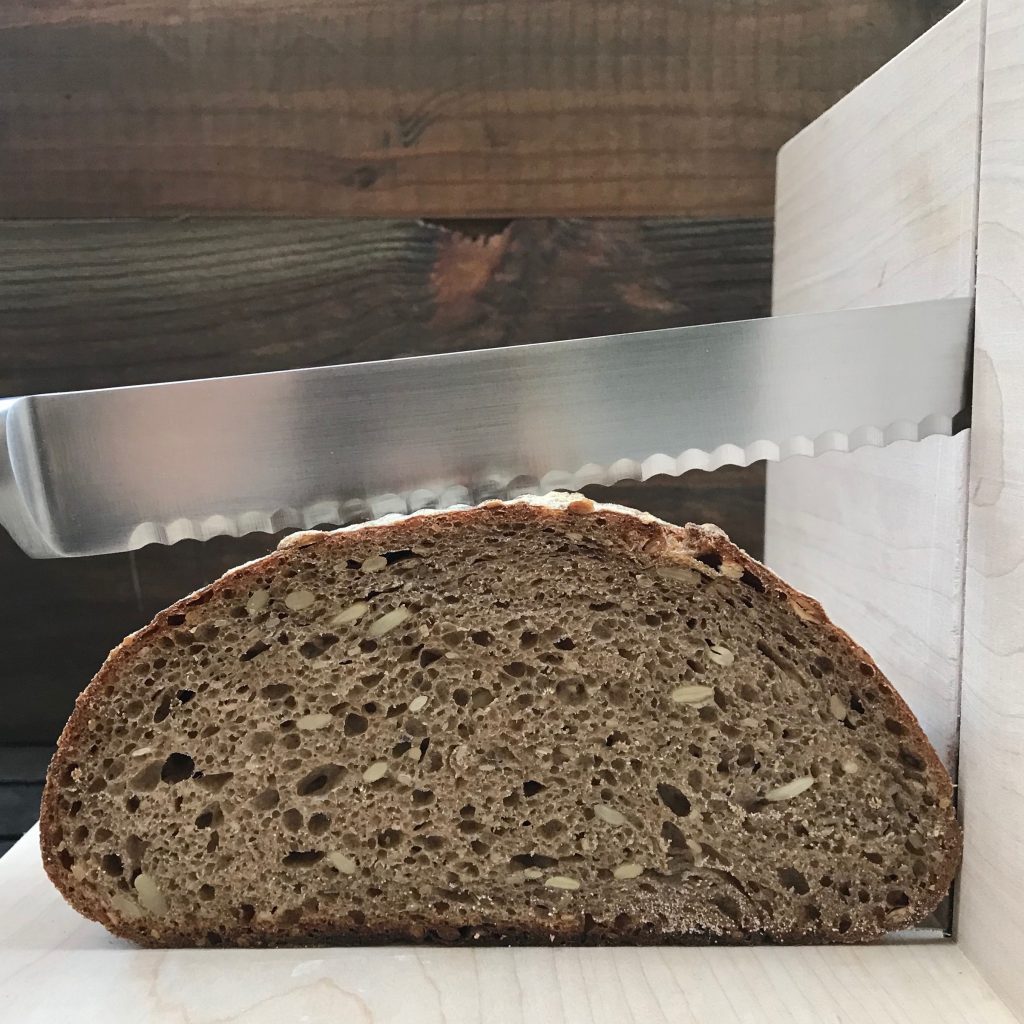
5. Slice your bread!
6. To clean, simply wipe with a cloth. If the slot needs serious cleaning, you can always unscrew half of the back board and clean each side edge of the slot.
Technical drawings
Chandra drew up the plans up for this project. View his PDF with either imperial or metric measurements.

Chandra drew the plans with old Apple software that he first learned to use in school back in the early 80s. At the time, an executive from Apple visited his school in Cupertino to show his class how to use computers and software the company had donated.
Chandra’s teacher—who had made a big fuss over the executive—pointed out the nice job Chandra had done rendering an airplane. (The other kids drew boxes.) The man came over to look and complimented Chandra on his work. Only a few years later did Chandra realize that the man was Steve Jobs.
This is great! I hate the store bought ones because they have slots already spaced and they cut the bread way too fat. I like skinny slices. I’m going to get my husband to make me this. 🙂 Thanks!
Thanks Christine. It’s so simple but really works well. My daughter is very proud of it 🙂
~ Anne Marie
I’m impressed by your family’s ingenuity. If my husband or I tried to make the bread slicer, it would all be askew. We’d have to disassemble it and store the parts out in the shed, where they’d stay until our children sort through our belongings after our death. I guess we’ll have to stick with a knife and cutting board. Thanks for sharing the idea, though.
Hahaha! Well I have been baking bread now for over 20 years and a knife and cutting board had always done the trick, Nancy 😉
~ Anne Marie
Hi Anne Marie,
Thanks for your light and inspiring posts.
I am composting in Santa Cruz and could compost bigger amounts. There are people who want to compost but can’t do that for different reasons . There is a social network to match these needs – https://sharewaste.com/ . Can you post about this social network so that people will be able to do more composting? There are many ways to compost and I am also willing to travel and consult people how to compost in their own place.
Best Wishes,
Yosi
Hi Yosi,
I learned about ShareWaste a few months ago and mention it often now. Food scraps should NEVER go to landfill (as you know…I am preaching to the choir…). Thank you for adding your compost bin to the app! I will add another compost blog to my to-blog list.
Thanks,
Anne Marie
I made one of these some years back for my second home, wouldn’t be without it, works on any bread, French sticks to crusty loaves.