Updated 09/24/22
In my home, homemade vinegar has been the Holy Grail of scratch cooking. My daughter MK tried a few years ago and came very close, but flies invaded her apple scraps and ruined it. It sure smelled great though as I tossed it onto the compost. I have tried making vinegar a couple of times, but had no idea how to do it, so just guessed and failed.
In my fermentation bible, The Art of Fermentation, Sandor Katz tantalizingly mentions that you can make scrap vinegar from fruit used to flavor mead—if any sweetness remains—but I couldn’t find any instructions in there on how to actually make the vinegar 🙁
I can buy many foods in bulk near me, but not vinegar. I love to make as many staples as I can. It makes me more self-sufficient and reduces my dependency on Big Food. But vinegar seemed hopeless.
Then I stumbled upon the wonderful blog, Kitchen Counter Culture. Finally! I found instructions for making scrap vinegar. I’ve made it a few times now and am thrilled with the results. It takes very little effort, costs nothing and yields several bottles of vinegar. I’ve only used apples to date, but you can use other fruit scraps as well, such as pineapple.

Apple scrap vinegar ingredients
- Peels and cores from 6 large apples
- 1 tablespoon of sugar
- Enough water to cover the apple scraps (about 6 cups)
“But I don’t have six apples!” you may say. You can freeze peels and cores, squirreling them away in the freezer until you have a large enough pile to make scrap vinegar. I do this often. Heat will kill the microbes but cold just puts them to sleep.
I sort of hate to give exact measurements for fermentations. Think of these measurements as rough guidelines. Fermentation is pretty foolproof. The bacteria present on the apples perform the fermentation and the sugar—both the added and the sugar in the fruit—fuels the process. You can add more sugar if you like, but mine turned out with just a little bit. If you want to kickstart your fermentation with a bit of whey or raw cider vinegar, you can do that also, but you don’t need to.
If your tap water contains lots of chlorine, before starting this, pour some water into a vessel and leave it open to the air for many hours, or even a day. The chlorine, which can kill the naturally occurring microbes that perform the fermentation, will simply dissipate.
Directions

1. Combine apple scraps, water and sugar in a large, wide-mouth glass or ceramic vessel and stir. Cover with a thin cloth. With most ferments, you don’t want air to come into contact with your food. For vinegar, you do. Also, especially with fruit and sugary fermentations, explosions are a real possibility. Pressure builds up in a closed container while the bacteria create carbon dioxide as a byproduct of fermentation. If you choose to close your vessel, in the next step, you will open it several times a day to stir and this opening will also release built-up CO2. Just always remember this step every day.

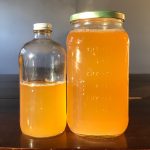
2. Over the next several days, stir your fermentation several times a day when you think of it. Stirring aerates your ferment, encouraging microbial activity and helping prevent mold formation. I drink too much tea, and stir every time I go into the kitchen to brew another cup. After a few days, your concoction should start to bubble and smell slightly alcoholic. I took the above picture on day 7.
3. Once the ferment starts bubbling, I stir it less often—once a day. Ordinarily, when you ferment anything alcoholic, the last thing you want to attract are Acetobacter bacteria, which turn alcohol into vinegar when you expose your ferment to oxygen. Here, you want exactly that result. For this reason, a wide mouth vessel that exposes the surface area to the air works best. Fermentation times vary, but your vinegar will likely start to taste sour after about a week.


4. Strain the fruit. Wait until the bubbling has subsided (about two weeks) to strain. Sally Fallon strains her pineapple vinegar after a mere three days BUT she adds whey, which contains microbes that kickstart the fermentation. At the point of straining, the fruit will have no flavor. Compost the spent scraps.
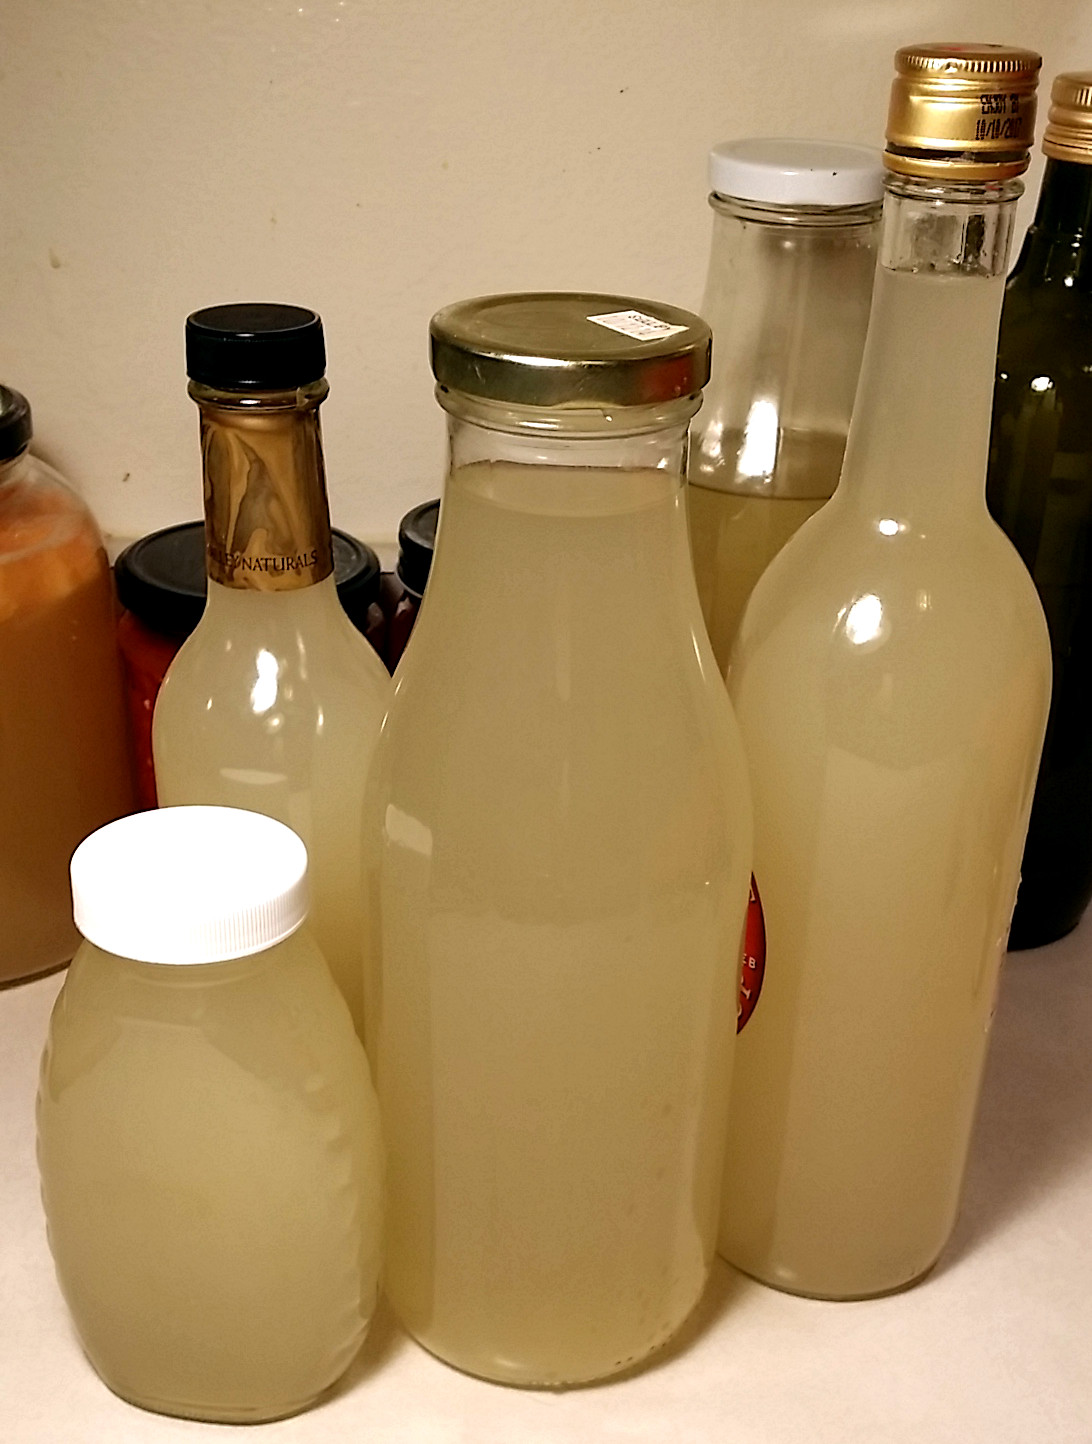
5. Bottle your vinegar if you detect zero fizz. Although you may see no evidence of bubbling, and believe the fermentation has ended, this may not be the case. To avoid messes—or worse, explosions—burp your jars regularly (i.e., open them). If you detect no fizziness, try burping them once every month or two just as a precaution. This vinegar keeps for a year (at least).
As the vinegar ages, the acidity will increase. My first batch is nearly one month old and it’s very acidic, but less acidic than cider vinegar. I have found many purposes for it:
- Soup. I always add a splash of vinegar to soup. It adds a nice tang to chicken broth, and enhances the flavor vegetable broth. The other night I made “trash soup” for dinner (my coworkers warned me not to call it that on my blog, but I really did make soup from practically nothing). In chicken drippings I had saved, I sautéed a quarter of a cabbage that had seen better days. To that I added about 1/2 cup of whey left over from homemade ricotta cheese and about 1/2 cup of scrap vinegar. The resulting chicken-flavored vegetable soup tasted delicious.
- Lemon juice replacement. I have used my scrap vinegar in a couple of recipes that called for a splash of lemon or lime juice, such as lentil dal or spicy black beans. Tastes great.
- My hair. I wash my hair with baking soda followed my a cider vinegar rinse (the no poo method). On the weekend, I replaced cider vinegar with my scrap vinegar. The first time I rinsed with scrap vinegar, I used too much, thinking I needed more because of its lower acidity. Well, that was a mistake and my hair looked a bit fried. The next time I washed it, I used less and my hair looked fine. It had a bit of frizz (normal for me), so I rubbed in a minuscule amount of coconut oil. My hair looked great. (My head is like a salad.) I feel I have taken no poo to a whole new level…
- Cleaning. I have always cleaned my toilet with vinegar. Now I use scrap vinegar. It works well. I have also mixed my scrap vinegar with baking soda to clean the kitchen sink and wash a pot I boiled dry with beans in it (oops).
I haven’t tried salad dressing yet, but I will. I don’t eat much mayonnaise, but I could try substituting this for vinegar in mayonnaise. My daughter adds a bit of vinegar to her pastry crust recipe—another recipe to try…The possibilities are endless. If you enjoy DIY projects, you’ll understand my excitement.

Apple Scrap Vinegar
Equipment
- 1 large jar
- thin cloth to strain the liquid
Ingredients
- peels and cores from 6 large apples
- enough water to just cover the apples and cores, about 5 cups
- 1 tablespoon sugar
Instructions
- Remove any broken seeds or seeds poking out of the cores. Combine apple scraps, water and sugar in a large, wide-mouth glass or ceramic vessel and stir. Cover with a thin cloth.
- Over the next several days, stir your fermentation several times a day when you think of it. After a fews days, your concoction should start to bubble and begin to smell slightly alcoholic.
- Once the ferment starts bubbling, stir it once a day.
- Continue to stir daily. Fermentation times vary, but your vinegar will likely start to taste sour after about one more week. At this point you may strain the fruit out and compost the spent scraps.
- Bottle your vinegar if you detect no carbonation. Although you may see no evidence of bubbling, and believe the fermentation has ended, this may not be the case. To avoid messes—or worse, explosions—burp your stored vinegar occasionally if you see any bubbles whatsoever. This vinegar will keep indefinitely.
Check out my award-winning cookbook!
- Taste Canada silver for single-subject cookbooks
- Second-place Gourmand cookbook award in the category of food waste
- Shortlisted for an award from the International Association of Culinary Professionals
Learn more about my book here.