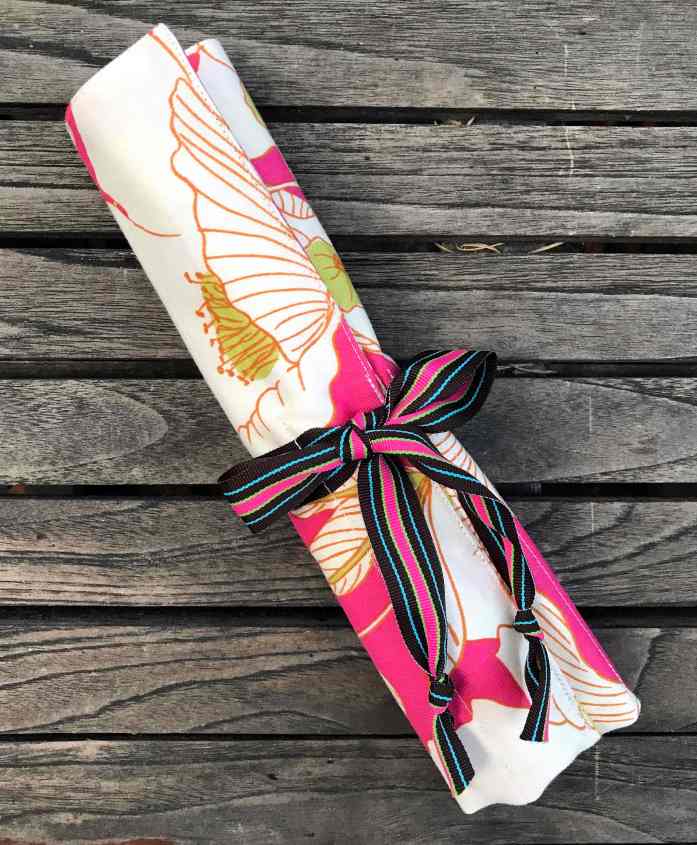
Whether you make or buy a utensil roll (Etsy offers lots), you can easily stash it in your bag, wielding your real spoons everywhere you go, deflecting disposable cutlery left and right like Wonder Woman brandishing her bracelets, but for plastic junk instead of bullets.
I made this utensil roll with some decor and drapery fabric a generous seamstress donated to the Reusa-bags project that I started last year. This pretty, medium-weight fabric made one beautiful shopping bag and with the scraps, a few of these utensil rolls.
If you don’t sew and want to learn, start with something simple like this utensil roll. It also makes a very nice gift for the zero-waster or zero-waste newbie in your life.

How to sew a utensil roll
Like simple cloth produce bags, this little project will help you clear out some of the scraps sitting on your fabric pile. Since this uses two layers of material, you can use something lighter weight than the decor fabric I used and still have a sturdy roll. I really could have used a denim needle on my standard sewing machine for this heavier fabric but I didn’t have one.
Materials
- 17 inch by 17 inch piece of light- to medium-weight fabric, such as a cotton print or a fairly lightweight denim
- 24 to 28 inches of ½- to ¾-inch ribbon
Step 1: Cut the fabric
For this utensil roll, I cut out a piece of fabric approximately 8 ½ inches wide by 34 inches long and folded it in half so I had one fewer side to sew. If you have smaller pieces of fabric, cut out two rectangles, each 8 ½ inches wide by 17 inches long. Two contrasting patterns would look nice.
I had other scraps left over and cut out a several pieces about six inches wide by 17 inches long for narrower utensil rolls. I’ll add fewer slots to those. The size of your utensil roll will ultimately depend on the size of your fabric scraps.


Step 2: Sew the two rectangles together
Sew the right sides (i.e., the patterned sides) facing together, leaving a 4-inch opening on the bottom side of the utensil roll. I should have first finished the bottom edges of the raw fabric on my serger (or with a zigzag on a standard machine). Oops! Not a big deal.
In the pic below, I haven’t sewn the top edge because I used a very long piece of fabric and folded it. No need for a seam there. If you have cut two rectangles, sew that top edge as well.
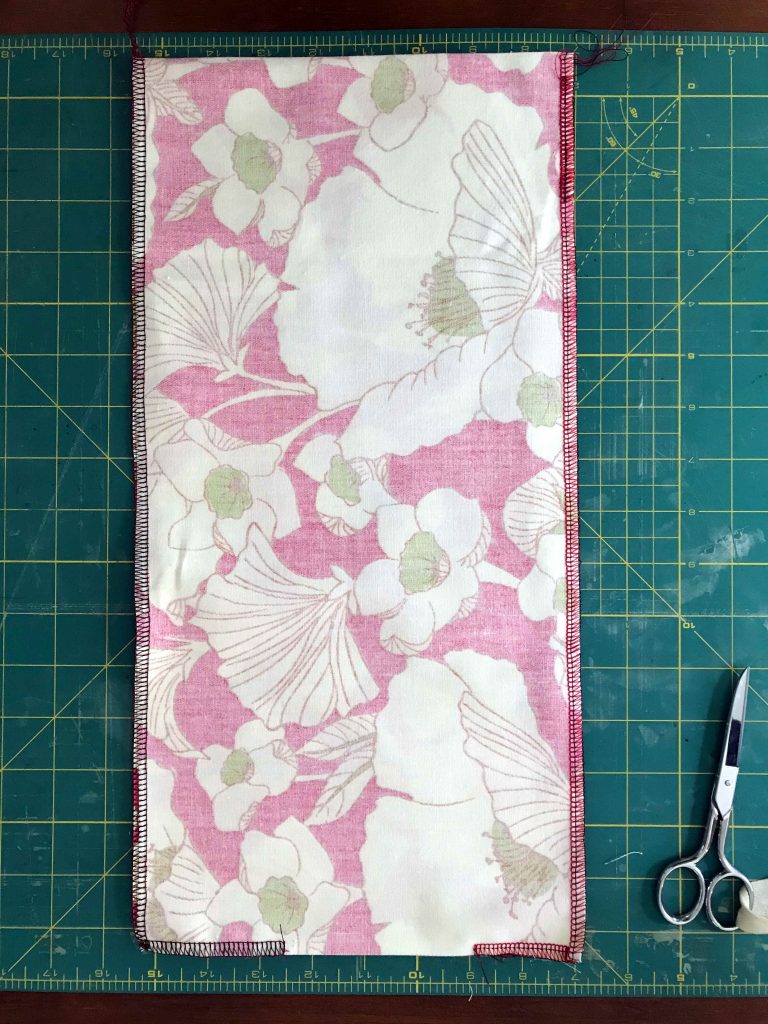
Step 3: Turn the rectangle inside out through the opening at the bottom
After turning this inside out, press everything well. Fold down the fabric of the opening toward the inside and press that also.


Step 4: Fold the bottom up six inches and topstitch all around the edges
If your fabric is heavy like mine was—and especially if it is heavier—I would topstitch around the entire rectangle before folding it. After you do that, fold the bottom up the six inches and sew the sides so you now have a pouch.


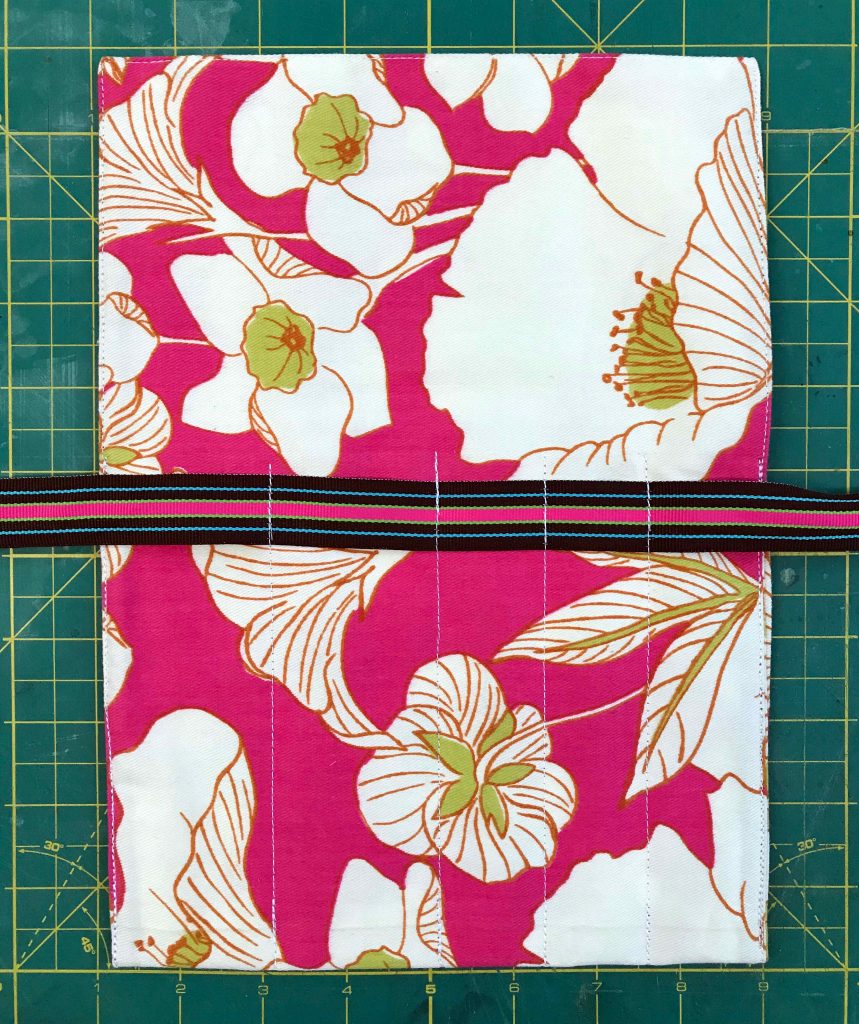
Step 5: Prepare and pin the ribbon to the utensil roll
Either tie the ends of the ribbon in a knot or hem them. Pin the middle of the ribbon to middle of the back of the rectangle. Pin it again at the sides of the roll.


Step 6: Sew the slots
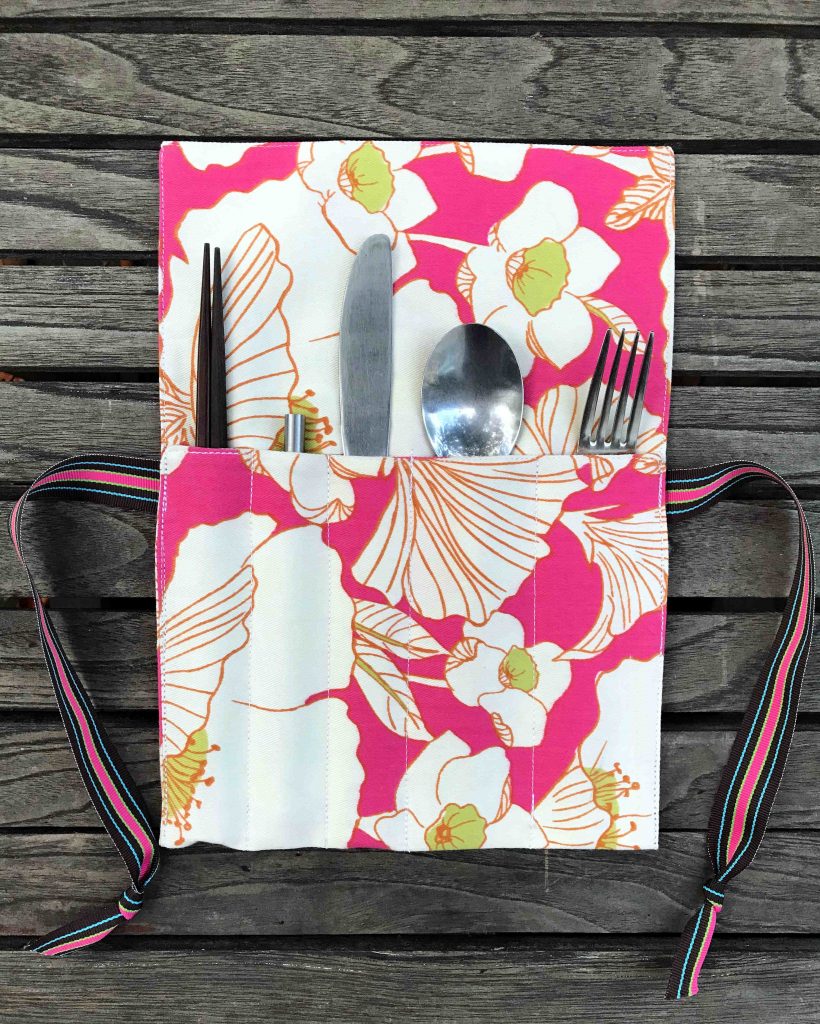
To make this easier, get a ruler out and draw lines where you’ll sew through the pouch, using either tailor’s chalk or a tracing paper and a wheel. For the utensil roll in this post, I made three small slots, each 1 ¼ inches wide and two larger slots, both nearly two inches wide.


Step 7: Fill with cutlery, chopsticks or a reusable straw or all of the above
Your utensil roll is ready for action! Fill it with your cutlery, roll it up, tie it up and pack it in your bag or zero-waste kit.