
I’m getting ready for several upcoming talks on zero waste and requests for one topic keep coming up: easy steps to get started. Many people also are strapped for cash at the moment, so I thought I’d write about easy steps to get started that don’t cost anything. That’s worth the price of admission (actually, admission to read this post doesn’t cost anything either…).
1. Store food in glass jars
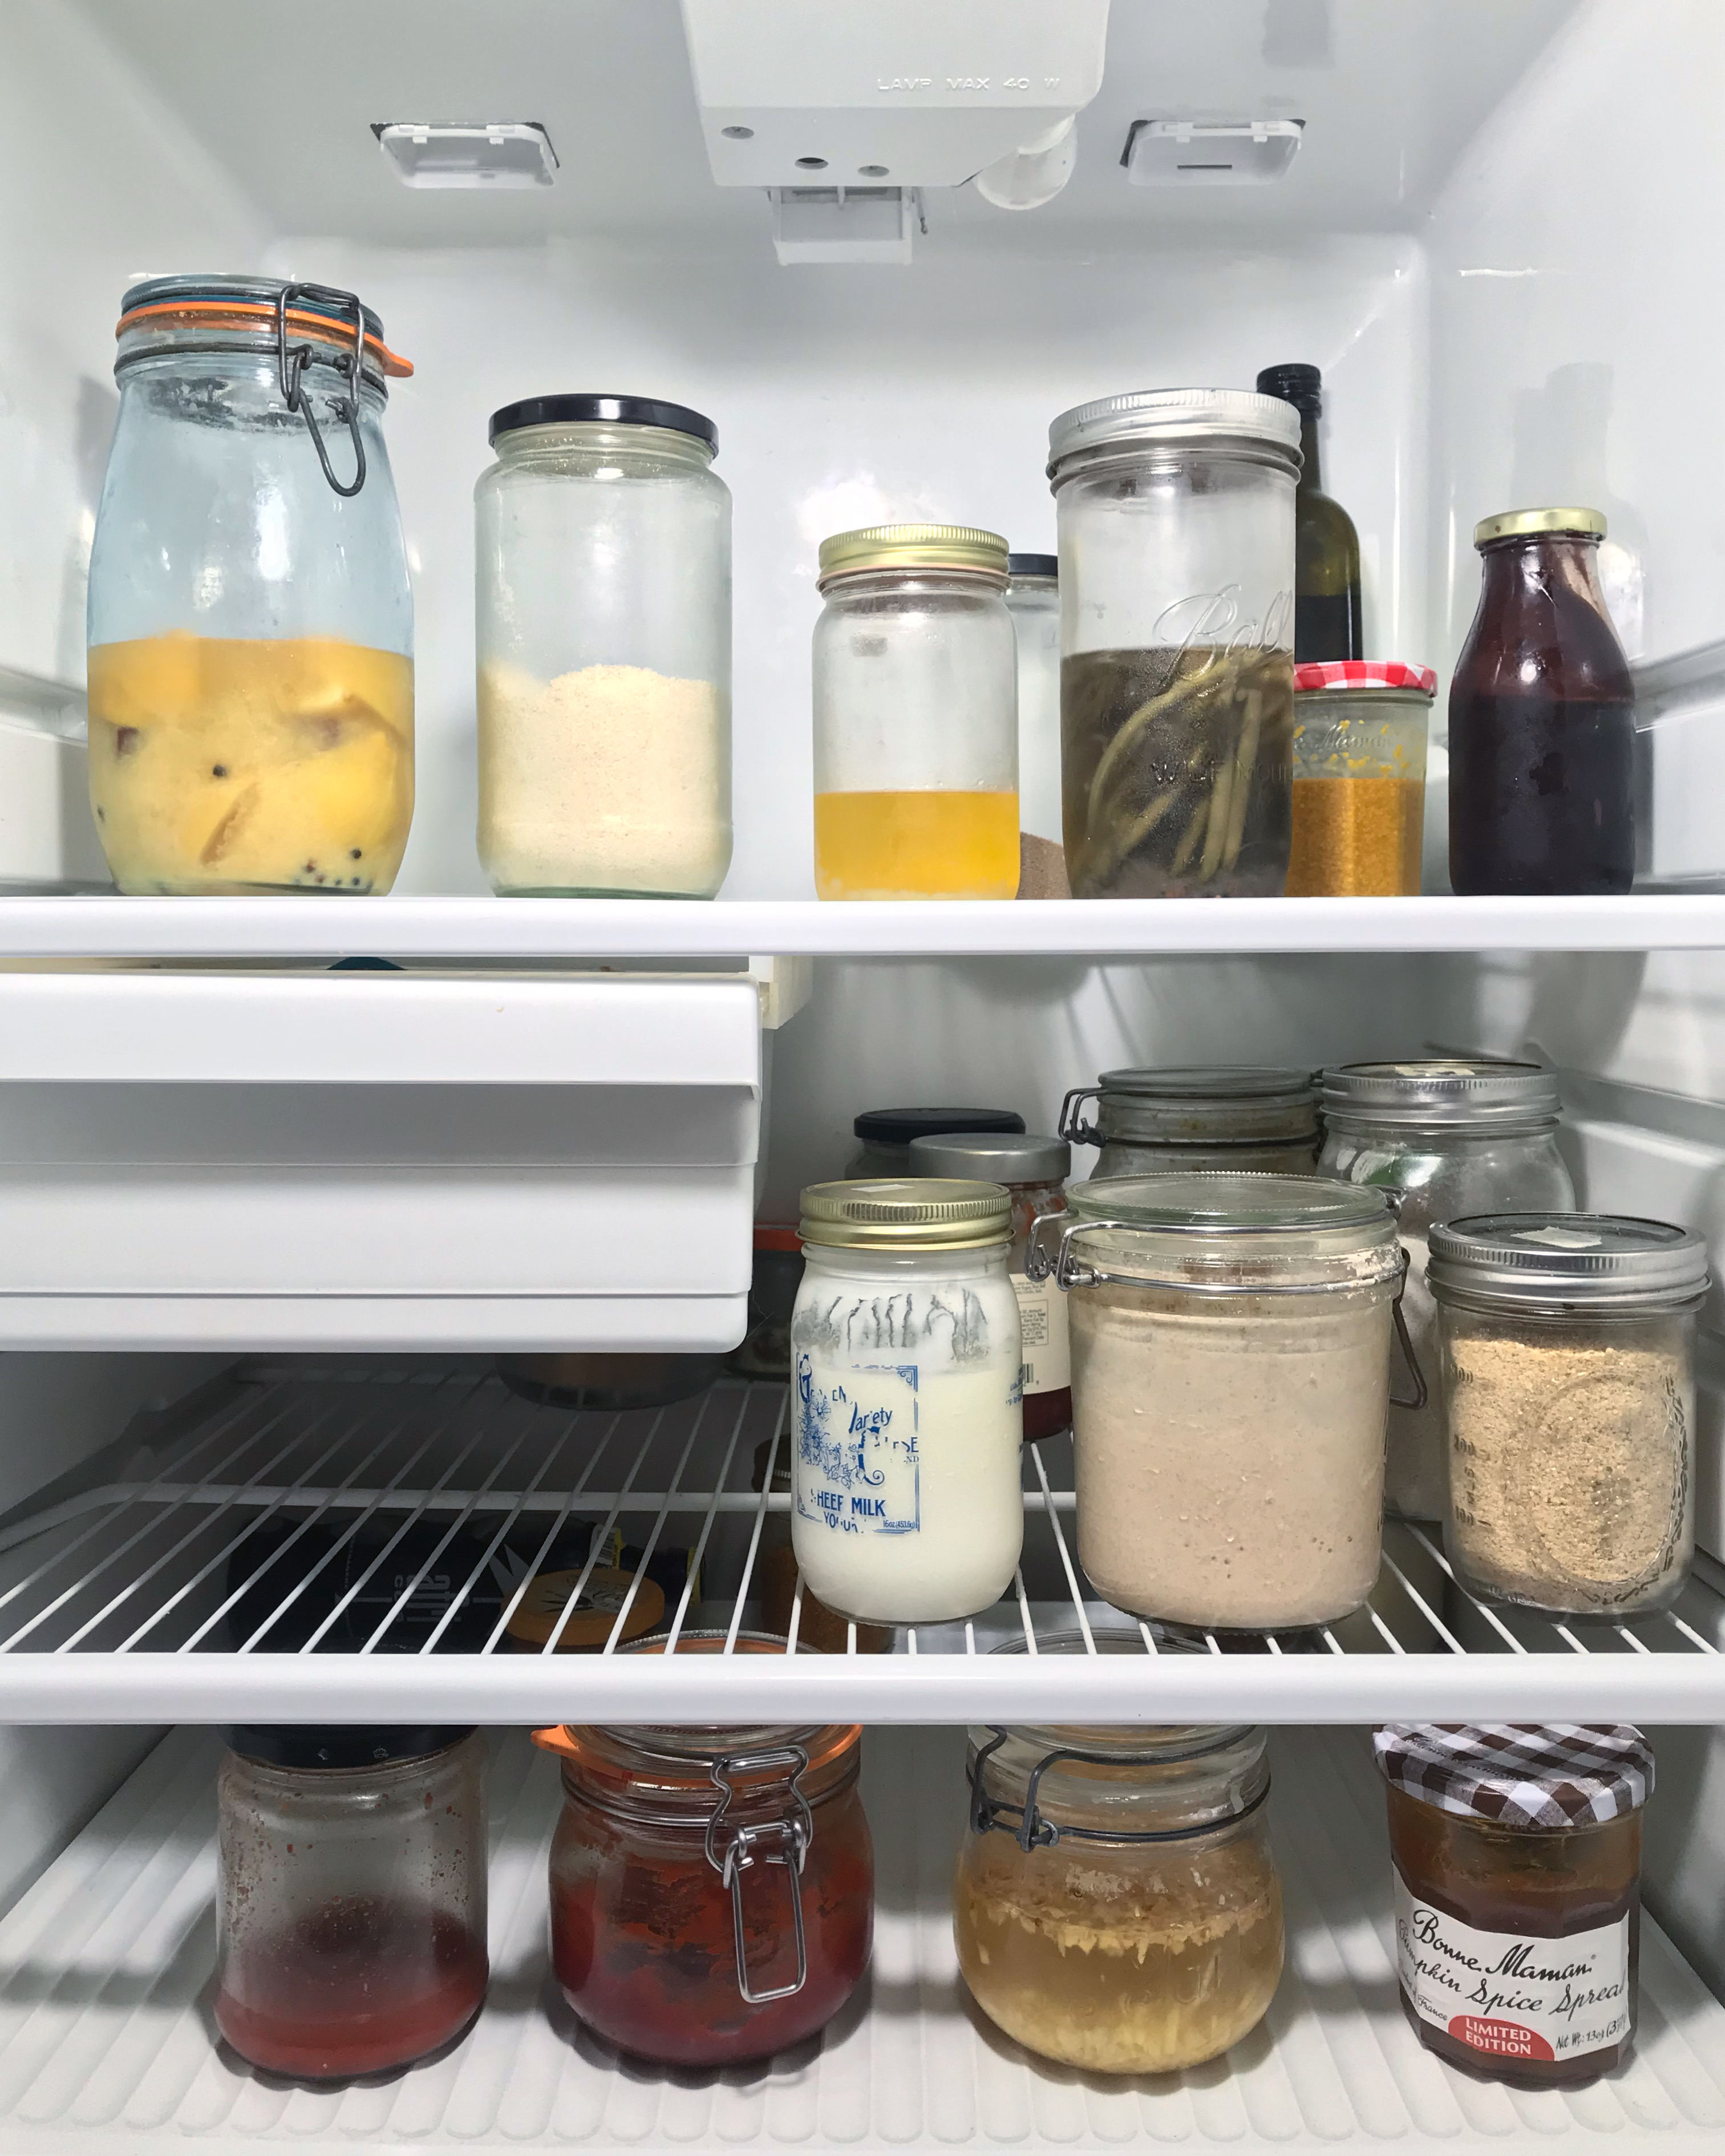
You may enjoy a good mystery but not likely the type that lurks in your refrigerator, hidden inside an opaque container until it decomposes. Store food in jars and you’ll see what you have on hand at a glance. This increases the likelihood that you’ll eat the food rather than stumbling upon an inedible puddle and tossing it. (I also store food in the freezer in jars.)
You can often find free jars at restaurants by simply asking. The staff would likely rather give them to you than recycle them or, worse, throw them out. Get free jars, reduce food waste and save money. Win-win-win. Go here for instructions on removing labels and smells from rescued jars.
2. Make your next meal with food you have on hand

After looking through your refrigerator and cupboards, come up with a dish that you can make with what you find. You’ll both eat more of the food you’ve already paid for and reduce food waste. People have been cooking this way more during Covid in order to avoid heading to the grocery store for as long as possible.
Non-recipe recipes that use up this and that include soup of course, but also fried rice, galettes, hand pies, frittata and pizza. And don’t worry, the pizza police won’t come after you if you don’t top your pizza with tomato sauce. On mine, I often spread hummus that I’ve made quite runny, pesto or, if I have cashews, amazing cashew cheese. Slice whatever vegetables you have on hand and distribute those across your sauce of choice.
3. Cook with scraps

Citrus zest adds so much flavor to food and, if you’ve already bought oranges, lemons or limes, basically costs nothing. Before juicing citrus, zest it with the fine holes of a box grater or with a microplaner. You can also peel off wider strips with a vegetable peeler.
When I zest or preserve citrus, I use organic, unwaxed fruit. Some of the shiny citrus you see at the grocery store has been treated with food-grade wax to help preserve the oranges, lemons and limes. I’d rather not eat this. I am fortunate to have a lemon tree and so I know those are organic and unwaxed. The oranges, lemons and limes at our farmers’ market are also organic and wax-free.
Use the zest immediately or freeze it in small amounts. Tiny glass jars work really well—you can freeze the small amounts you’ll use in a recipe. Add the zest to quick breads, pancakes, cookies, cakes, ginger beer, a pitcher of water…
Go here for more ideas for cooking creatively with scraps.
4. Regrow vegetable scraps

I’m a little bit obsessed with regrowing vegetable scraps. The ones in the picture had been sitting in the windowsill in water, some for over a month.
I planted some of these outside after I took the picture: one each of the parsnips, carrot tops and celery, all the green onions and all the rosemary. (You could also plant these indoors in some soil.) If all goes well, the parsnip and carrot tops will go to seed, bringing some volunteer vegetables in the spring. We’ll see what happens with the celery top. The green onions always do well when I replant them in soil, indoors out out. Rosemary, one of my favorite herbs, is a perennial that I put in many dishes.
If none of these take, at the very least, these vegetable scraps will return to the soil and they have provided me with hours of entertainment. Whether you subscribe to scrappy gardening like this or you grow all your own food or you tend gorgeous flower gardens, planting anything shows you have hope for the future. Our very long, very difficult winter will eventually give way to spring and renewal. Hang in there.
5. Sprout beans, grains or seeds without buying special equipment

Where I live, most sprouts come packaged in plastic clam shells. You can grow your own and you can do it without buying special sprouting tools.
The broccoli seeds my daughter MK sprouted in the above pic are sold specifically for sprouting—not for growing. (Seeds for planting may have been treated so don’t sprout those.) I’ve also sprouted lots of beans from bulk bins (mung beans, French lentils, black beans…). Do NOT sprout kidney beans. Raw kidney beans contain the toxin phytohaemagglutinin. Cooking neutralizes this toxin however.
I have a full post on sprouting here but the basic method is as follows:
- First soak beans, seeds or grains overnight in a jar. (I close mine to keep out debris.)
- Rinse, drain and return to the jar and secure a piece of cheesecloth to the open top or place the beans, seeds or grains in a colander or pie dish and cover with a plate.
- Rinse and drain twice a day.
- Wait 2 to 4 days (or longer) for tails to grow at least the length of the bean, grain or seed.
- When ready, refrigerate sprouts for about a week.
6. Make stuff out of scrap fabric
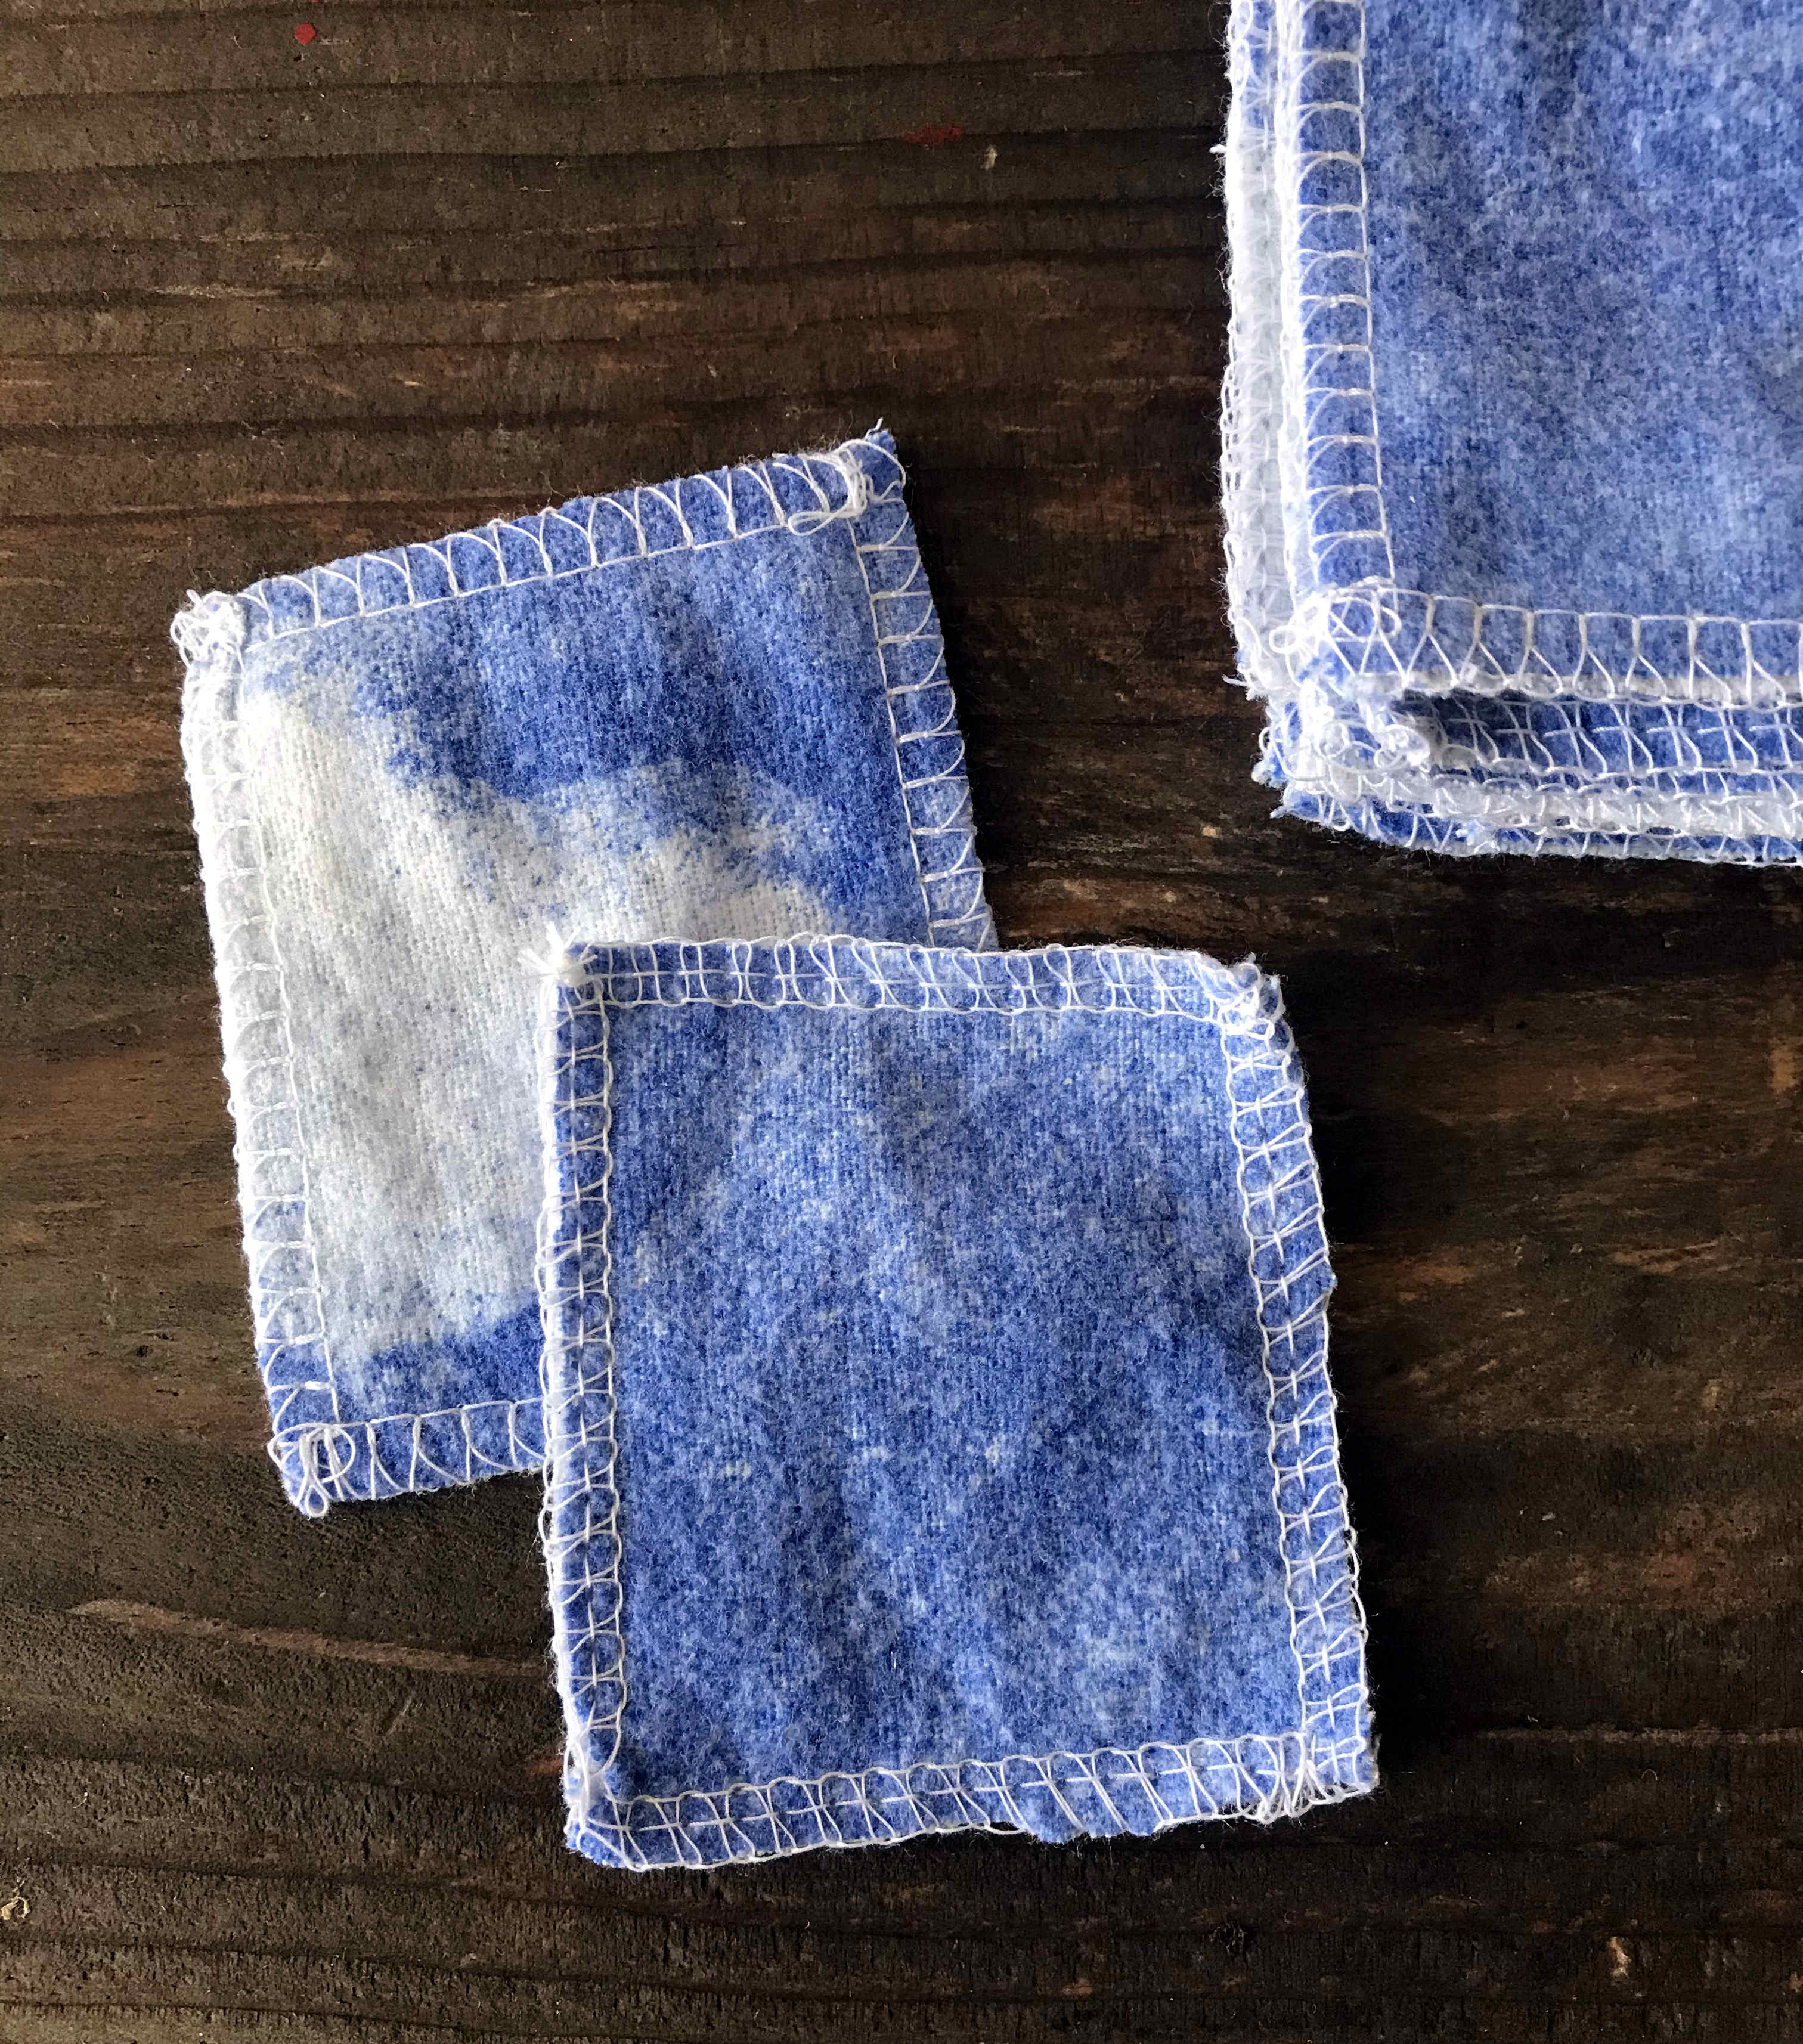
This step assumes you know how to sew basic stuff.
Last night, I sewed some reusable cotton facial squares for my daughter MK. I used a secondhand flannel sheet that, after having served its purpose, had become threadbare and torn. I made squares because cutting out squares wastes less fabric than cutting out circles. Squares are also easier to sew together. But if you prefer circles, then make circles.
I sewed two layers together using my serger. If you have a standard sewing machine, you can zigzag the raw edges to prevent them from fraying. These cost nothing to make and work well. A couple of years ago, part of this same sheet became unpaper towels and handkerchiefs.
7. Conserve your bars of soap

When my friend Monique sent me a pic of her rubber band soap dish a couple of years ago, I understood at a glance: MY EXPENSIVE BLOCKS OF DISH SOAP AND MY SHAMPOO BARS WOULD NO LONGER TURN TO MUSH ![]()
When you reduce the waste, you often increase the bars of soap you use, swapping out plastic bottles of liquid for bars for your skin, hair and dishes. Make them last with a rubber band soap dish. I have a lifetime supply of rubber bands that I compulsively saved in the old days. In the above pic, I used the lid from a large jar to construct my soap dish. An actual ceramic dish also works and I find the rubber bands slip less—if at all—on ceramic.
I try to save all my citrus peels. The non-organic ones (it happens…) go in vinegar to make cleaning solutions and the organic ones get dried on the counter, popped in the oven when it’s still warm and ground in my coffee grinder once they are really dry. I store the powder in glass jars and use it in cakes. A tablespoon of dried orange/clementine/lemon peel really brightens up a carrot, squash or beet cake. Using citrus peels lets me make interesting baking without spices brought from the other side of the world, so my “anti-post-colonial-ingredients” vegan son will eat them… And when he is not around, orange or clementine complements chocolate really well.
All good tips! Thank you.
Thank you Dorothy 🙂
~ Anne-Marie
I always love to read your ideas on things like this…such good information! After reading this, it gave me an idea that I am now starting to implement. I use 2 – 3 fresh lemons a day in the lemon/stevia water I am drinking all day long. Sadly they are usually not organic but it is what it is. I have been trying to thing of a good use for the transparent orange plastic little pill bottles my medicines come in. So now, I’m washing those up and using them to store small amounts of frozen lemon zest that are just about the right size to toss into a recipe. I’m excited to be able to use all those little bottles, instead of tossing them into the trash and I’m looking forward to trying lemon zest in more dishes! Thanks for your inspiration!
What a great idea! You save the bottles and the zest! Thank you for reading 🙂
~ Anne-Marie
Regrowing vegetable scraps is a great idea and I love to try it as well.Celery is my favourite here, but I must give shallots a try. Transferring them to the garden in our summer is challenging, and sometimes I love them, but as autumn approaches I will do it as well, otherwise the compost bin benefits. I am using glass jars more and more as well, and store my nuts in them in the freezer. Really enjoyed your post, thankyou.
We used to regrow all our avocado pits when I was a kid! I guess my mom was ahead of her time. 🙂 Love that soap bar hammock idea. Totally going to do that.