
I love the convenience of this dough. Once you have proofed it, if you don’t feel like baking all of it right away (or any of it), you can store as little (or as much) of the dough in the refrigerator for up to five days.
When you crave pitas, simply tear off a few hunks of dough from your stash, roll them, bake them and enjoy incredibly fresh and soft, delicious pitas. You’ll essentially have refrigerator dough on hand but with none of the artificial ingredients or plastic food packaging, which may be toxic.
In addition to convenience, refrigeration renders satisfyingly chewy dough. You may want to make this dough a day in advance for the chewy texture alone.
Two ways to bake the pita bread
Bake these in the oven or on the stove top.
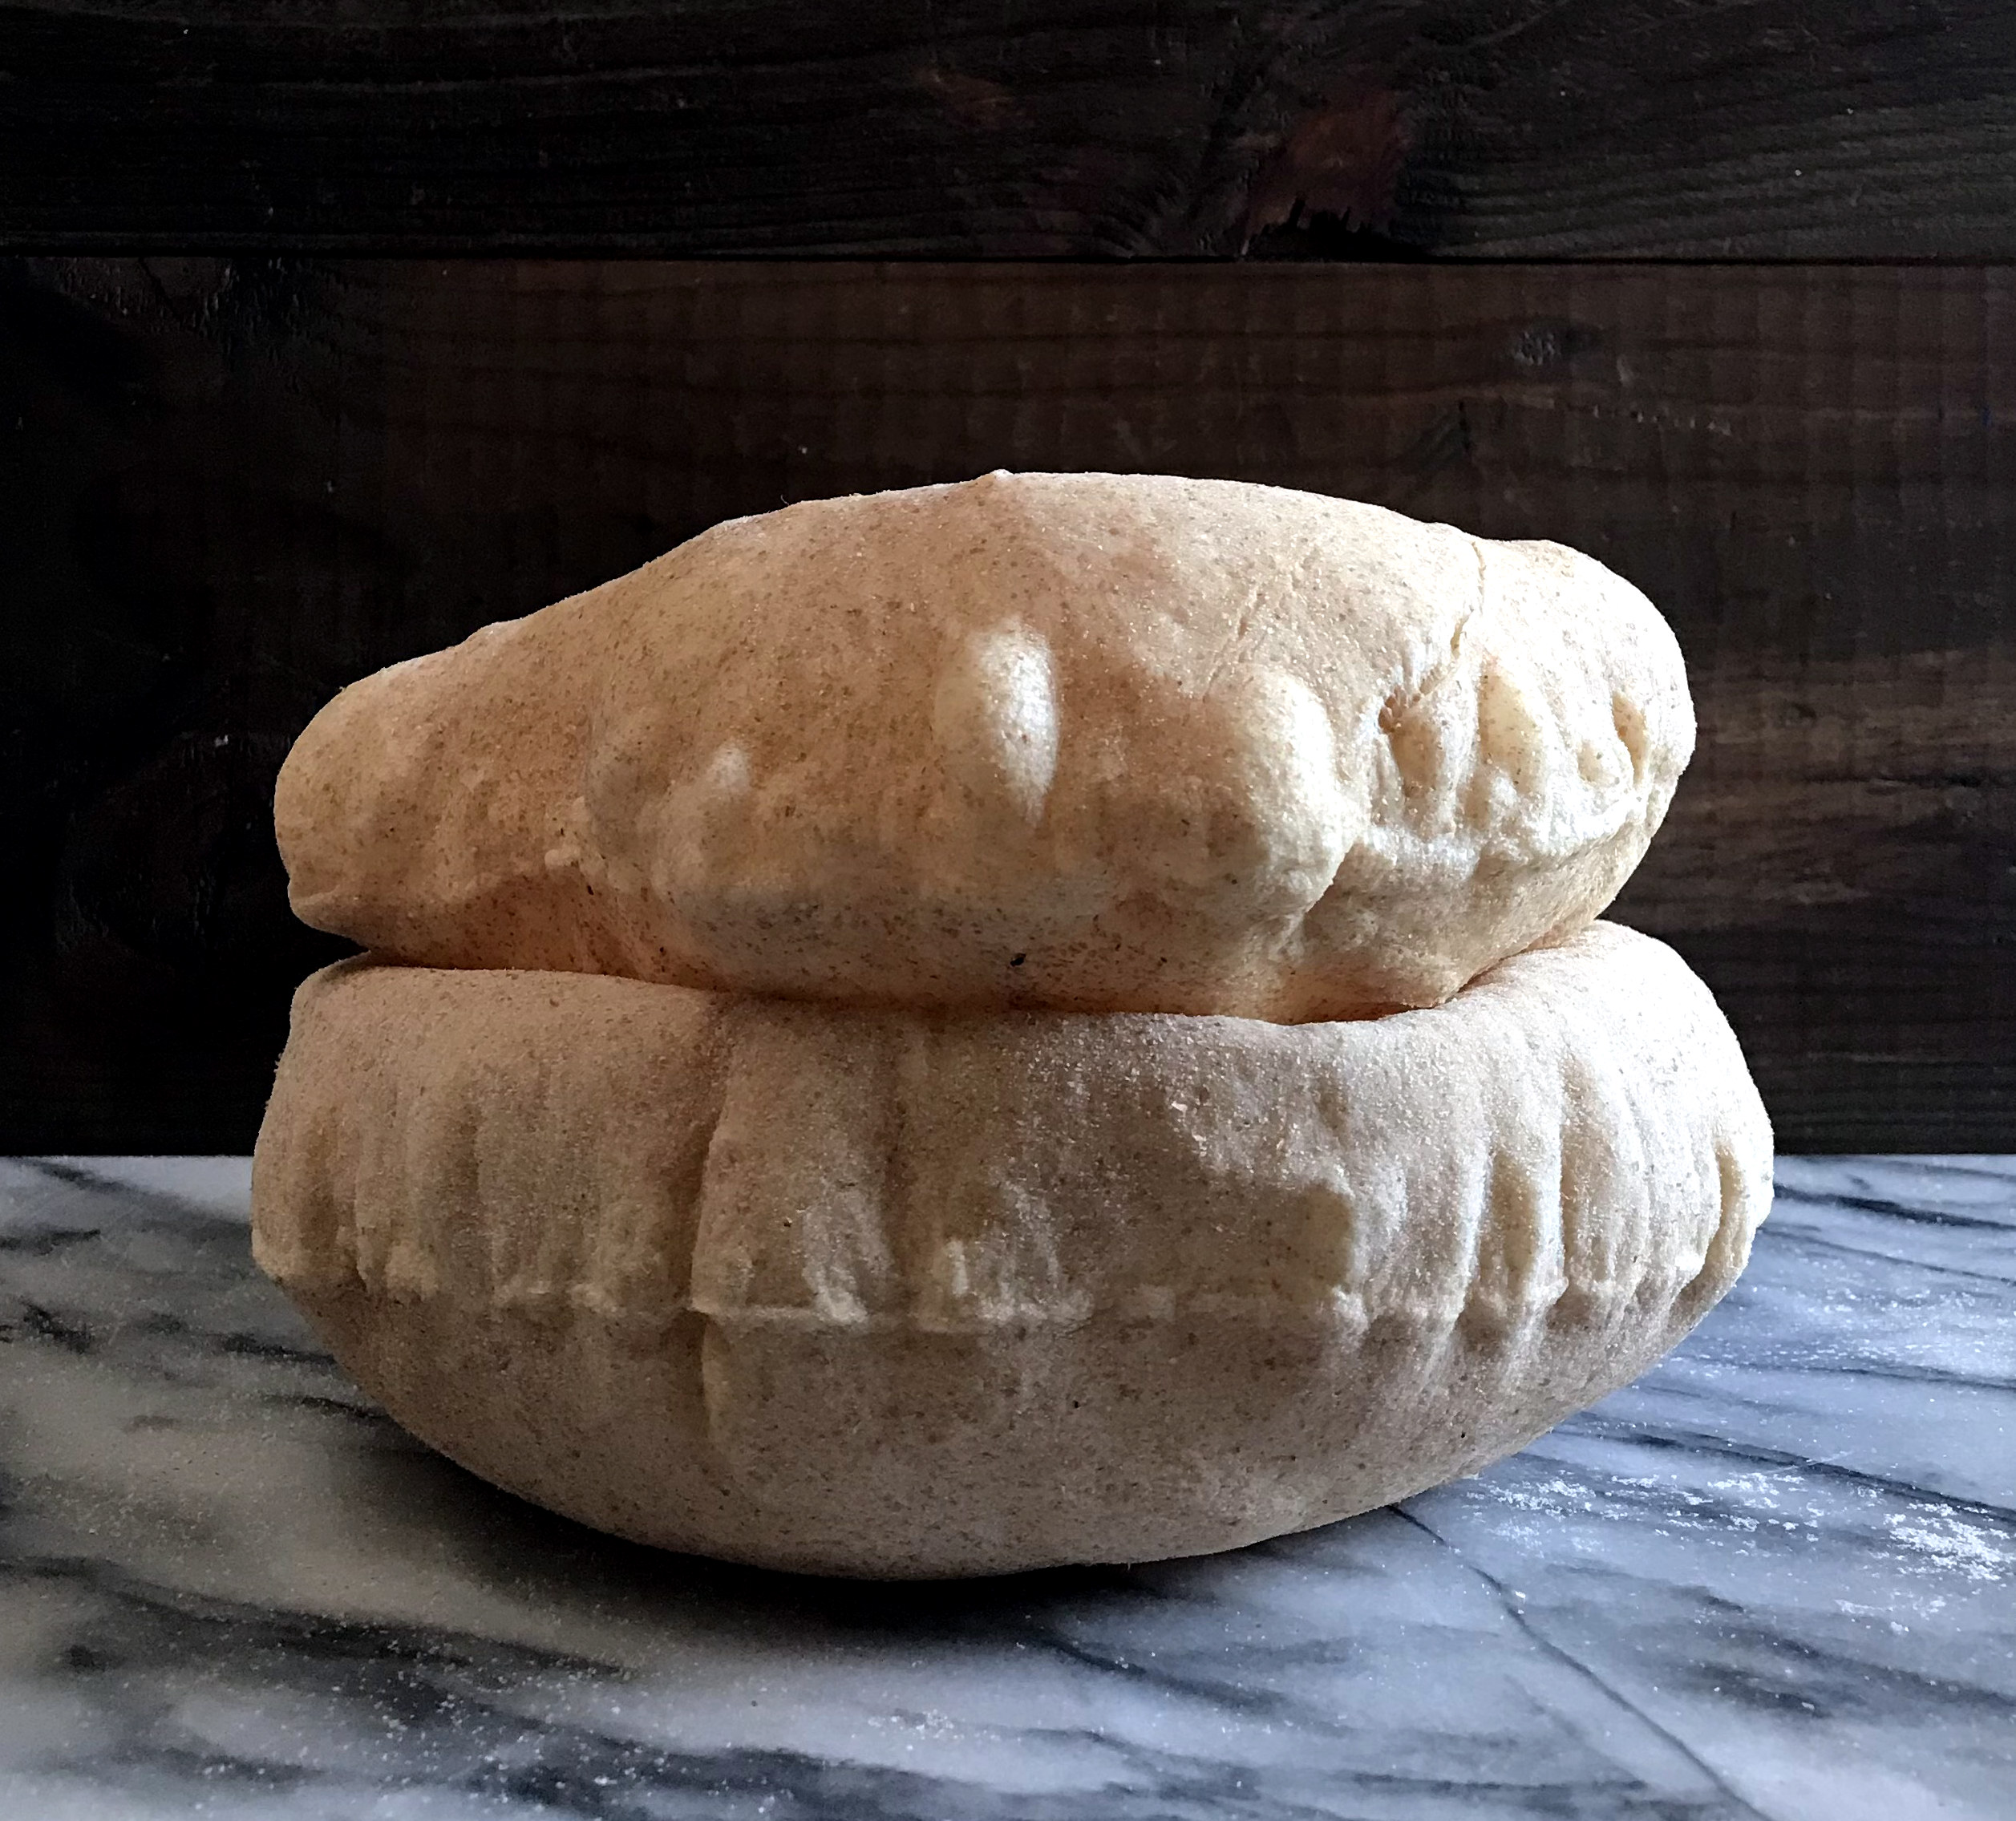
In the oven, the pitas puff up like giant pillows. Place an ungreased metal baking sheet, cast iron pans or a pizza stone in the oven while it heats.
For more of a pocketless pita, cook the pitas in a pan on the stove, where they tend to puff up much less, if at all. My daughter Charlotte, master hummus maker, prefers to eat these pitas with her dips.


Homemade Pita Bread
Ingredients
- 1 ½ cups warm water (about 110°F)
- 1 ½ teaspoons sugar
- 2 teaspoons salt
- 3 tablespoons olive oil plus more for greasing the bowl and for frying if cooking the pitas on the stove
- 1 tablespoon active dry yeast
- 3 ¼ cups plus 2 tablespoons all-purpose flour, divided plus more as needed and for rolling out the dough
- ¾ cup cup whole wheat flour
Instructions
- Combine the warm water, sugar, salt, olive oil and yeast in a large bowl. Add half of the all-purpose flour and all of the whole-wheat flour and stir until well combined. Add the remaining all-purpose flour, half a cup at a time, mixing well after each addition.
- Form the dough into a ball. If the dough is too sticky to work with, add 1 to 2 tablespoons of flour or more as needed. Turn the dough out onto a floured surface and knead for about 5 minutes, until smooth and elastic. Wipe out the bowl and oil it lightly. Place the dough in it and turn it over to lightly coat the entire ball. Cover the bowl with a plate. Let the dough rest for 1 hour in a warm spot, until doubled in size.
- Punch down the dough. If you won't bake the pitas immediately, store the dough in the refrigerator for up to 5 days. Because the dough may double in size in the refrigerator, choose an appropriately sized container. (When you want to bake, remove as much dough as you’d like.)
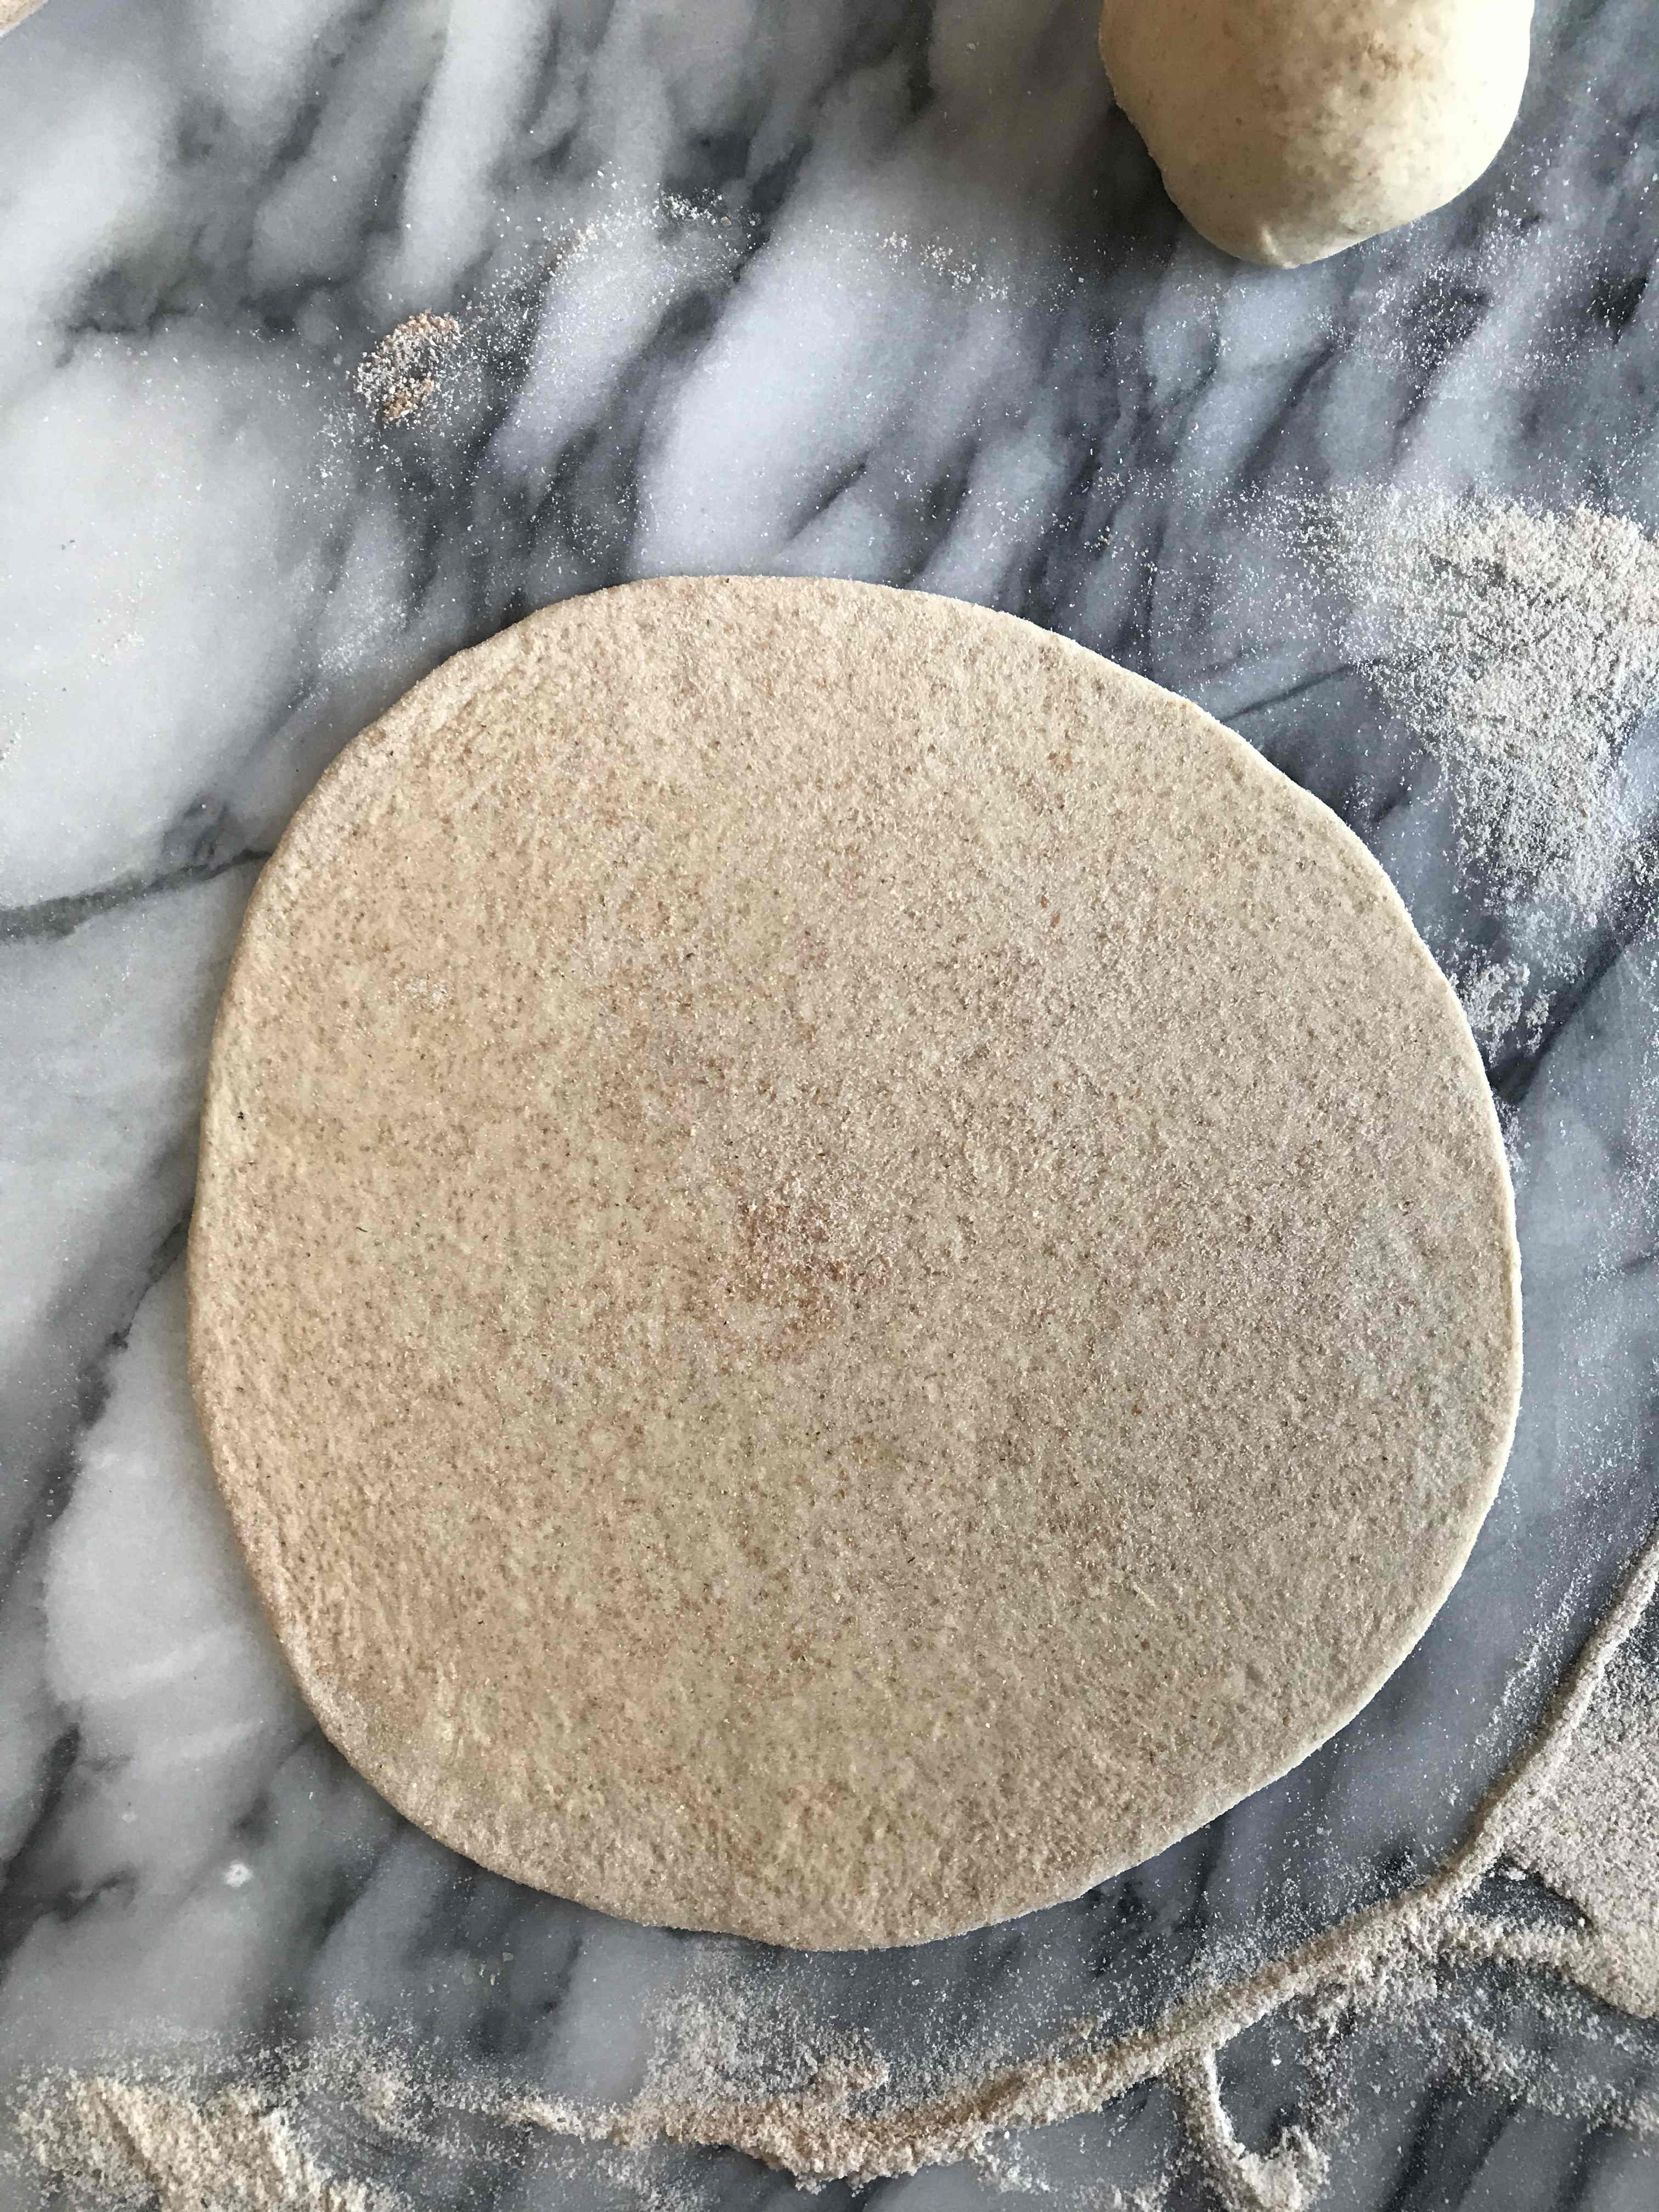
- Turn the dough out onto a floured surface and cut it into 12 pieces. Roll into balls between your palms. With a rolling pin, roll the balls into 7-inch disks, between ⅛- and ¼-inch thick. As you work, add flour to the work surface as necessary to ensure that the dough doesn't stick.
Oven method
- Place a baking sheet, cast-iron pans or a pizza stone on the middle rack of the oven and preheat the oven to 450°F.
- Once the oven has heated, arrange a few of the rolled-out disks onto the hot surface, at least 2 inches apart. Do this by placing a disk on the palm of your hand and flipping your hand to drop the disk onto the surface, being careful not to burn yourself. The pitas will puff up almost immediately. Bake for 1 minute, flip over with tongs and continue to bake for 1 more minute. Remove the pitas from the baking surface and place them in a towel-lined basket or bowl to keep warm. Repeat with the remaining dough disks.
Stove top method
- Heat a medium-size skillet over medium-high heat and brush on a very thin layer of oil. You'll know the pan is hot enough to cook the pitas when it sizzles after you've sprinkled on a few drops of water.
- Place a disk in the hot pan. Cook until you see bubbles begin to form, about 1 to 2 minutes. Flip the disk over and cook for 1 minute. It should begin to puff up a bit. Flip over again and cook for 1 more minute on the other side. Transfer to a towel-lined basket or bowl to keep warm. Continue to cook the remaining pitas, brushing a very thin layer of oil onto the pan in between cooking.
Is it possible to use this recipe with sourdough starter discard with no commercial yeast? Thank you 🙏
Hi Trinity,
I’ve only tried it with the discard plus commercial yeast. I make tortillas that are similar to this recipe but without the yeast so I think they will turn out something like those–very tasty but not exactly pitas. I hope that helps 🙂
~ Anne-Marie
Love this – I have been wanting to try making my own pita bread! I love making tortillas so I will definitely try this out soon 🙂
Jenna ♥
Stay in touch? Life of an Earth Muffin
Hi Jenna,
Thank you! I make these pretty much the same way as tortillas (except that these proof). Homemade tastes so good. Enjoy!
~ Anne-Marie
Wonderful! Thank you for the recipe, and happy holidays!
My pleasure Paola. Happy holidays to you too 🙂
~ Anne-Marie
Delicious. Bread any way.
I Hope to try these next week.
Do you know how much 1 tablespoon dry yeast weighs in grams?
I’ trying to convert it to fresh yeast, as it’s easier to buy, here in Denmark.
Happy New year.
Hi Anne-Marie, Happy New Year. I would love to make these pittas, but I am confused by the amounts given. Would it be possible if you could give weights for everything, including the liquid. I used to do cups before, but have been weighing ingredients for my sourdough bread and it has made a huge difference. Sorry to be a pain.
Maria
xx
Hi Maria,
I will update the recipe with the weights. I need to do that for a couple of recipes on here so I’ll do them all at the same time. I prefer a scale also. It’s both more accurate and easier!
~ Anne-Marie
Anne Marie, thank you for this recipe!! It was so easy and way tastier than any store bought pita! Also I can’t wait for your cookbook that I preordered:-)
I’m so glad you like the recipe, Amber. Thank you very much for preordering my book! I really appreciate it 🙂
~ Anne-Marie
Absolutely love this recipe and have made it a few times now (: It does take my pita a little longer to cook in the oven but its not an issue.
Hi Hannah,
Thank you for the feedback on the cooking time. I’m glad you like the pitas 🙂
~ Anne-Marie
Is it possible to use more wholesome flout like chapati or whole-wheat ?
I have made them for the third time now, they are great! And I love that you added the metric measurements.
I made these and while they were soft, fresh, and tasty, they were not at all puffy as shown. I used new yeast and made a wheat loaf that rose just fine, so I don’t think the yeast was the issue. Cooked them in the oven. Stored them overnight in a glass pyrex with a rubber lid and the next day I could not even open the pita pocket. Any ideas?
I’ve never commented… but I feel such a need to let people know about my mistake turned masterpiece. I didn’t have wheat flour so I had to use all white flour. While I was measuring it, someone stopped by and I forgot where I was in the process. I accidentally added extra flour. The dough was beautiful… I did make some pita bread that night and it was VERY good. (I recommend the oven stone method as it puffed up a bit more – however the stove was easy, quick and delicious.). The reason I’m responding is the next night I made pizza crust with it… OH MY…. I cooked it like the pita bread on the stone in the oven and then took it out to add all the ingredients and put it back in the oven. If you like super crispy crust that does not get soggy with such delicious flavor, you need to try this! As our family ate it we dreamed of opening a pizza parlor. Yes… it was that good! Now I’ll make your mouth water… we used fresh mozzarella, basil from the garden, tomatoes, bacon and a little salt on top. ohhhh soooo good : )
That pizza sounds fantastic. I would come to your pizzeria! I will try making some pizza with this dough. The pizza stone really does work well. Thank you for sharing the tips for your masterpiece 🙂