Updated 08/16/20
Jump to RecipeMy daughter Charlotte loves almond milk. You can find my recipe for that here. Yes I know almonds require lots of water. Dairy cows require more. We don’t guzzle almond milk or cow’s milk. Everything in moderation.
Or as Charlotte put it the other day:

At the bottom of my original almond milk post, reader Diana Botero left a life-changing comment.
Blend the pulp more than once. And it works! I make almond milk for my whole family and after I blend the first time I strain it and then with fresh water I blend the pulp. I blend a total of three times and make two liters with 1 cup and 1/4. The last strain the water is clear with lil white. I add a pinch of salt and its amazingly good. The left over is also way smaller that in the first strain. I recommend doing this because gets more out of the almonds. Its more efficient. The salt is a must since enhance the flavor. Hope it helps! Please share my tip for my was almost life changing milk wise.
So I tried it. And it worked amazingly well! I followed Diana’s directions and:
- Soaked my cup of almonds overnight
- Drained and rinsed them
- Blended them with 2 cups of fresh water
- Strained out the milk
- Put the pulp back in the blender with less fresh water than the first time along with a pinch of salt
- Blended everything again and made a second batch
- Repeated the process and made a third batch

I was thrilled! I rendered double the amount of milk I had been getting for the same price and not much more effort. I’ve already made a mess of the blender; I may as well keep going 😉
I prefer the first batch—it’s rich, creamy and sweet (but contains no added sugar). Charlotte prefers the lighter tasting second and third batches. You can also combine all of the milk together for one consistent batch if desired.
Now if your almond guilt still gnaws at you, this next milk alternative will assuage your guilt while satisfying your tastebuds.

My daughter MK started making this. You follow the same basic method to make nut and seed milks.
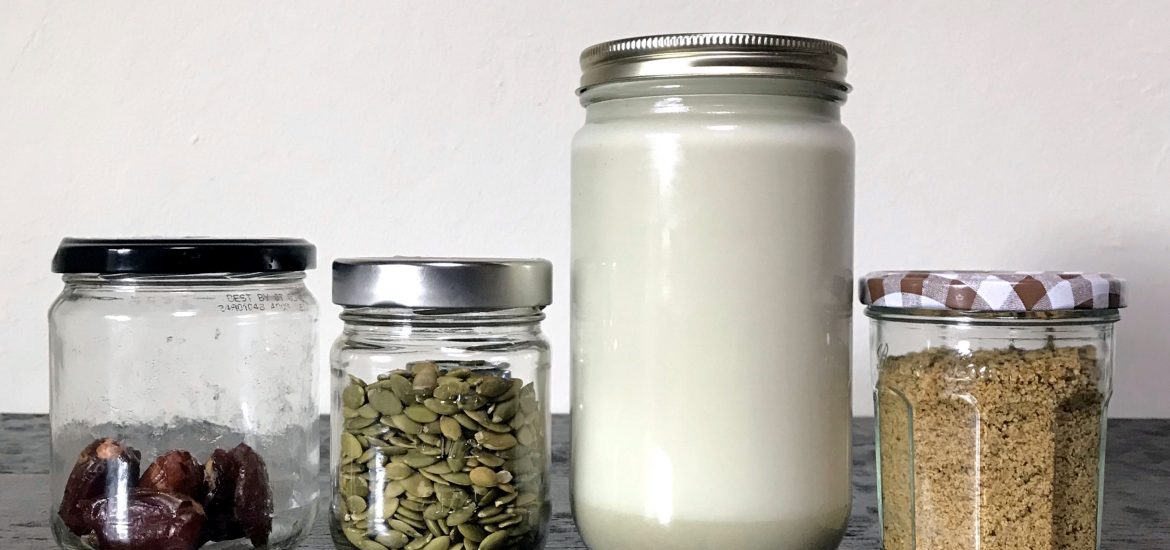
Pumpkin Seed Milk
Equipment
- blender, seive and thin linens or a nutmilk bag
Ingredients
- 1 cup pumpkin seeds raw and hulled
- 3 cups water plus more for soaking
- 3 Medjool dates optional
Instructions
- Soak the seeds overnight.
- Rinse the seeds and place in a blender with 3 cups of fresh water and the dates if desired. Blend for 3 to 5 minutes until very smooth.
- Strain out the pulp and store the pumpkin seed milk in jars in the refrigerator.
Notes
Judge me not for my nut milks! (Or anything else for that matter.)

I need to start making my own milks again. Do you use what is left of the nuts in cakes?
I do. I add them to all sorts of things: cookies, pancakes, crumble toppings, crackers, granola. I toss in a little bit here and there. Usually I dry the pulp out first in the oven.
~ Anne Marie
I hadn’t though about drying the pulp out first I will try that. Thank you 🙂
Great post 😁
This is amazing. I would have never tried making my own nut milks. EVER. This post was so cool. Thanks for the information!
What do you estimate the calorie count of diy nut milks to be?
I found a really easy way to make almond milk from The Kitchen. You take a tablespoon or two of almond butter and blend it with 3-4cups water (depending on your desired thickness), no straining and no waste!
You can use the pulp from making nut and seed milks to make a non dairy baked feta cheeze so there really is no waste at all. https://www.youtube.com/watch?v=fV5TC9YCNzU
What a great idea! It always bothers me to throw away the pulp (apartment dweller, so no compost pile, unfortunately). Thank you for the link! <3
Thank you so much for sharing! I am definitely going to do this from now on!
Your daughter’s quote is amazing… and true. 🙂
That quote tho!
I have been making my own cashew milk for years now and have recently started experimenting with pumpkin and sunflower seed milks but find when lightening my cup of tea or coffee with them that they settle pretty quickly (after shaking thoroughly) leaving the top watery and the bottom “chunky”. So unappealing. Is there any way to prevent this? I have tried hemp milk and didn’t care for the taste. IDK if rice or oat milk would hold together better. Any ideas?
I make lots of plant milks, and never have any pulp. If you use a high-speed blender (mine is a Vitamix), the pulp does not need to be strained, as it is pulverised so well into the milk, it isn’t noticeable. This way, you have a more nutritious milk with all the fibre retained. I do this with almond milk, cashew milk (and cream), macadamia milk (and cream), hazelnut milk, soy milk and milk made with any other nuts and seeds, and oats sometimes, too!
I dry the nut pulp *completely* and then grind it fine in my nut and seed grinder (also known as coffee bran grinder, I think); then rub that through a fine mesh wire sieve for nice,smooth flour. Then take anything too big to make it through the sieve and regrind it. Then rub through the sieve also. A third repeat shouldn’t be necessary; but if there’s enough for a third regrind and rub, by all means, do it; you’d be surprised how much extra flour yield you can get this way.
Hi Spirit Wolf,
Thank you for this. Tips like this can really help us stretch our food and waste less of it.
~ Anne Marie
Can’t wait to try this with squash seeds. This summer I was blessed with volunteer squash. I have an abundance of delicious pumpkin/butternut-like winter squash of uncertain heritage. Since it would be a shame to squander such bounty, I am learning a lot about what you can do with squash!
Why don’t you blend together the soaking water? Phytic acid?