A flimsy plastic kitchen gadget that should not exist inspired this post: the Evriholder Avo Saver Avocado Holder.
Shaped like one half of an avocado, with a round indentation for the seed and an adjustable rubber strap, this gadget buckles in the half avocado you didn’t eat so you can store it in the refrigerator and not waste it.
Amazon sells these in two-packs. Why would anyone need two? If you have stashed half an avocado in the refrigerator in one avocado holder, why would you cut another avocado in half…and use the other avo…don’t you have half right there in the…oh forget it…
You have (at least) a couple of other options for storing your half avocado:
- According to this video, storing half an avocado in a container with a bit of chopped onion will keep your avocado fresh. Apparently chopped onion emits gas that inhibits your avocado from browning. And now you have onion prepped for making guacamole! I haven’t tried this myself because, well, see #2 below…
- You could eat the other half of the avocado. I love leftovers. I eat leftovers for lunch every day and always have them in the refrigerator. I never have a leftover avocado half. I can’t remember ever eating only half an avocado. This is madness.
Before you rush out to buy this avocado holder—or any other kitchen gadget—look through your cupboards and drawers. You may already have what you need.
Glass Jars to the Rescue
Jars come in handy for so many tasks:
- Storing half an avocado in the refrigerator with some chopped onion…
- Bulk shopping (be sure to mark the tare—or weight—of the jar before you fill it with food)
- Packing food for lunch at work or school (not so much for kids though)
- Storing leftovers (so you will notice what’s in the refrigerator and eat it before the food decomposes into slime)
- Freezing food (click here for how to freeze food without plastic)
- Straining yogurt to make Greek yogurt or labneh (yogurt cheese)
- Storing my sourdough starter, Eleanor
- Sprouting seeds
- Drinking from
- Brewing kombucha
- Fermenting anything
You can spend a lot of money on special equipment to ferment food—kimchi, dill pickles, kombucha and so on—but a simple glass jar works, with or without the lid, depending. I love the simplicity of fermentation—in addition to the amazing flavors. To make sauerkraut, you need a knife, a cutting surface, a bowl and a jar. You don’t even need electricity. I once did an outdoor sauerkraut demo at Crissy Field in San Francisco.

Multi-Purpose Kitchen Equipment
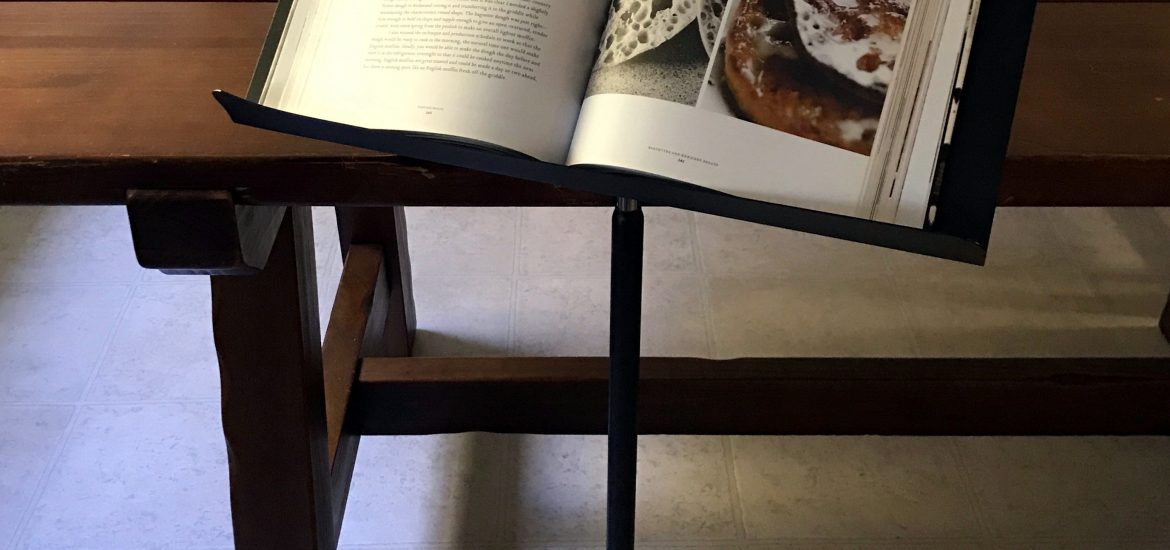
Music stand turned cookbook holder
Because you are a maestro in the kitchen.
Not only does my music stand free up precious counter space in my tiny yet efficient kitchen, I can also read recipes more easily when I position them upright. And I don’t splatter food all over them.

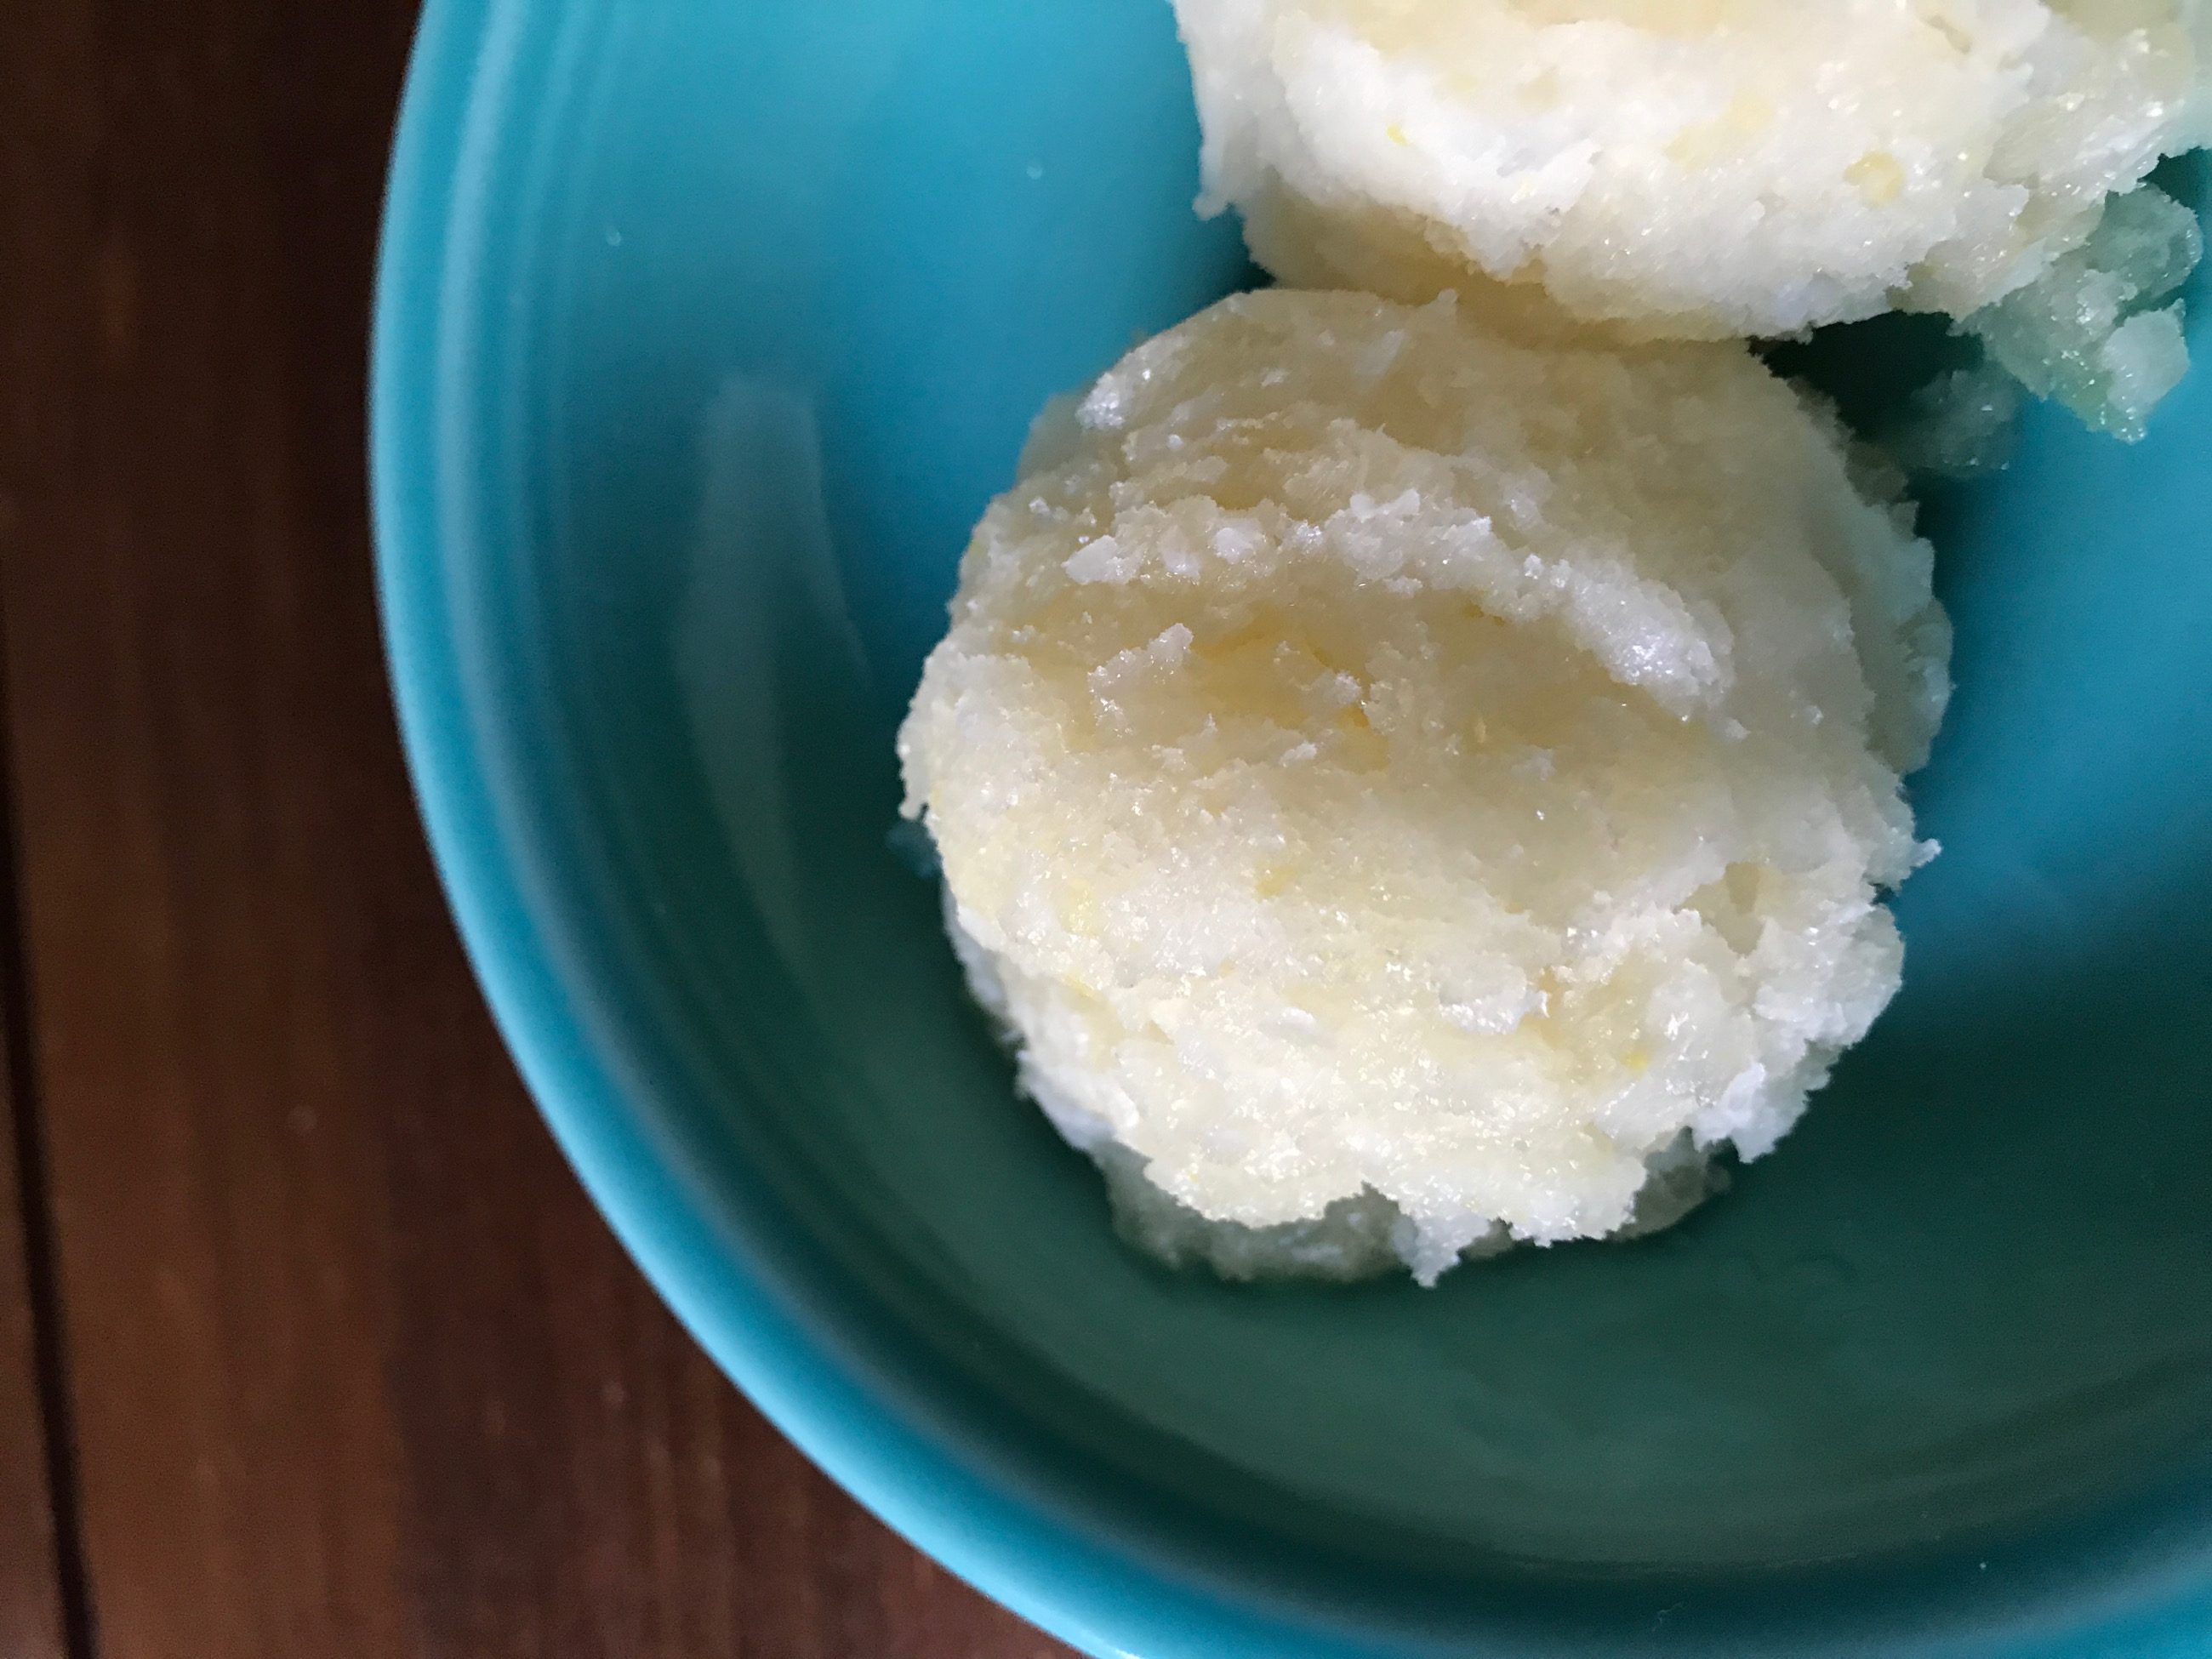
Glass or metal pan for making sorbet or ice cream
If you follow me on Instagram or read my last blog post, you may have seen the practically new (it looks brand new) Cuisinart ice cream maker I found on the side of the road. I owned one of these years ago but the bowl broke and I didn’t want to buy another one only to have the same thing happen. But free on the road? I’m not passing that up.
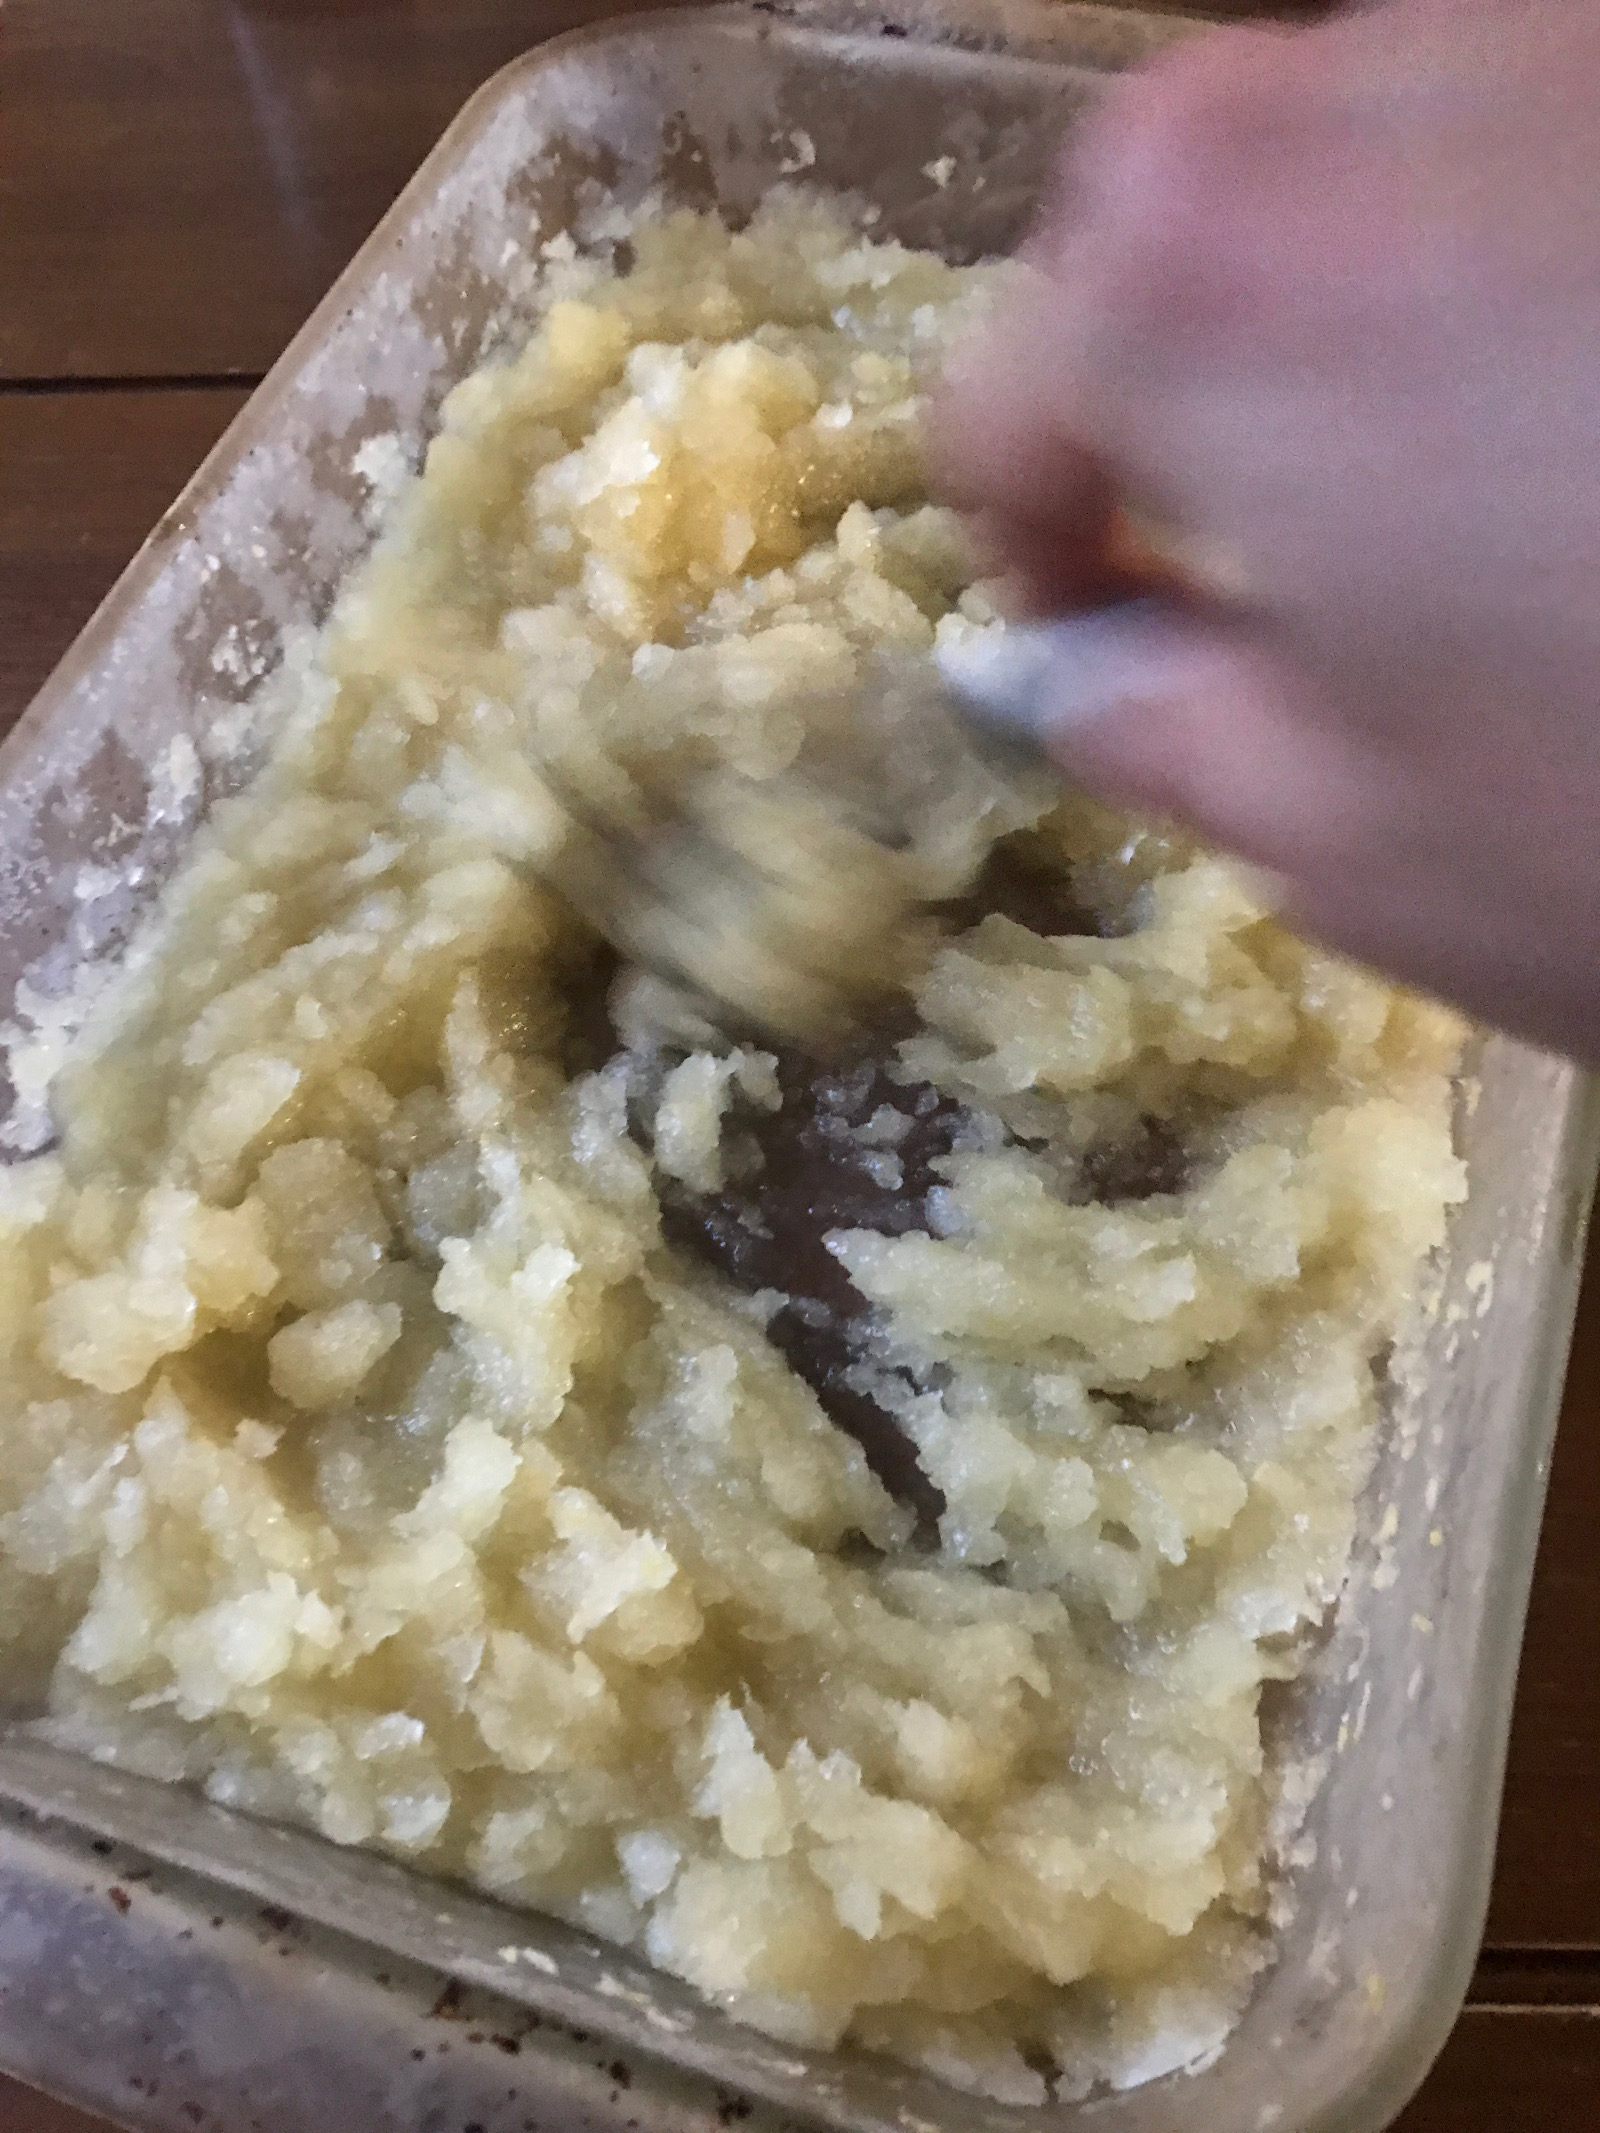
If you haven’t an ice cream maker and don’t find one just sitting there on the curb near your home, you can use a pan. Before you start, put the pan in the freezer to chill it. Make your ice cream, sorbet or whatnot and pour it into the pan. Every half hour or so, pull it out and give it a good stir (I have used a whisk for sorbet). After several hours, it will freeze. (Click here for my lemon sorbet recipe.)

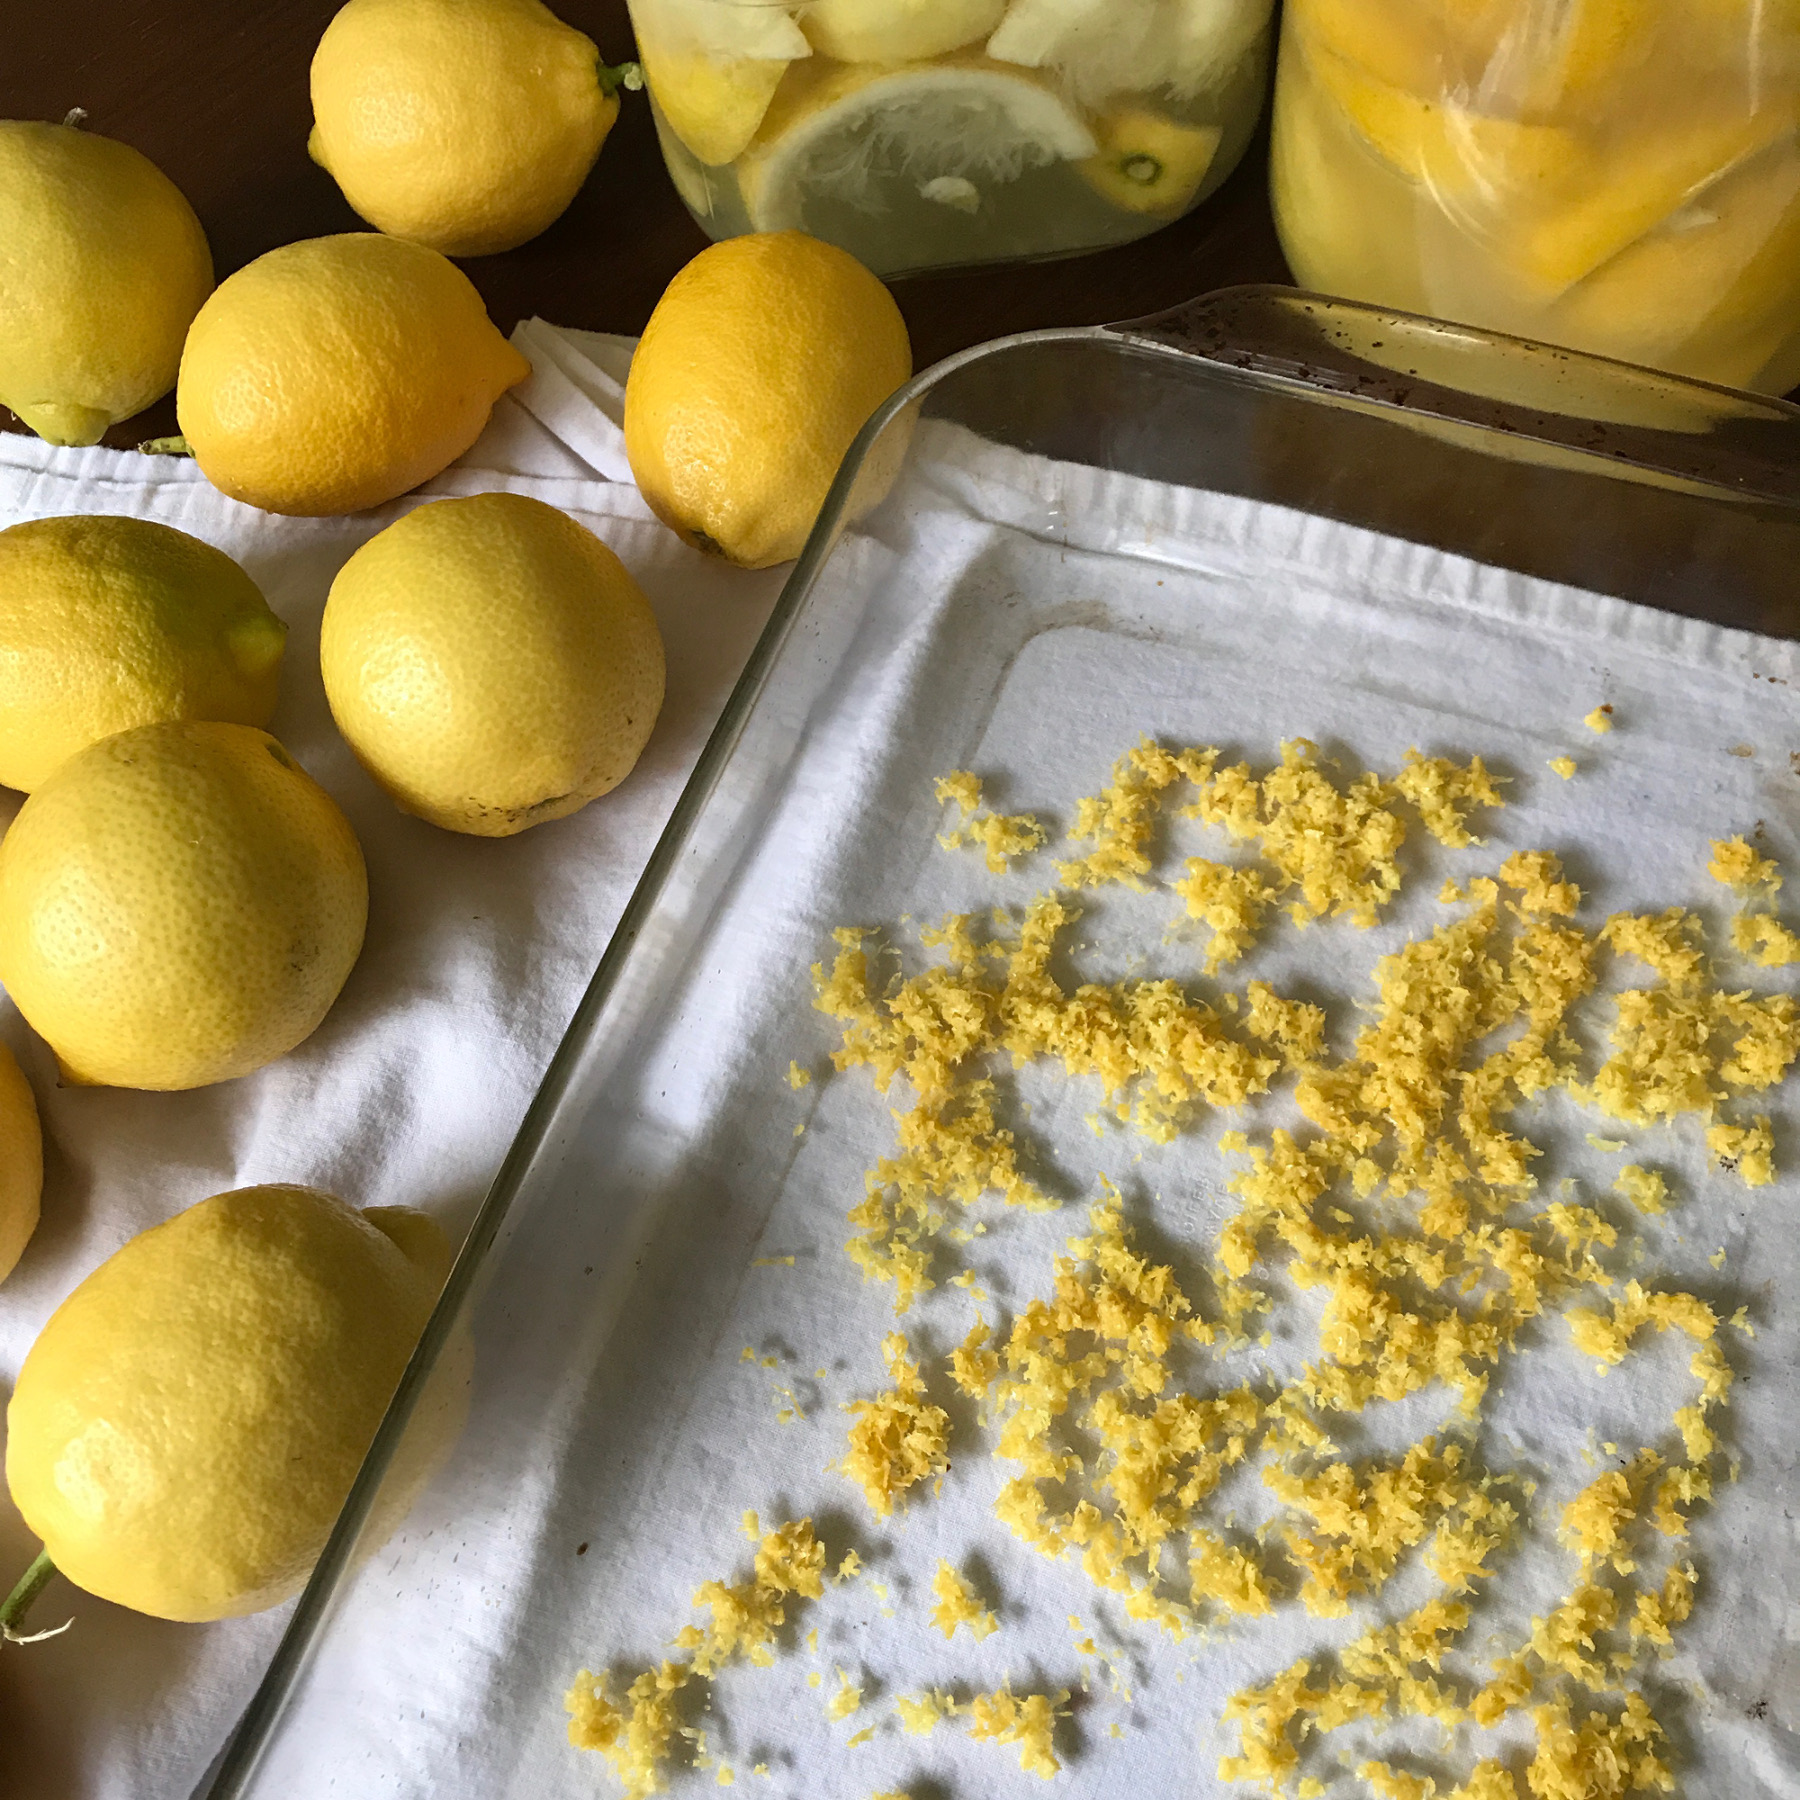
Dish for dehydrating citrus zest
While you’re making lemon sorbet, remove the zest and spread it across a plate or dish to dry out. Cover it with a clean towel for a day or two until it is ready. Transfer the zest to a jar and store it in the refrigerator.
Towel-lined bowl to proof bread
I really do love my banneton baskets but a bowl and thin towel will do to proof my dough. My sourdough bread boot camp students bring these to class. They line their bowls with the towels, dust the towels with generous amounts of flour and then place their formed dough on the towel, folding it over on top of the dough. You don’t want to make the bread in a metal bowl—the acids in the dough may react with the metal—but with a towel as a barrier, you shouldn’t have a problem proofing it in one.
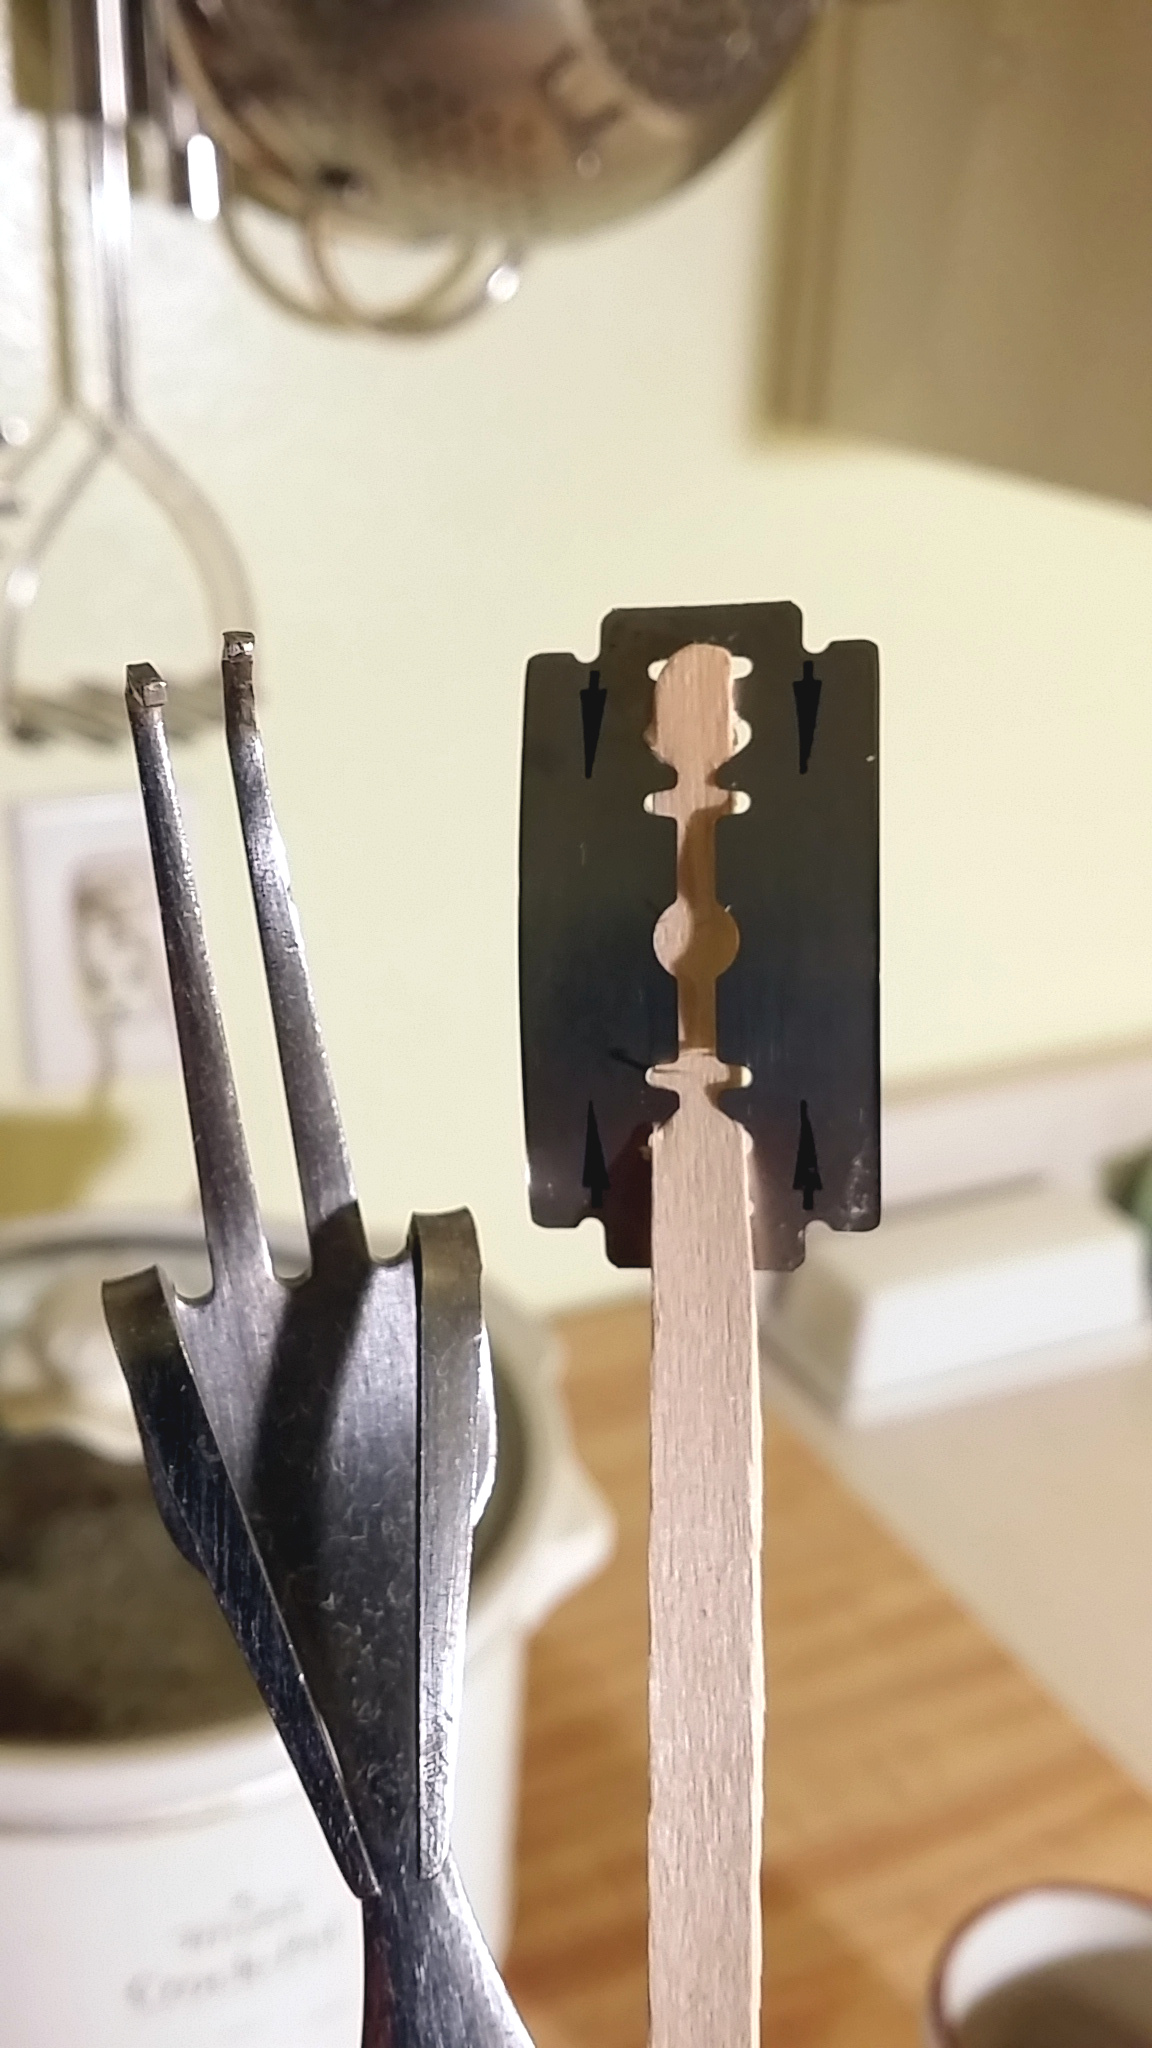
Homemade bread lame
I find that a sharp knife doesn’t score my sourdough bread nearly as well as a razor blade. The lames I looked at years ago consisted of a plastic handle with a fixed razor blade. Once the blade dulled, you tossed the entire thing. So I stuck with my kitchen knife until I—carefully!—made my own lame with a wooden stir stick and razor blade. (This also gives you another reason to switch to a safety razor for plastic-free shaving so you’ll have extra clean blades.)
My lame transformed my bread. It scores the dough so well and gives the bread room to expand while it bakes.

Homemade cherry pitter
After bringing home several pounds of cherries from her dad’s house a few years ago, my daughter then proceeded to shop for a cherry pitter. She bought a flimsy looking gadget that would have soon broken. While she returned that to the store, I googled homemade cherry pitters.
I found this video and made a pitter out of an inexpensive fork before she returned with her refund. With pliers, you just bend the outside prongs all the way over and down at their base, and make little hooks at the top of the inner prongs. Plunge the middle prongs through the top of the cherry and pull out the pit.
Jar, colander or pie plate to sprout beans, seeds or grains
I mentioned this in my last post. You don’t need to spend a bunch of money on a sprouting kit. Instead, you can use:
- A jar with a piece of cheesecloth secured to the lid
- A colander covered with a plate
- A pie dish covered with a plate
Now that you have decided on your equipment, follow these steps:
- Soak beans, seeds or grains overnight in a jar
- Rinse, drain and return to the jar and secure the cheesecloth to the open top; place in a colander or pie dish and cover with a plate
- Rinse and drain twice a day
- Wait 2 to 4 days (or longer) for tails to grow at least the length of the bean, grain or seed
- When ready, refrigerate sprouts for up to a week
(Click here for more details on sprouting.)
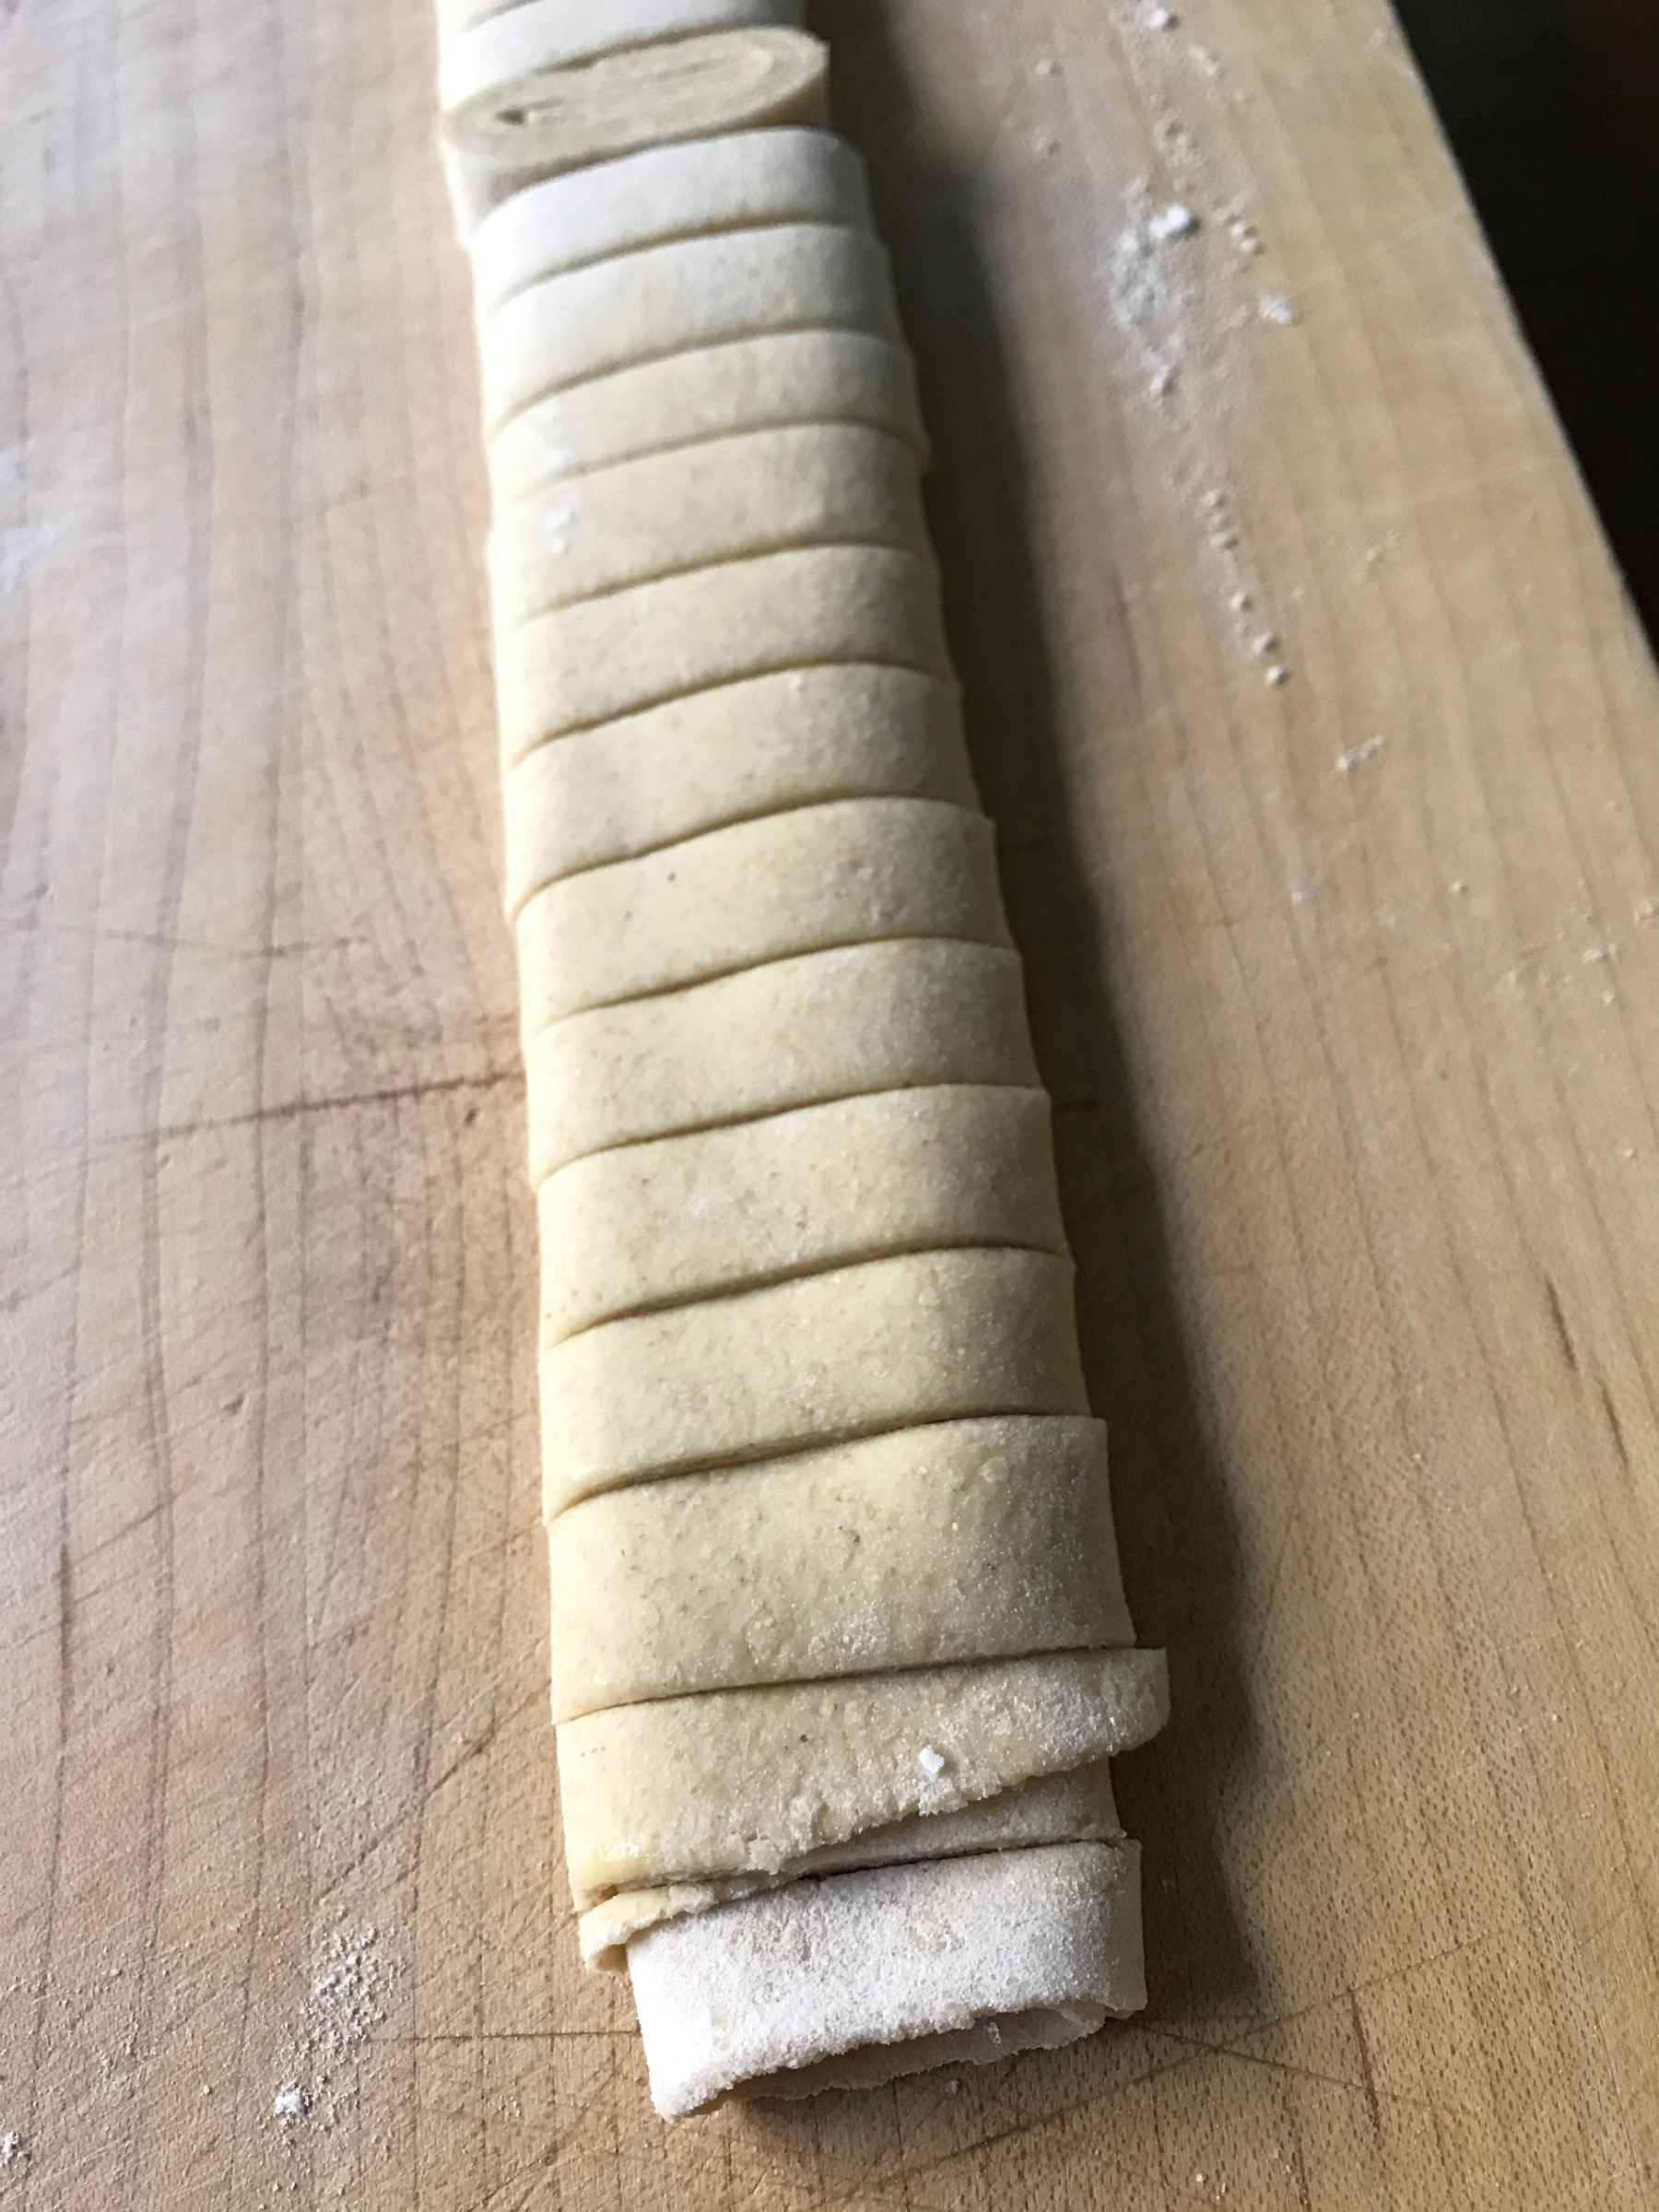
Rolling pin and knife for homemade pasta
If you don’t have a pasta machine, make your dough, roll it out very thinly with a rolling pin, roll the dough up into a log and slice off noodles. (Click here for my homemade pasta recipe. Click here for a vegan sourdough version.)
A spoon for peeling ginger
If you peel lots of ginger as I do—for Indian dishes, my ginger bug, ginger beer—you will love this tip! Use a spoon to peel your ginger rather than a vegetable peeler. A spoon removes the skin only rather than the skin plus lots of ginger.
Cast iron skillet for pie
I love, love, love cast iron. It cooks well, cleans up easily and lasts forever. I have made tamale pie in mine, shepherd’s pie, apple pie. Earlier this week, someone sent me a picture of the apple crumble she made in her cast iron pot, based on this use-it-up recipe.
Cast iron pot as yogurt maker
I have been making yogurt for years, long before I became obsessed with fermentation. I’ve never used a yogurt maker. To make yogurt, you heat up milk to around 180ºF at which point it begins to bubble slightly around the edges (you don’t want to scald it), let it cool to about 110ºF, add yogurt from the previous batch and let the mixture sit overnight until it transforms into fresh yogurt.
I make this in a pot. In the last few years, I’ve upgraded to a small Le Creuset pot that my neighbor gave me. It retains the heat really well. A pilot light in an oven also works. Or a heating pad. Or any other warm place in your home. (Click here for the full post on making yogurt.)

Bread maker
This is your oven.
Your senses and your brain
I did like using my digital thermometer during its short life—it broke long ago. Today, to make my yogurt or proof yeast for pizza dough or test the temperature of water for my sourdough leaven, I use my senses rather than a thermometer.
When making yogurt, I can tell from the appearance of bubbles just beginning to form around the edge of the pot that the milk has hit that desired, near-scalding-but-not-quite-scalding temperature. When I proof yeast, I can sense from touching the water whether or not it has reached the correct temperature (around 110ºF). This ability to sense “doneness” comes with practice so you may want a thermometer when you start out but after it breaks, if you have cooked regularly, you may not need it. Of course, never stick your finger into scaling hot water!
Similarly, you do not need apps or a smart refrigerator to notify you of when your food will go bad. If you think that your leftover lasagne has turned, smell it and look at it. If it passes the sniff test, it is probably fine. To prevent food waste, first, buy less food. Second, learn how to cook without a recipe. You’ll use up what you have on hand and buy less food and fewer silly kitchen gadgets to keep your food fresh.
Good post! It is amazing all the silly kitchen gadgets there are out there. We can stop perpetuating this creation of more plastic junk in the world and start using our brains to figure out how to do things using what we’ve already got at home or can scrounge up or borrow. Seems simple. But then along comes another Insta-pot fad that overtakes people’s common sense, just like the bread machines of long ago did.
I love this! My husband uses the round metal top of a mason jar to create perfectly circular eggs for his breakfast sandwiches. I think there’s a fancy product sold for that too, sigh.
Oh my. I kept chortling. Not just about the two-pack of avocado savers, but about the ice cream maker… I have to admit that I have a cherry pitter. But should it ever break, the fork thing looks like a cool trick.
That avocado saver sounds like a scam! 😁 I’ve always found that a leftover half of avocado stays fresh in the fridge as long as you leave the stone in it.
Is there really a fridge that tells you when food is going off? Our brains must be atrophying at an astonishing rate!
Madeleine
good tips. i already use mason jars for pretty much everything you mentioned. gallon pickle jars for kombucha. will absolutely try peeling ginger with a spoon next time and using cast iron pans for more than the usual
A bent open paper clip also works remarkably well as a cherry pitter, with the added bonus of being able to make extras as you need if you can coerce helpers (aka kids) with the project.
I’m generally anti-gadget in my kitchen, but a few years ago I splurged on a cherry pitter that pits four cherries at once. Totally worth it. It gets lent out to various friends and neighbors so that it works quite hard during cherry season. After years of not having a food processor, I recently inherited one from a friend who was moving and downsizing. It’s an old one, but it still works beautifully. And the price was right!
Great post! For pie-making I can also recommend a Pyrex mixing bowl; I made a pumpkin pie in one last weekend and it came out great, although I had to bake it a little longer because of the extra depth.
[…] Kitchen gadgets you already own. […]
We used a chopstick to pit cherries with minimal trouble (we do own a cherry pitter that is holding up nicely but the chopstick comes out when we have a ton to pit and want more than one person working).
I’ve stopped peeling a lot of foods, including my ginger. I was so thrilled to learn that the peel is perfectly edible. We give it a thorough scrub and use as we wish. It reduces the need for extra tools as well as waste.
I, also, use a blanket in our cooler as a yogurt incubator. We’ve experimented with some thermal cooking but haven’t gotten very far with it since we have other great ways of cooking with limited energy.
We were given an Instant pot type device (keep an eye out because the rumor is that most people who buy them lose interest in them after a few months). What we love is that we can make a pot of beans for other recipes without using much energy in a short amount of time. No soaking necessary so we can get beans even when we forget to plan ahead. Take less than an hour from start to finish (I haven’t completely timed this but I think the cook time is around 40 minutes). I used to can my beans so we had them at the ready but this seems like a much better alternative.
Great ideas! You are so clever. Thanks for sharing. My in-laws used the looped end of a bobby pin for pitting cherries. When I moved to another state a few years ago, I looked at pretty much everything in my kitchen and decided to get rid of anything that was designed to be ‘single-purpose’. That included that stupid Pampered Chef avocado slicer. About those avocados- I agree with you- I never eat just a half. I think that God designed it so that we either share it or eat the whole thing. Same with bananas, apples, pears and all fruits that brown when exposed. Problem is, we have hybridized those things to be more than a single serving size!
Honestly my avocado half stays super nice in the fridge if I take out the pit, and put it cut side down on a saucer, lid, or anything flat and clean. I think people want plastic wrap and special packaging as a ritual that makes them feel like they are being careful and conscientious, sort of like wrapping Christmas presents, and getting brownie points and gold stars for doing things “right” and in a more complicated fashion than necessary. We like rituals and courtesies, and so we put this wedding-veil-type thing on our food, perfumes in our cleaning supplies, and artwork on Kleenex boxes. Remember when “generic” non-branded food came out in the 80s, and it was black type on white labels? We still have generic food but it has pretty packaging now. Japan leads the way in packaging up anything as a ritual, whether consumerist or not. Maybe we just need new ways of creating rituals and courtesies…
[…] via Kitchen Gadgets You Didn’t Know You Already Own — The Zero-Waste Chef […]
[…] via Kitchen Gadgets You Didn’t Know You Already Own — The Zero-Waste Chef […]
I love the cherry pitter!!! Now I want to get cherries so I can make the pitter, LOL!
I don’t peel my ginger; I have a zester (yes it is a gadget;-)) and just zest it from frozen and it works really well.
Best cherry potter is a narrow glass jar and chopstick. Put the stemmed cherry on the opening, push the pit into the jar. The jar collects the residual cherry juice with the pits. Drink or freeze the juice.
I just picked a 7 litre basket of cherries, and was looking for a way to pit with minimal pain. Here’s the method I plan to use: Stick a chopstick in a bottle so an inch or two is out the top. Push cherry down onto chopstick, pit comes out the top. I also saw a similar method using a metal icing tip, just push the cherry down onto it. I’d have to borrow an icing tip but I have a chopstick and a bottle!