Because you want to take your hippie game to the next level…
The word “ferment” comes from the Latin verb “fervere,” to boil
One of the benefits of making fermented foods is that you can prepare many of them without consuming energy. So, after the apocalypse, I’ll still be able to eat my mouth-watering fermented salsa, sauerkraut, dill pickles and so on, assuming I can find vegetables. I’ll simply pack my black market or illegally grown chopped and salted tomatoes, onions, peppers, cabbages or cucumbers into clean glass jars as I do today and wait for the food to ferment.
In a jar of fermenting vegetables, the lactic acid bacteria naturally present on the veggies eat the sugars in them, reproduce wildly and release lactic acid that both preserves the food and creates that tangy flavor I crave. In other words, the energy required to transform the food into something delicious comes from within the jar, not from an outside source, like fracked gas piped into the stove or “clean coal,” whatever on earth that may be.
One of these days, I hope to live off the grid. In the meantime, I’ll consume less energy when possible. As I wrote in my last blog post, I feed my sourdough starter Eleanor room temperature water these days rather than heating up the kettle for warm water. It’s a very small change, I know. But that small change plus all the other small changes I’ve made add up.
To make kombucha, I had always boiled water to brew my tea but I noticed a couple of years ago that my neighbor doesn’t bother with this step. Instead, she simply throws tea into room temperature water to brew for several hours. I finally tried her method and it works well.
Although I must wait many hours for the tea to brew, the actual prep time (i.e., the I-have-to-do-work time) adds up to a mere ten minutes (if that) to start kombucha this way. And that can be convenient. If I’m on my way out, I can throw some tea leaves into a jar of water, come home hours later and finish the kombucha as usual:
- Strain out the tea leaves
- Stir in the sugar
- Add some kombucha from a previous batch (or a small amount of apple cider vinegar)
- Throw in my SCOBY (or mother, or mushroom—the blob that ferments the tea goes by many names, mine is Etheldreda)
- Wait patiently
Before I tried this method, I read up a bit on brewing sun tea—tea brewed outside in the sun’s rays. I read some warnings stating that a jar of sun tea can harbor harmful bacteria. Mine isn’t exactly sun tea as I set my jar outside on an overcast day. Even if it had been sunny, I’m not worried about bacteria thriving in tea that I essentially have not sterilized. Here’s why:
- We tend to freak out over bacteria in our culture (I mean that in a social sense, not a kombucha culture sense) and try to kill every microbe out of sight. This has wreaked havoc on our gut microbiota, which control our health, our weight and even our mood.
- If some bad guys do somehow sneak into my jar of fresh tea, the addition of my SCOBY (symbiotic culture of bacteria and yeast) and a bit of kombucha will initiate the fermentation and soon create an acidic environment in which bad bacteria cannot survive. They’ll simply die.


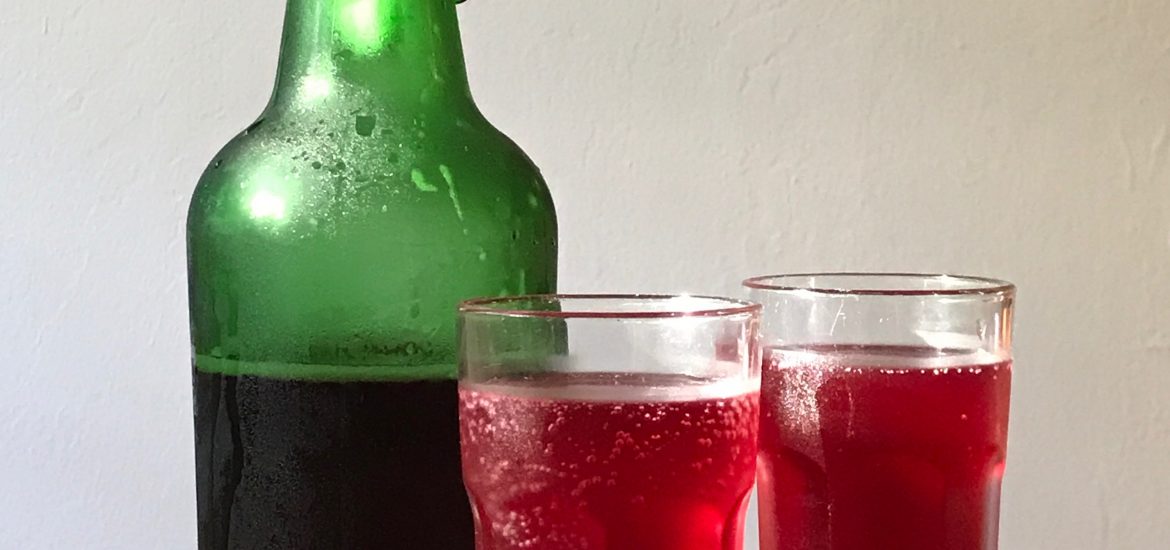
Your kombucha is ready when you like the flavor (around seven days for mine). At that point, you can drink it, bottle it plain or bottle it with flavorings.
If you have questions about kombucha, you will find help here:
- The Mother of All Ferments: Kombucha
- The Secondary Fermentation: Hippie Jargon for “Put Kombucha in a Bottle”
- Kombucha FAQs
Ingredients
- 4 teaspoons looseleaf organic tea (black, green, oolong, white or puerh)
- 4 cups room temperature filtered water
- 1/2 cup sugar
- 1/4 to 1/2 cup kombucha OR 2 to 3 tablespoons apple cider vinegar, such as Bragg's, with a live mother
- 1 virile SCOBY
Instructions
- Pour water into a clean jar and add the tea leaves. Cover with a lid or secure a cloth around the top of the jar.
- After about 8 hours, or until the tea has brewed to your desired strength, strain the tea leaves.
- Stir in the sugar. Let the jar sit until the sugar has dissolved.
- Add the kombucha from a previous batch or add the apple cider vinegar.
- Add the SCOBY.
- Cover the jar with a cloth secured tightly around the mouth of the jar.
- Wait about five days and taste. Continue brewing if you want the kombucha to taste less sweet and more sour.
- When the kombucha has reached your desired flavor, either drink it, bottle it plain or bottle it with flavoring such as fresh or dried fruit, fresh ginger or hibiscus tea leaves.

Boiling water helps remove chemicals and other impurities in it, including things like chlorine added to kill off harmful bacteria, which all public water has added to it. Unless one is using water that hasn’t been treated (like bottled spring water), the water has to sit for 24 hours or so for the chemicals to dissipate.
I boil my water because the sugar dissolves faster and easier in hot water than it does cold.
I can’t wait to try this! I actually dislike boiling the water and then waiting for it to cool. Great idea, thanks for sharing!
Hi Missy, I dislike that step too. I check it, “Has it cooled?” then I check it again “Is it cool now?” and then check again. I like this just-let-it-sit there method. Thanks for checking out the post. ~ Anne Marie
We are living in SE Asia right now so we have to boil all of our water, but we still use the Japanese charcoal sticks to remove chlorine. I would definitely try this with our cold, pre-boiled water, if I could get my hands on a Scoby. I need to find info on how to create a Scoby out of nothing! 😉 I would love to make Kombucha again!
You can make a SCOBY out of good raw kombucha if you can find some. You just pour it in a jar, put a cover over it and wait. A thin SCOBY will form in a week or two and you can use that. You could also try making scrap vinegar. That recipe is here: https://zerowastechef.com/2014/10/30/apple-scrap-vinegar/ One problem is that IF a SCOBY forms it will take many months and it may not form at all. But you’ll have vinegar. You could try to use that SCOBY to make kombucha. I have had SCOBYs form in my scrap vinegar but haven’t made kombucha out of them. I have read that they are the same as kombucha SCOBYs though. I need to try it because people have asked me about this. Hopefully you can just find some kombucha. Good luck!
Hi! I usually make 4 gallons at a time beginning with a 1 gallon tea/sugar concentrate. Then add remaining 3 gallons cool water so there’s no wasting time waiting for cooldown. But so you think this would work with your no boil method? I just moved to a home with no air and I don’t use the stove much!
How do you make it bubbly and carbonated afterwards. I’ve heard of a second bottling?
Hi Brette,
Yes, if you bottle it, that will increase the carbonation. Here’s a post on that: https://zerowastechef.com/2015/07/21/secondary-fermentation-flavors/
~ Anne Marie